Ir para o conteúdo principal

Dell Latitude E6510 Fan Replacement

O que você precisa

  1. Dell Latitude E6510 Fan Replacement, Fan: passo 1, imagem 1 %32 Dell Latitude E6510 Fan Replacement, Fan: passo 1, imagem 2 %32 Dell Latitude E6510 Fan Replacement, Fan: passo 1, imagem 3 %32
    • Remove the battery.

    • Remove the five strews that are holding the back cover down.

    • Firmly grasp the laptop and slide the cover to the front, then lift.

  2. Dell Latitude E6510 Fan Replacement: passo 2, imagem 1 %32 Dell Latitude E6510 Fan Replacement: passo 2, imagem 2 %32 Dell Latitude E6510 Fan Replacement: passo 2, imagem 3 %32
    • Unscrew the 7 gray screws.

    • They will not disconnect from the gray plates.

    • Remove the 2 black screws that hold the fan in place.

  3. Dell Latitude E6510 Fan Replacement: passo 3, imagem 1 %32
    • Wiggle the fan in the direction of the arrows until the end of the fan comes out.

  4. Dell Latitude E6510 Fan Replacement: passo 4, imagem 1 %32
    • Pick up and pull the heat sink out in the direction of the arrow.

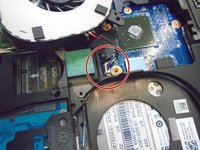
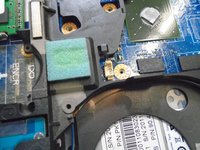
  5. Dell Latitude E6510 Fan Replacement: passo 5, imagem 1 %32 Dell Latitude E6510 Fan Replacement: passo 5, imagem 2 %32
    • Firmly grasp the fan cord close to the plug, and pull straight up.

Conclusão

To reassemble your device, follow these instructions in reverse order.

2 outras pessoas executaram este guia.

0 comentários

Adicione um comentário

Exibir estatísticas:

Últimas 24 horas: 1

Últimos 7 dias: 2

Últimos 30 dias: 4

Duração total: 1,762