Esta versão pode conter edições incorretas. Mude para o último instantâneo verificado.
O que você precisa
-
Este passo não foi traduzido. Ajude a traduzi-lo
-
Remove the 3.9 mm Phillips #1 screw from the battery compartment.
-
-
Este passo não foi traduzido. Ajude a traduzi-lo
-
Locate the laptop battery release button lock
-
Push the battery release in the direction of the arrow, and pull upward.
-
-
Este passo não foi traduzido. Ajude a traduzi-lo
-
Use an opening tool or flat tool to remove the plastic cover above the keyboard.
-
-
-
Este passo não foi traduzido. Ajude a traduzi-lo
-
Remove the two 3.9mm Philips #1 screws that are holding the keyboard in place.
-
-
Este passo não foi traduzido. Ajude a traduzi-lo
-
Using an opening tool, carefully release the keyboard from the case.
-
-
Este passo não foi traduzido. Ajude a traduzi-lo
-
Carfully lift the key board.
-
Pull on the blue tab to unplug the keyboard.
-
-
Este passo não foi traduzido. Ajude a traduzi-lo
-
Remove the two 3.9mm Philips #1 screws from the case.
-
-
Este passo não foi traduzido. Ajude a traduzi-lo
-
Remove the sixteen 3.9mm Philips #1 screws from the back.
-
-
Este passo não foi traduzido. Ajude a traduzi-lo
-
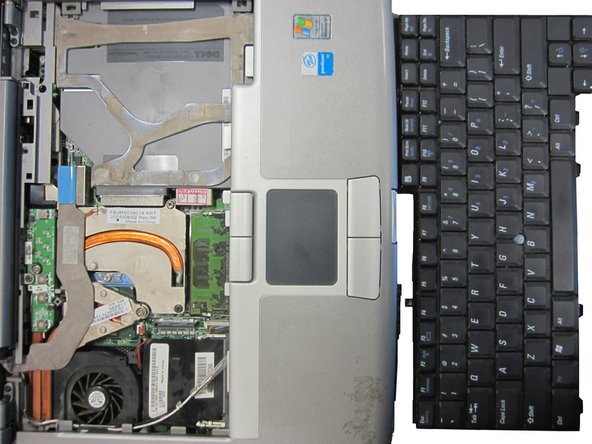
Turn the computer over. Using an opening tool seperate the top cover from the rest of the frame.
-
-
Este passo não foi traduzido. Ajude a traduzi-lo
-
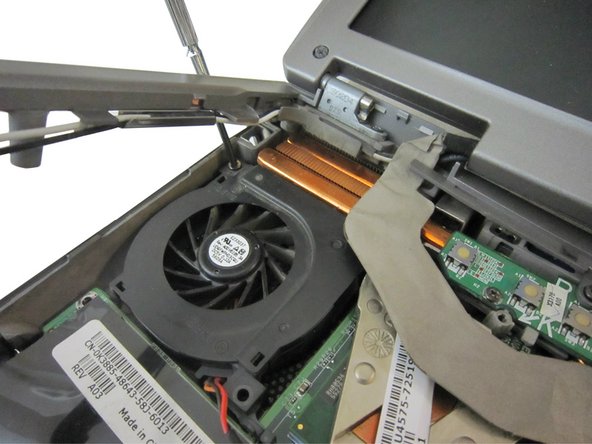
Remove the 3.9 mm Philips #1 screw.
-
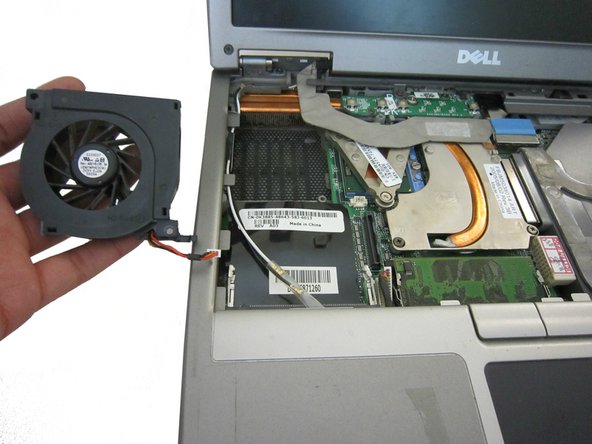
Unplug the fan cable.
-
Lift fan out of compartment to remove the fan.
-


Cancelar: não concluí este guia.
2 outras pessoas executaram este guia.
Equipe

Cal Poly, Team 6-24, Maness Winter 2014 Membro de Cal Poly, Team 6-24, Maness Winter 2014
CPSU-MANESS-W14S6G24
Membros da 4
Autoria de 5 guias