Ir para o conteúdo principal

Dell Latitude 9410 2-in-1 Motherboard Replacement

O que você precisa

  1. Dell Latitude 9410 2-in-1 Motherboard Replacement, Base Panel: passo 1, imagem 1 %32
    • Ensure that the laptop is unplugged and powered off before beginning.

    • Place the laptop upside down on a flat surface.

  2. Dell Latitude 9410 2-in-1 Motherboard Replacement: passo 2, imagem 1 %32 Dell Latitude 9410 2-in-1 Motherboard Replacement: passo 2, imagem 2 %32
    • Use a Phillips #00 screwdriver to loosen the ten captive screws.

    • The screws are permanently fastened to the base panel; do not attempt to remove them.

  3. Dell Latitude 9410 2-in-1 Motherboard Replacement: passo 3, imagem 1 %32 Dell Latitude 9410 2-in-1 Motherboard Replacement: passo 3, imagem 2 %32 Dell Latitude 9410 2-in-1 Motherboard Replacement: passo 3, imagem 3 %32
    • Carefully lift off the back panel.

  4. Dell Latitude 9410 2-in-1 Motherboard Replacement, Battery: passo 4, imagem 1 %32 Dell Latitude 9410 2-in-1 Motherboard Replacement, Battery: passo 4, imagem 2 %32
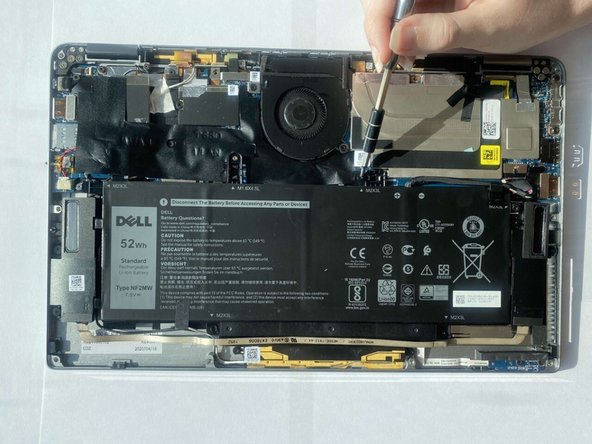
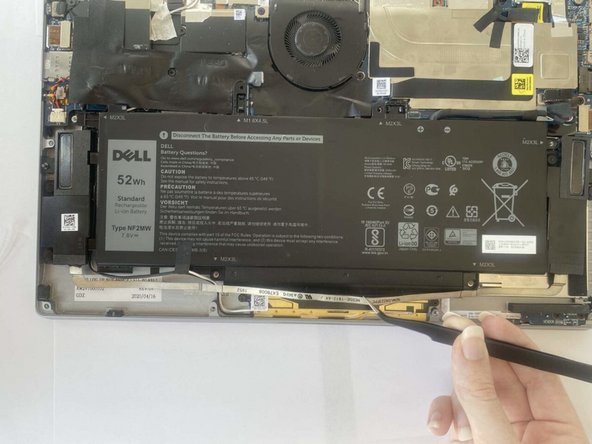
    • Use a Philips #00 screwdriver to remove the five 3mm screws that secure the battery.

  5. Dell Latitude 9410 2-in-1 Motherboard Replacement: passo 5, imagem 1 %32 Dell Latitude 9410 2-in-1 Motherboard Replacement: passo 5, imagem 2 %32 Dell Latitude 9410 2-in-1 Motherboard Replacement: passo 5, imagem 3 %32
    • Use a Philips #00 screwdriver to remove one 4.5 mm screw.

  6. Dell Latitude 9410 2-in-1 Motherboard Replacement: passo 6, imagem 1 %32 Dell Latitude 9410 2-in-1 Motherboard Replacement: passo 6, imagem 2 %32
    • Grip the battery cable near the plug and pull it straight out, in the direction of the cable.

  7. Dell Latitude 9410 2-in-1 Motherboard Replacement: passo 7, imagem 1 %32 Dell Latitude 9410 2-in-1 Motherboard Replacement: passo 7, imagem 2 %32
    Ferramenta utilizada nesse passo:
    Tweezers
    $4.99
    Comprar
    • Use tweezers to gently move the speaker ribbon cable away from the bottom of the battery.

    • The ribbon cable is thin and fragile; handle it carefully.

    • The ribbon cable only needs to be moved so that the battery can be removed; do not completely remove the ribbon cable.

  8. Dell Latitude 9410 2-in-1 Motherboard Replacement: passo 8, imagem 1 %32 Dell Latitude 9410 2-in-1 Motherboard Replacement: passo 8, imagem 2 %32
    • Lift the battery out with two hands.

  9. Dell Latitude 9410 2-in-1 Motherboard Replacement, Motherboard: passo 9, imagem 1 %32
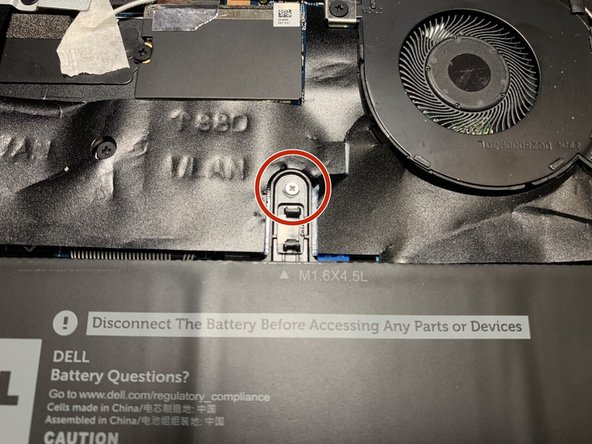
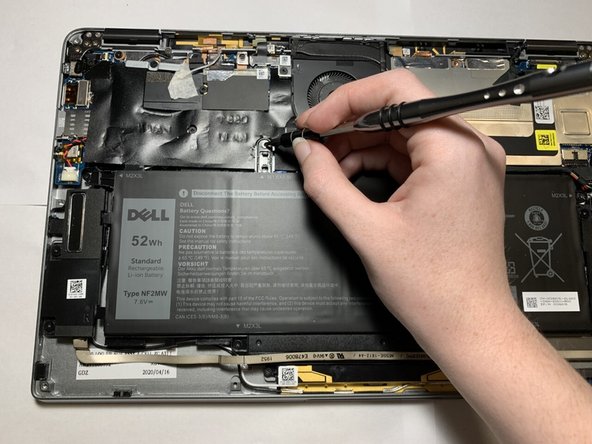
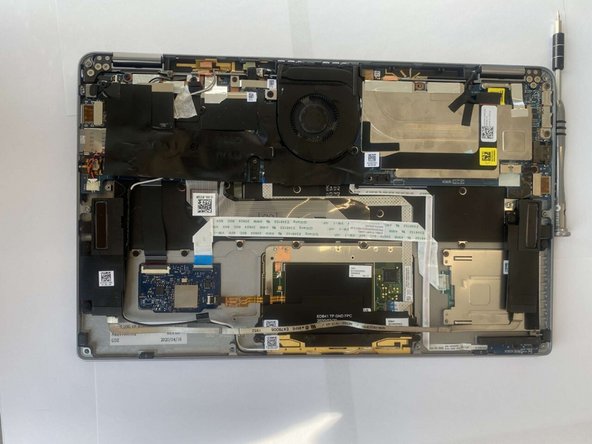
    • Use a Philips #00 screwdriver to remove the two 2 mm screws that secure the fan.

  10. Dell Latitude 9410 2-in-1 Motherboard Replacement: passo 10, imagem 1 %32
    • Disconnect the two ribbon cables connected to the motherboard by lifting the black ZIF tab and pulling the ribbon cables free.

  11. Dell Latitude 9410 2-in-1 Motherboard Replacement: passo 11, imagem 1 %32
    • Disconnect the two Wi-Fi card cables by prying them up and away from the press-fit connector.

  12. Dell Latitude 9410 2-in-1 Motherboard Replacement: passo 12, imagem 1 %32
    • Disconnect the small black wire from the mother board by pulling in the direction of the cable.

    • Disconnect the black and red wire from the motherboard, also by pulling the direction of the cable.

  13. Dell Latitude 9410 2-in-1 Motherboard Replacement: passo 13, imagem 1 %32
    • Use a Philips #00 screwdriver to remove the eight 3 mm screws that secure the motherboard.

Conclusão

To reassemble your device, follow these instructions in reverse order.

0 comentários

Adicione um comentário

Exibir estatísticas:

Últimas 24 horas: 3

Últimos 7 dias: 5

Últimos 30 dias: 13

Duração total: 302