Ir para o conteúdo principal

Dell Inspiron 9100 Fan 2 Replacement

O que você precisa

  1. Dell Inspiron 9100 Fan 2 Replacement, Battery: passo 1, imagem 1 %32 Dell Inspiron 9100 Fan 2 Replacement, Battery: passo 1, imagem 2 %32 Dell Inspiron 9100 Fan 2 Replacement, Battery: passo 1, imagem 3 %32
    • Unplug the laptop from the power adapter and turn the power off.

    • Failure to unplug laptop before proceeding could result in risk of electric shock!

  2. Dell Inspiron 9100 Fan 2 Replacement: passo 2, imagem 1 %32 Dell Inspiron 9100 Fan 2 Replacement: passo 2, imagem 2 %32 Dell Inspiron 9100 Fan 2 Replacement: passo 2, imagem 3 %32
    • Slide the battery-lock tab and hold.

    • Flip the battery away from the chassis to remove it.

  3. Dell Inspiron 9100 Fan 2 Replacement, Fan 2: passo 3, imagem 1 %32 Dell Inspiron 9100 Fan 2 Replacement, Fan 2: passo 3, imagem 2 %32
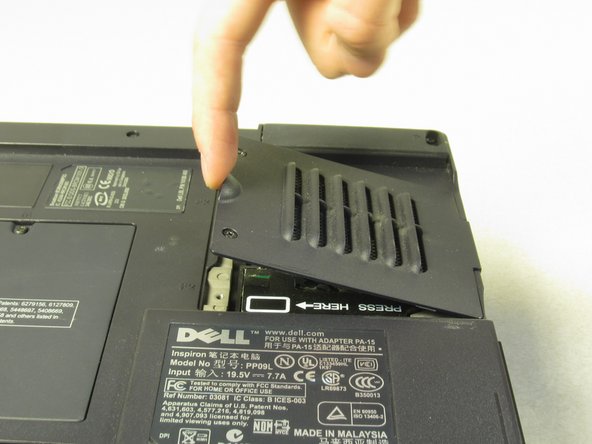
    • Undo the two screws on the fan cover labeled "F2"

    • These screws will remain in the panel

    • Remove cover plate.

  4. Dell Inspiron 9100 Fan 2 Replacement: passo 4, imagem 1 %32
    • Remove the single 6mm screw holding the fan in place.

  5. Dell Inspiron 9100 Fan 2 Replacement: passo 5, imagem 1 %32 Dell Inspiron 9100 Fan 2 Replacement: passo 5, imagem 2 %32
    • Flip the handle up.

    • Use the handle to pull the fan away directly up, away from case.

Conclusão

To reassemble your device, follow these instructions in reverse order.

Uma outra pessoa concluiu este guia.

charlierefvem

Membro desde: 01/11/11

854 Reputação

Autoria de 7 guias

Equipe

Cal Poly, Team 13-2, Forte Winter 2011 Membro de Cal Poly, Team 13-2, Forte Winter 2011

CPSU-FORTE-W11S13G2

Membros da 5

Autoria de 8 guias

0 comentários

Adicione um comentário

Exibir estatísticas:

Últimas 24 horas: 0

Últimos 7 dias: 1

Últimos 30 dias: 5

Duração total: 2,258