Esta versão pode conter edições incorretas. Mude para o último instantâneo verificado.
O que você precisa
-
Este passo não foi traduzido. Ajude a traduzi-lo
-
Place the laptop on a flat surface with the Dell logo upside down.
-
Flip the laptop over. The battery will be in the top center.
-
-
Este passo não foi traduzido. Ajude a traduzi-lo
-
Slide both the left lock and right lock, towards the center of the battery.
-
Push upwards on the grip on the bottom of the battery to remove it.
-
-
Este passo não foi traduzido. Ajude a traduzi-lo
-
Flip over and open your device. Gently wedge the metal Jimmy into the rightmost hole at a 45-degree angle. Make sure that the Jimmy is between the silver metal portion of the keyboard and the silver plastic edge around the keyboard.
-
Tilt the metal jimmy away from you to pry up the edge of the keyboard.
-
Repeat the previous actions on each of the other three holes to release the keyboard.
-
-
Este passo não foi traduzido. Ajude a traduzi-lo
-
Gently flip the keyboard over and lay it on the touchpad area.
-
-
Este passo não foi traduzido. Ajude a traduzi-lo
-
Flip up the black flap where the keyboard cable connects to the motherboard
-
Gently pull the cable away from the slot to release the keyboard.
-
Remove the keyboard from the device.
-
-
-
Este passo não foi traduzido. Ajude a traduzi-lo
-
Use a Phillips #0 screwdriver to unscrew the 5mm screws from the bottom. There are a total of 15 screws.
-
Flip the laptop over.
-
-
Este passo não foi traduzido. Ajude a traduzi-lo
-
Use a Phillips #0 screwdriver to unscrew the four 5mm screws from the palmrest.
-
Flip up the black flap over the first cable.
-
Gently pull the cable away from the tab to remove it.
-
Repeat for the other two cables pictured.
-
-
Este passo não foi traduzido. Ajude a traduzi-lo
-
Use a plastic opening tool to pry up the edges of the palmrest cover.
-
Gently lift up the palmrest cover.
-
-
Este passo não foi traduzido. Ajude a traduzi-lo
-
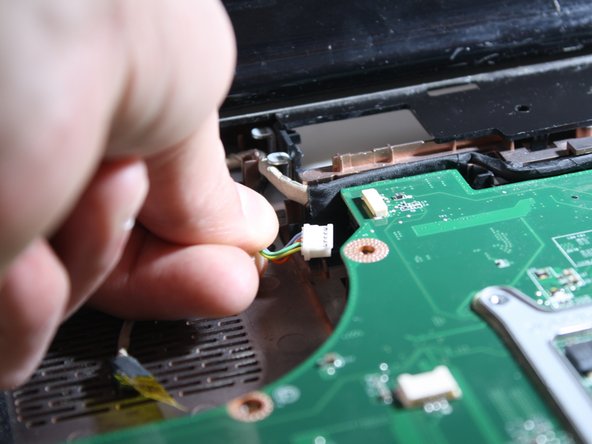
Gently pull the cooling fan cable horizontally to unplug it.
-
Use a Phillips #0 screwdriver to remove the two 5mm screws from the cooling fan.
-
Lift the top right corner of the fan and pull up and to the right.
-
-
Este passo não foi traduzido. Ajude a traduzi-lo
-
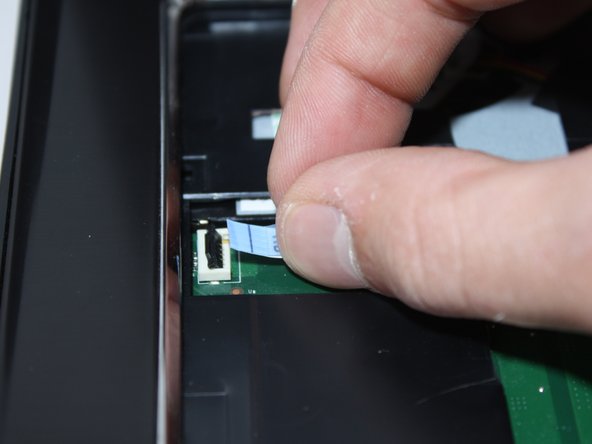
Flip up the flap over the first cable pictured and then gently pull the cable to remove it.
-
Use your finger to pull up the yellow tape and unplug the webcam cable.
-
Unplug the DC power jack cable.
-
-
Este passo não foi traduzido. Ajude a traduzi-lo
-
Lift the two cables with the gold ends connected to the I/O board to disconnect them.
-
Use a Phillips #0 screwdriver to unscrew the two 5mm screws from the right side of the screen base.
-
Use a Phillips #0 screwdriver to unscrew the two 5mm screws from the left side of the screen base.
-
-
Este passo não foi traduzido. Ajude a traduzi-lo
-
Gently hold the screen and pull it straight up to remove it.
-
Pry the plastic backing that is under the screen upward with your fingers to remove it.
-
-
Este passo não foi traduzido. Ajude a traduzi-lo
-
Use a Phillips #0 screwdriver to unscrew the 5mm screw from the DC power jack base.
-
Pull the DC power jack cable towards you.
-


Cancelar: não concluí este guia.
4 outras pessoas executaram este guia.
Equipe

Eastern Washington University, Team S1-G4, Carnegie Spring 2018 Membro de Eastern Washington University, Team S1-G4, Carnegie Spring 2018
EWU-CARNEGIE-S18S1G4
Membros da 4
Autoria de 7 guias