Introdução
If your Dell Inspiron 1721 is unable to properly read any disk, or if your device does not recognize the DVD drive, this guide will help lead you through the process of removing and replacing the DVD drive and any related components.
Be sure the device is completely turned off before starting the removal process.
O que você precisa
-
-
Slide tabs outward to undo the locks.
-
Grab and pull the battery away from the device to remove.
-
-
-
Pry up on the corner of the hinge cover with an iFixit opening tool.
-
Use the iFixit opening tool along both sides and the front of the hinge cover to release it.
-
Lean the display back as far as it goes and lift up on the hinge cover to remove.
-
-
-
-
Remove four 3mm Phillips #1 screws from the top of the keyboard.
-
Use an iFixit opening tool to slide the keyboard upwards toward the display.
-
Slide the keyboard until it is clear of the lock tab, and lift it up to remove.
-
-
-
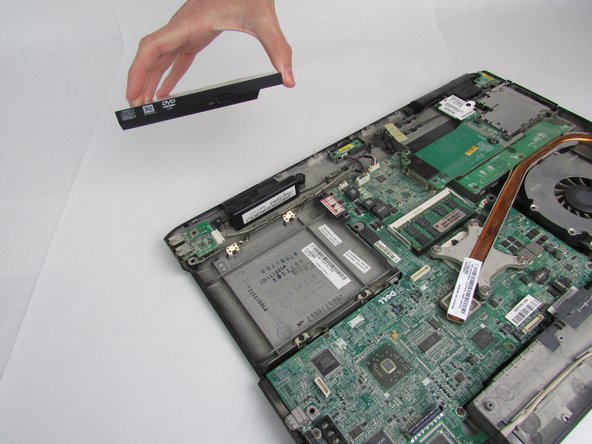
Grab the DVD drive and pull straight out from the side of the case to remove.
-


To reassemble your device, follow these instructions in reverse order.
To reassemble your device, follow these instructions in reverse order.
Equipe

Embry-Riddle Aeronautical University, Team S8-G5, Salas Fall 2019 Membro de Embry-Riddle Aeronautical University, Team S8-G5, Salas Fall 2019
ERAU-SALAS-F19S8G5
Membros da 4
Autoria de 9 guias