Esta versão pode conter edições incorretas. Mude para o último instantâneo verificado.
O que você precisa
-
Este passo não foi traduzido. Ajude a traduzi-lo
-
Using tweezers, remove the circular stickers that are covering the two screws near the middle of the back cover. Stick them to the laptop next to the screws.
-
-
Este passo não foi traduzido. Ajude a traduzi-lo
-
Using a Phillips #0 screwdriver, loosen all seven 2.5mm screws on the back cover of the device.
-
-
Este passo não foi traduzido. Ajude a traduzi-lo
-
Using a plastic opening tool, begin to separate the back cover from the body of the computer.
-
-
Este passo não foi traduzido. Ajude a traduzi-lo
-
Using your hands, pull the back cover fully off of the body of the computer.
-
-
-
Este passo não foi traduzido. Ajude a traduzi-lo
-
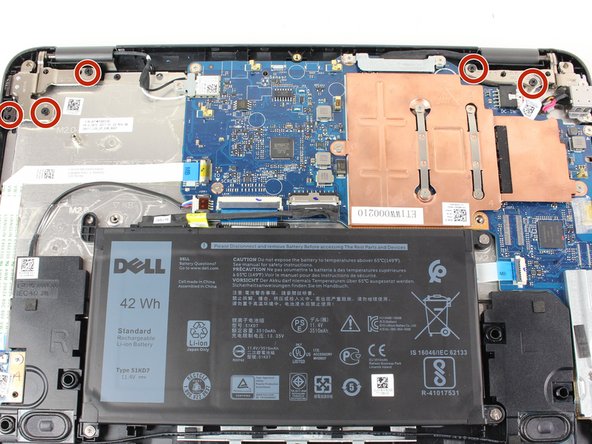
Using a Phillips #0 screwdriver, remove each of the five 5.5mm screws.
-
-
Este passo não foi traduzido. Ajude a traduzi-lo
-
Using a Phillips #0 screwdriver, remove the single 3mm Phillips head screw holding down the small metal bracket that covers where the small black and white wires connect to the motherboard.
-
Once this screw has been removed. Unplug these two wires by gently puling them up and away from the motherboard. Hold the wire as close to the end as possible.
-
-
Este passo não foi traduzido. Ajude a traduzi-lo
-
Using a Phillips #0 screwdriver, remove the two 3mm Phillips head screws from the metal bracket that covers where the wrapped cable from the screen attaches to the motherboard.
-
-
Este passo não foi traduzido. Ajude a traduzi-lo
-
Remove the screen connector cable. To do this, gently lift up on the black tab where the cable plugs into the motherboard.
-
Once you have lifted the tab, gently pull the cable horizontally away from the motherboard connector to unplug it.
-
-
Este passo não foi traduzido. Ajude a traduzi-lo
-
Using a plastic opening tool, remove the plastic hinge covers by inserting the tool into the gap and prying away from the computer.
-
You should now be able to separate the screen assembly from the rest of the laptop.
-
-
Este passo não foi traduzido. Ajude a traduzi-lo
-
Once it's separated from the rest of the computer, place the screen assembly face up on your work space.
-
Using tweezers, remove all four stickers covering screws on the front. Stick these to the computer, a few inches from the screw holes.
-
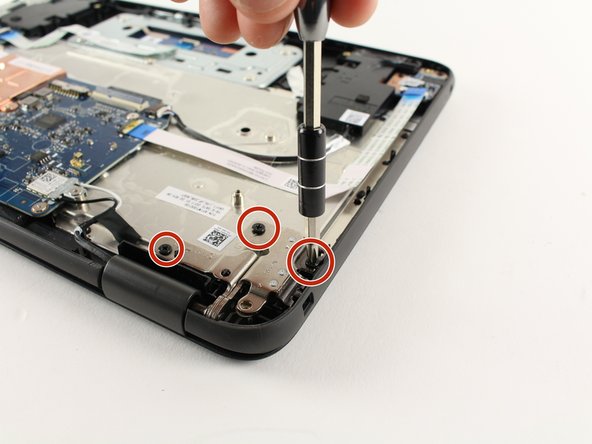
Using a Phillips #0 screwdriver, remove all four 3.5mm Phillips head screws from the front of the display assembly.
-
-
Este passo não foi traduzido. Ajude a traduzi-lo
-
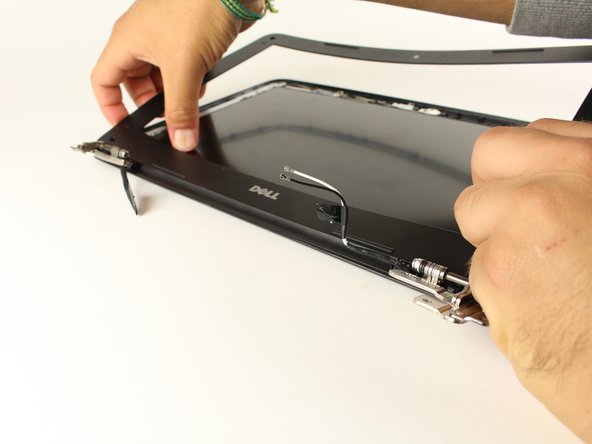
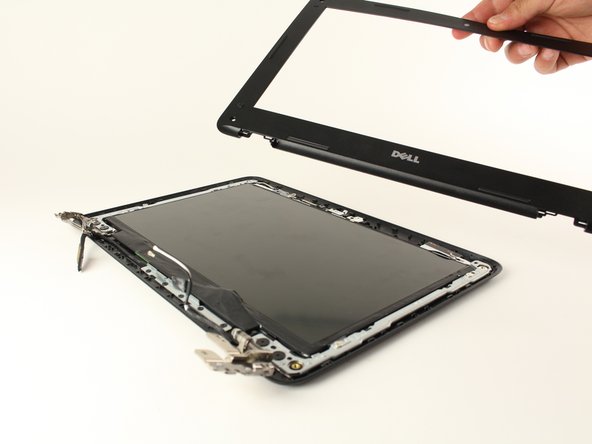
Using a plastic opening tool to start, and then eventually your hands, pry the front most face of plastic off of the screen assembly.
-
-
Este passo não foi traduzido. Ajude a traduzi-lo
-
Using a Phillips #0 screwdriver, remove all four silver 3mm Phillips head screws that hold the screen tabs to the bracket.
-
-
Este passo não foi traduzido. Ajude a traduzi-lo
-
Lift the screen itself away from the rest of the assembly. Place it face down next to the rest of the assembly.
-
-
Este passo não foi traduzido. Ajude a traduzi-lo
-
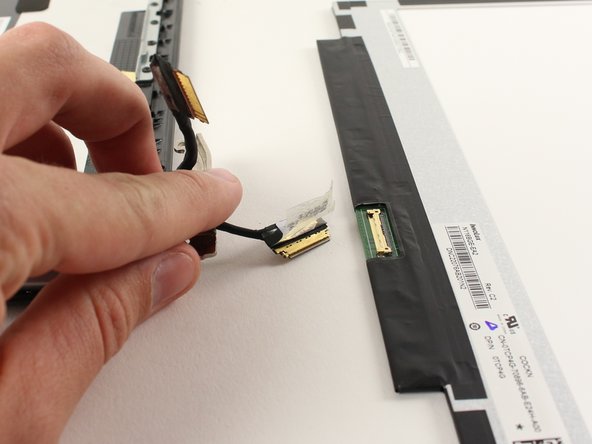
To unplug the screen, use tweezers to lift the small metal wire on the connector, and then gently pull the cable away from the screen.
-


Cancelar: não concluí este guia.
6 outras pessoas executaram este guia.
Equipe

Cal Poly, Team S22-G1, Livingston Spring 2017 Membro de Cal Poly, Team S22-G1, Livingston Spring 2017
CPSU-LIVINGSTON-S17S22G1
Membros da 4
Autoria de 8 guias
Um comentário
You don’t have to disconnect the display from the main body. Just be careful cause the plastic lcd bezel has strong adhesive and it is easy to crack the plastic bezel when separating it from the LCD panel.