Esta versão pode conter edições incorretas. Mude para o último instantâneo verificado.
O que você precisa
-
Este passo não foi traduzido. Ajude a traduzi-lo
-
Place the projector upside down to access the screws on the bottom.
-
Remove the five 7mm long screws using a #3 Phillips screwdriver at least 2 inches long.
-
-
Este passo não foi traduzido. Ajude a traduzi-lo
-
Flip the projector over and then remove the cover by lifting it up.
-
-
-
Este passo não foi traduzido. Ajude a traduzi-lo
-
Remove the three 6mm PH2 phillips head screws.
-
Disconnect the ribbon cable by flipping up the latch on the connector and then pull the ribbon out.
-
-
Este passo não foi traduzido. Ajude a traduzi-lo
-
Disconnect the three wire connectors. Grasp both sides of the connector and pull apart.
-
Lift the motherboard up and place it out of the way.
-
-
Este passo não foi traduzido. Ajude a traduzi-lo
-
Remove the five 7mm PH2 phillips head screws on the black plate and lift the plate out.
-
Lift the aluminum heat sink up to remove it from the projector.
-
-
Este passo não foi traduzido. Ajude a traduzi-lo
-
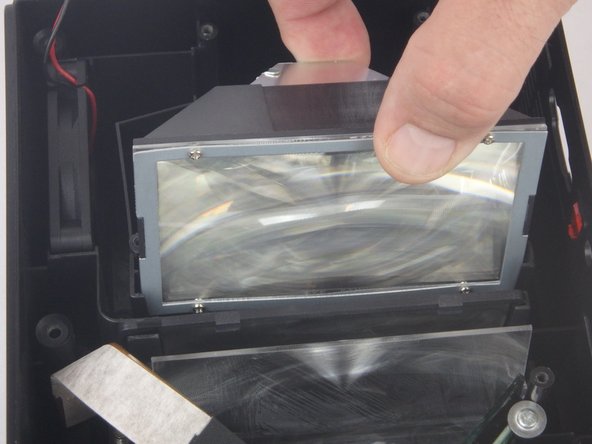
Remove the two 9mm PH2 phillips head screws.
-
Lift the Magnifier out of the projector.
-


Equipe

USF Tampa, Team S5-G3, Eyestone Spring 2018 Membro de USF Tampa, Team S5-G3, Eyestone Spring 2018
USFT-EYESTONE-S18S5G3
Membros da 3
Autoria de 9 guias