Ir para o conteúdo principal

D-Link DIR-890L Heat Sink Replacement

O que você precisa

  1. D-Link DIR-890L Heat Sink Replacement, Case: passo 1, imagem 1 %32 D-Link DIR-890L Heat Sink Replacement, Case: passo 1, imagem 2 %32 D-Link DIR-890L Heat Sink Replacement, Case: passo 1, imagem 3 %32
    • Peel off the four rubber rectangular feet with your fingers.

    • The feet may be hard to remove. Apply additional force if necessary.

  2. D-Link DIR-890L Heat Sink Replacement: passo 2, imagem 1 %32 D-Link DIR-890L Heat Sink Replacement: passo 2, imagem 2 %32 D-Link DIR-890L Heat Sink Replacement: passo 2, imagem 3 %32
    • Unscrew the 5mm screws in each corner using the Phillips #1 screwdriver.

  3. D-Link DIR-890L Heat Sink Replacement: passo 3, imagem 1 %32 D-Link DIR-890L Heat Sink Replacement: passo 3, imagem 2 %32 D-Link DIR-890L Heat Sink Replacement: passo 3, imagem 3 %32
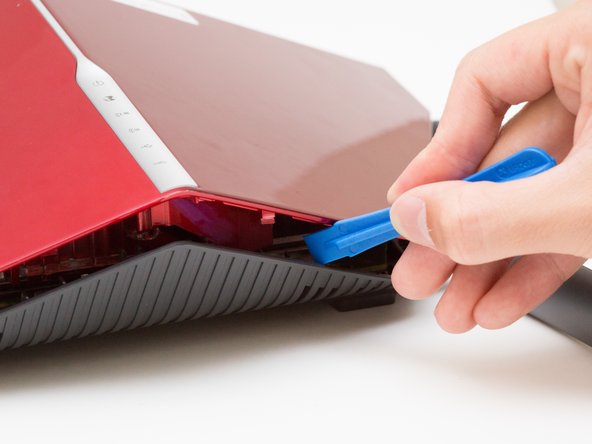
    • Wedge the opening tool between the red top panel and the gray bottom panel.

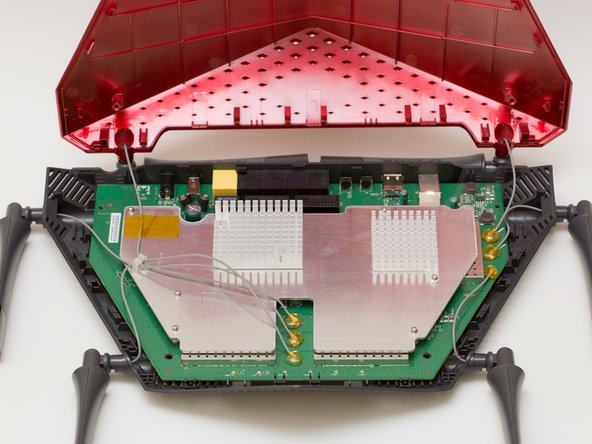
    • Twist the opening tool to separate the panels. Work your way around the case until both of the panels are separated.

  4. D-Link DIR-890L Heat Sink Replacement, Heat Sink: passo 4, imagem 1 %32 D-Link DIR-890L Heat Sink Replacement, Heat Sink: passo 4, imagem 2 %32 D-Link DIR-890L Heat Sink Replacement, Heat Sink: passo 4, imagem 3 %32
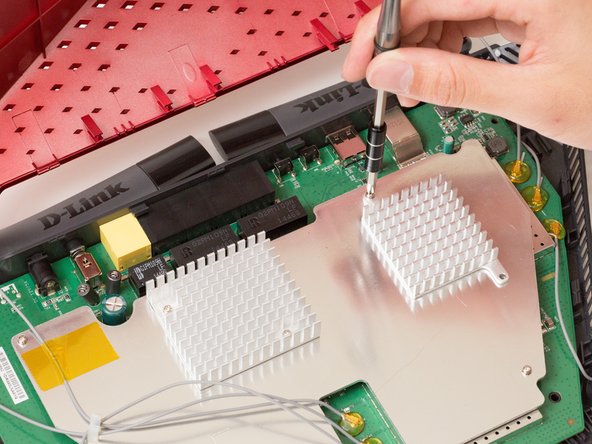
    • Unscrew the two 7mm screws with a Phillips #1 screwdriver.

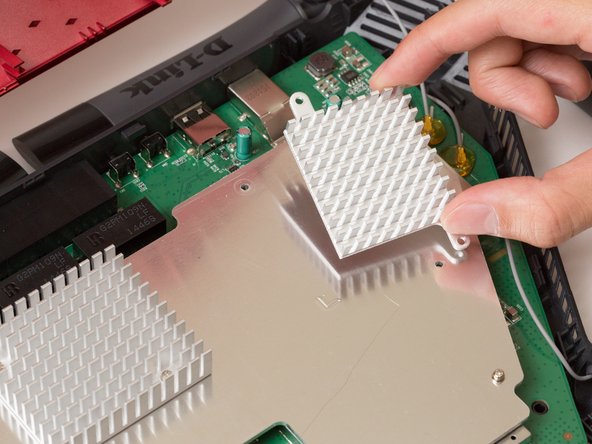
    • Lift the heat sink off the metal plate with your fingers.

Conclusão

To reassemble your device, follow these instructions in reverse order.

Uma outra pessoa concluiu este guia.

Equipe

Cal Poly, Team 10-7, Livingston Fall 2016 Membro de Cal Poly, Team 10-7, Livingston Fall 2016

CPSU-LIVINGSTON-F16S10G7

Membros da 4

Autoria de 12 guias

0 comentários

Adicione um comentário

Exibir estatísticas:

Últimas 24 horas: 0

Últimos 7 dias: 0

Últimos 30 dias: 13

Duração total: 1,211