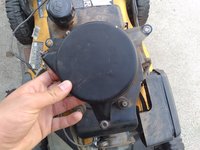
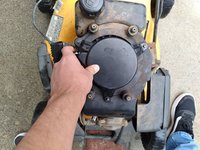
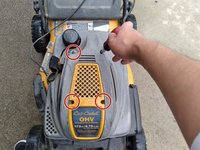
Ir para o conteúdo principal

Cub Cadet OHV 173cc/6.75 Recoil Starter Replacement

O que você precisa

  1. Cub Cadet OHV 173cc/6.75 Recoil Starter Replacement, Recoil Starter: passo 1, imagem 1 %32
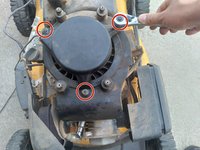
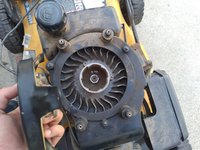
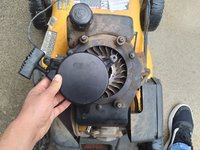
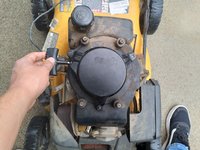
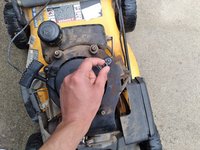
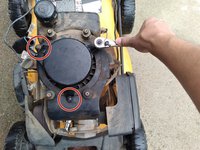
    • Remove the four screws from the hood of the lawnmower using a Phillips #0 screwdriver.

  2. Cub Cadet OHV 173cc/6.75 Recoil Starter Replacement: passo 2, imagem 1 %32 Cub Cadet OHV 173cc/6.75 Recoil Starter Replacement: passo 2, imagem 2 %32 Cub Cadet OHV 173cc/6.75 Recoil Starter Replacement: passo 2, imagem 3 %32
    • Remove the hood of the lawnmower by pulling up.

  3. Cub Cadet OHV 173cc/6.75 Recoil Starter Replacement: passo 3, imagem 1 %32 Cub Cadet OHV 173cc/6.75 Recoil Starter Replacement: passo 3, imagem 2 %32 Cub Cadet OHV 173cc/6.75 Recoil Starter Replacement: passo 3, imagem 3 %32
    • Using a wrench, remove the three nuts from the lawnmower’s defective recoil starter.

  4. Cub Cadet OHV 173cc/6.75 Recoil Starter Replacement: passo 4, imagem 1 %32 Cub Cadet OHV 173cc/6.75 Recoil Starter Replacement: passo 4, imagem 2 %32 Cub Cadet OHV 173cc/6.75 Recoil Starter Replacement: passo 4, imagem 3 %32
    • Remove the defective recoil starter by pulling up.

  5. Cub Cadet OHV 173cc/6.75 Recoil Starter Replacement: passo 5, imagem 1 %32 Cub Cadet OHV 173cc/6.75 Recoil Starter Replacement: passo 5, imagem 2 %32 Cub Cadet OHV 173cc/6.75 Recoil Starter Replacement: passo 5, imagem 3 %32
    • Place the new recoil starter in the lawnmower where the defective one was prior.

  6. Cub Cadet OHV 173cc/6.75 Recoil Starter Replacement: passo 6, imagem 1 %32 Cub Cadet OHV 173cc/6.75 Recoil Starter Replacement: passo 6, imagem 2 %32 Cub Cadet OHV 173cc/6.75 Recoil Starter Replacement: passo 6, imagem 3 %32
    • Tighten the new recoil starter onto the lawnmower with a wrench and the nuts you had removed earlier.

  7. Cub Cadet OHV 173cc/6.75 Recoil Starter Replacement: passo 7, imagem 1 %32 Cub Cadet OHV 173cc/6.75 Recoil Starter Replacement: passo 7, imagem 2 %32 Cub Cadet OHV 173cc/6.75 Recoil Starter Replacement: passo 7, imagem 3 %32
    • Tighten the hood back onto the lawnmower with a Phillips #0 screwdriver and the four screws you had removed previously.

    • Make sure not to screw the hood on too tightly.

Linha de Chegada

Andres Dominguez

Membro desde: 01/26/22

145 Reputação

Autoria de 1 guia

Equipe

0 comentários

Adicione um comentário

Exibir estatísticas:

Últimas 24 horas: 3

Últimos 7 dias: 20

Últimos 30 dias: 89

Duração total: 1,686