Ir para o conteúdo principal

Corsair Harpoon RGB Wireless Battery Replacement

O que você precisa

  1. Corsair Harpoon RGB Wireless Battery Replacement, Corsair Harpoon RGB Wireless Battery: passo 1, imagem 1 %32 Corsair Harpoon RGB Wireless Battery Replacement, Corsair Harpoon RGB Wireless Battery: passo 1, imagem 2 %32
    • Flip the mouse upside down.

    • Use a spudger to help pry the 4 mouse feet from the bottom of the mouse.

    • Start at the small grooves at the edge of each mouse foot.

    • Be careful when removing the mouse feet so you don't tear them, as you will need them for reassembly.

  2. Corsair Harpoon RGB Wireless Battery Replacement: passo 2, imagem 1 %32 Corsair Harpoon RGB Wireless Battery Replacement: passo 2, imagem 2 %32
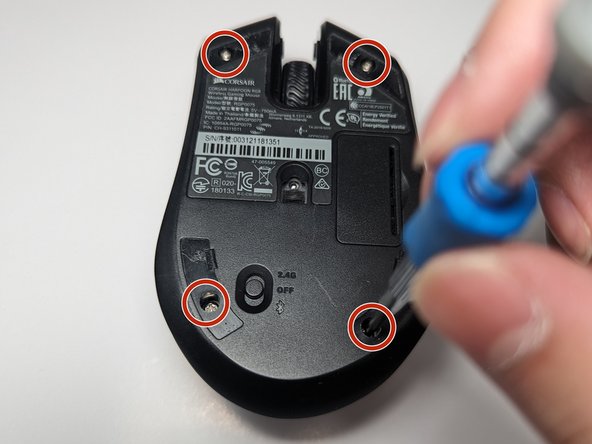
    • Use a Phillips #0 screwdriver to remove the four 9 mm-long screws under the feet.

  3. Corsair Harpoon RGB Wireless Battery Replacement: passo 3, imagem 1 %32 Corsair Harpoon RGB Wireless Battery Replacement: passo 3, imagem 2 %32 Corsair Harpoon RGB Wireless Battery Replacement: passo 3, imagem 3 %32
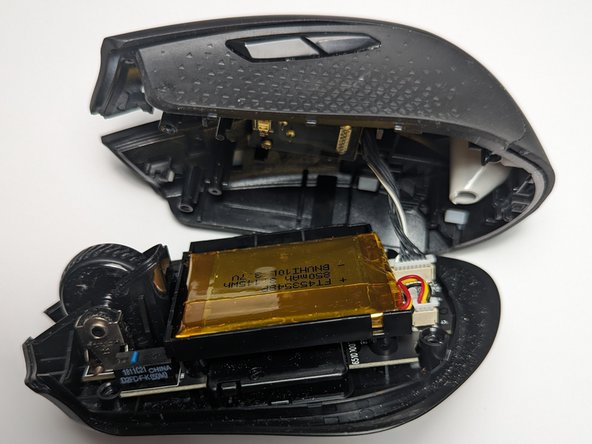
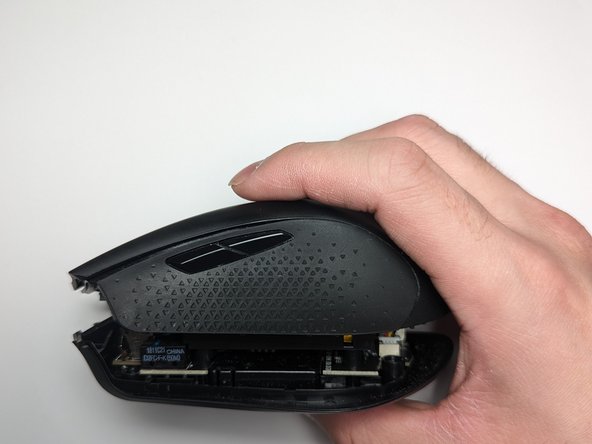
    • Use a spudger to pry along the seam between top and bottom of the mouse.

    • Gently separate the top and bottom case until you can see the internals of the mouse.

    • Do not fully remove the top cover as it is connected by a cable and will damage the mouse.

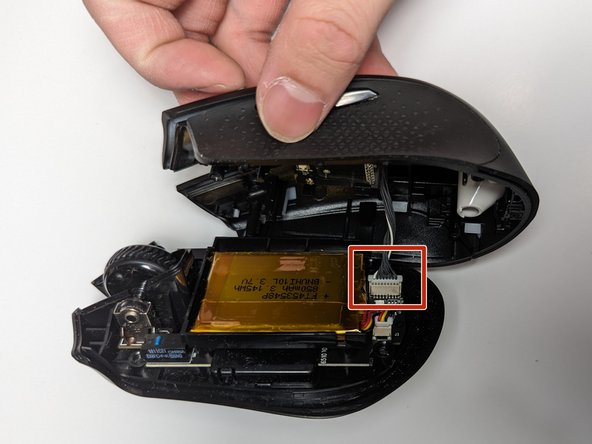
    • Use the point of a spudger to push on alternating sides of the connector to "walk" it out of its socket and remove the cable attaching the top and bottom of the mouse.

  4. Corsair Harpoon RGB Wireless Battery Replacement: passo 4, imagem 1 %32 Corsair Harpoon RGB Wireless Battery Replacement: passo 4, imagem 2 %32 Corsair Harpoon RGB Wireless Battery Replacement: passo 4, imagem 3 %32
    • Use the point of a spudger or opening pick to push on alternating sides of the battery connector to "walk" it out of its socket and remove the battery cable.

    • Use a spudger and wedge it between the battery and the mouse.

    • Work the spudger left and right to slowly lift the adhesive.

    • Do not poke the spudger into the battery.

    • Once it is loose, lift and remove the battery.

  5. Corsair Harpoon RGB Wireless Battery Replacement: passo 5, imagem 1 %32 Corsair Harpoon RGB Wireless Battery Replacement: passo 5, imagem 2 %32 Corsair Harpoon RGB Wireless Battery Replacement: passo 5, imagem 3 %32
    • Place the new battery into the tray with the battery plug near the port.

    • Make sure the battery is secured by pressing on the corners of the battery.

    • Use your fingers to carefully plug the battery connector to its connection point.

  6. Corsair Harpoon RGB Wireless Battery Replacement: passo 6, imagem 1 %32 Corsair Harpoon RGB Wireless Battery Replacement: passo 6, imagem 2 %32 Corsair Harpoon RGB Wireless Battery Replacement: passo 6, imagem 3 %32
    • Take the top of the mouse and plug the connector to the bottom of the mouse

    • Join the two parts of the mouse together.

  7. Corsair Harpoon RGB Wireless Battery Replacement: passo 7, imagem 1 %32 Corsair Harpoon RGB Wireless Battery Replacement: passo 7, imagem 2 %32 Corsair Harpoon RGB Wireless Battery Replacement: passo 7, imagem 3 %32
    • Make sure the mouse fits together with no gaps.

    • Flip the mouse over and use a Phillips #0 screwdriver to secure the four 9 mm-long screws back in place.

    • Do not overtighten the screws.

    • Replace the four mouse feet that cover the screws.

Linha de Chegada

2 outras pessoas executaram este guia.

Kevin Diep

Membro desde: 01/10/24

175 Reputação

Autoria de 1 guia

Equipe

0 comentários

Adicione um comentário

Exibir estatísticas:

Últimas 24 horas: 3

Últimos 7 dias: 11

Últimos 30 dias: 46

Duração total: 151