Introdução
I found a couple 2013 iMacs destined to be recycled. The built-in 2560x1440 display is still very nice, so I found a way to turn it into a monitor to use with another computer.
O que você precisa
-
-
With the hinge free to move, the iMac will be unbalanced and hard to work on. Repairs can be completed with the iMac laying down, but are faster and easier with an iMac service wedge.
-
If you are using the iFixit cardboard service wedge, follow these assembly directions to put it together.
-
-
-
Set the iMac face-up on a table.
-
Starting from the top right corner of the iMac, insert a plastic card between the display and frame.
-
-
-
-
With the cards inserted as shown near the corners, gently twist the cards to increase the gap between display and case.
-
If there are any sections that seem to stick and won't separate, stop twisting and use one of the cards to cut the adhesive in the problem area.
-
Begin to lift the top of the display up from the frame.
-
-
-
If there is a wire or cable underneath adhesive tape, always pull the tape off first.
-
If the cable is glued to the chassis, use a heated iOpener or a hair dryer to soften the adhesive first. You can then slide an opening pick underneath the cable to loosen it. Never pull directly on the delicate connectors.
-
Slide an opening pick underneath the foam cushion pieces to separate them from the display, and gently pull them off. You may need some double sided tape to re-attach them to the new display.
-
-
-
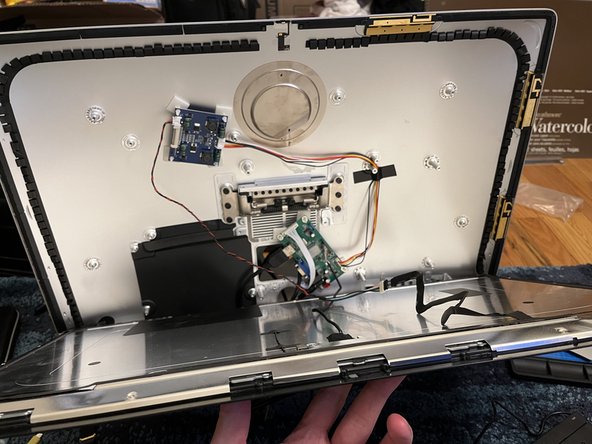
Follow along with the official iFixit teardown to remove all internal parts from the iMac.
-
I also pulled out the port for the AC power cord using vice grips. I ran my cables through the resulting hole, but you could alternatively use the ram door hole.
-
Remove the old adhesive the held the display to the aluminum case. This will make assembly later much easier.
-
-
-
Find the panel identifier on the back of the screen. Mine is LM270WQ1(SD)(F2).
-
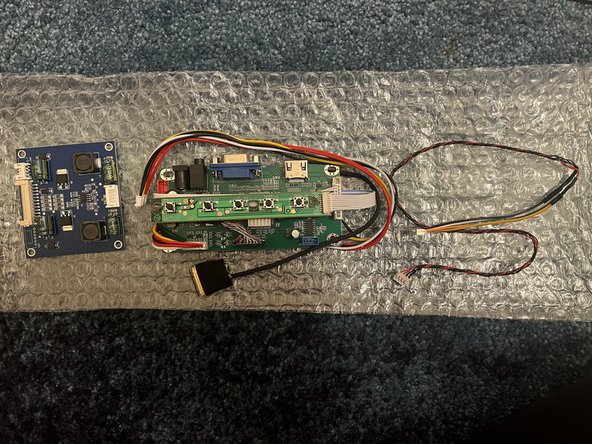
Search for a controller board kit for your exact display model, probably on AliExpress. Here is the one I used.
-
Get an AC adapter to match your board. The specs for my board said "Power adapter input: 12V, 4A-5A" so I found one on Amazon.
-
Wait 2-3 weeks for your board to ship from China...
-
In the meantime, get supplies for the rest of the process: a spudger, painter's tape, electrical tape, needlenose pliers, adhesive PCB standoffs, and an HDMI cable.
-
-
-
Use a spudger to lift the little bar securing the ribbon cable at the top of the display.
-
Replace the ribbon cable with the one connected to the controller board.
-
My controller board is actually two boards, which I connected with the included 6-pin cable.
-
-
-
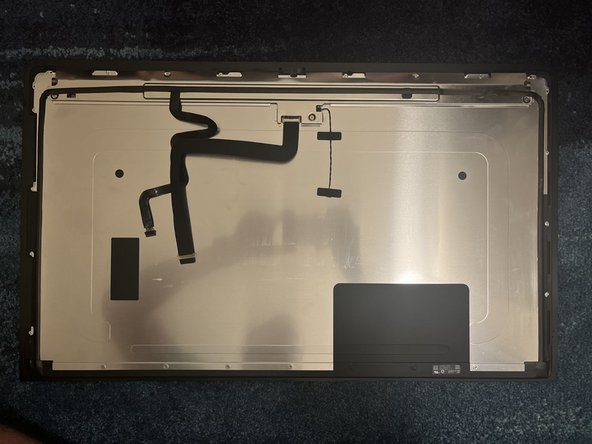
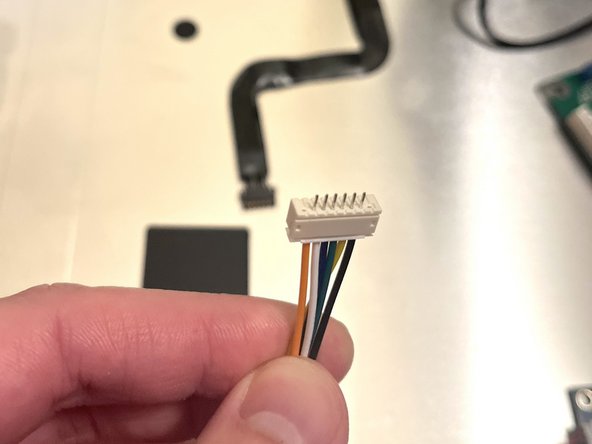
For the backlight, a 4-pin cable went to the board.
-
On the other end, the controller cable had 8 pins for 6 sockets present on the built-in backlight cable. I pulled out the extra pins (1 on each side) using needlenose pliers. I could see only the middle 6 slots on the header were being used.
-
-
-
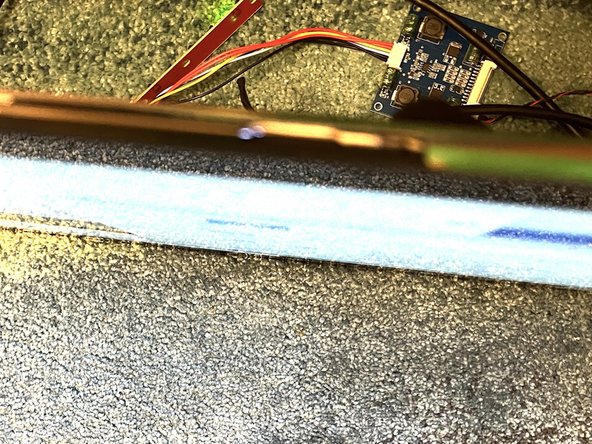
Connect the 6-pin cable from the controller (modified from 8 pins) to the 6-socket backlight cable that was already attached to the display.
-
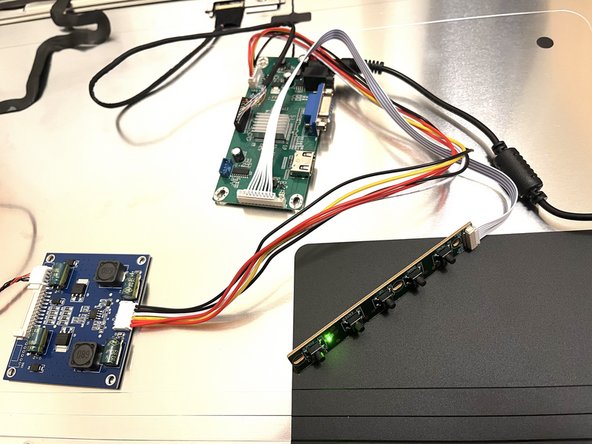
Plug in your AC adapter and confirm the board is getting power.
-
Connect a computer via HDMI to see if there's a picture. If you have picture but no backlight, you may have to reverse the 6-pin backlight connection.
-
-
-
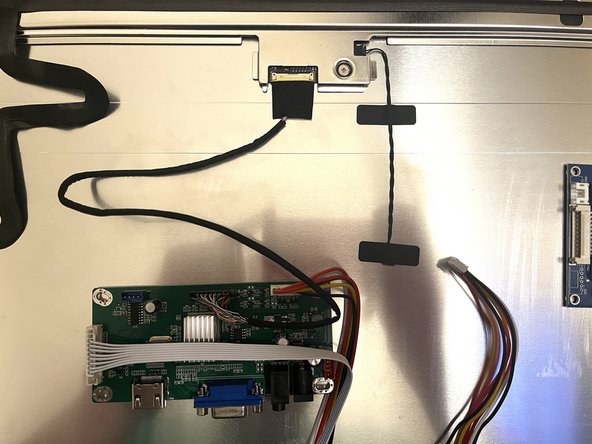
Disconnect some or all of the controller board so you can move the board around the iMac case without the heavy glass display getting in your way.
-
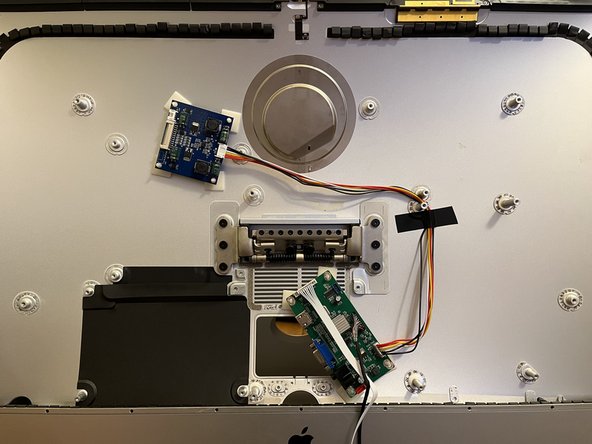
Arrange the controller board in the iMac case so that the external connections (HDMI, power) could be accessed from the RAM door and/or power cord hole. I put it somewhere else in my first attempt and regretted it after something went wrong later.
-
Make sure all your cables can reach where their final destination with some slack before you attach the controller board to the case. Also ensure any cables that attach to the board perpendicularly have enough room to turn after the display is attached to the case. I ended up using a slightly awkward arrangement on top of the vents.
-
After you're happy with the arrangement, attach the board with something like these adhesive stand-offs.
-
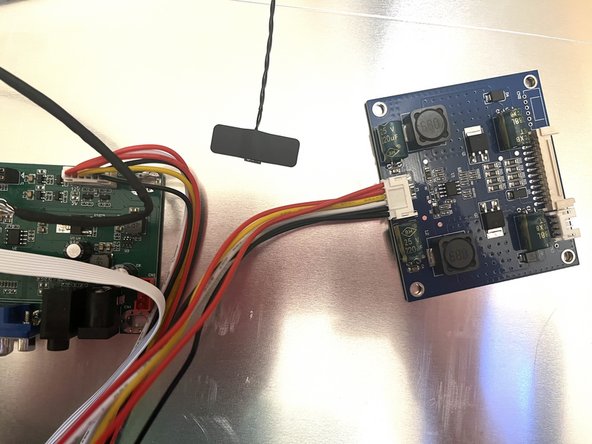
If your board has a secondary board too, attach that in the same way, making sure all cables can reach their destination. Secure wires with electrical tape.
-
-
-
Plug in the HDMI and power.
-
Thread the controller board outside the back of the case so you can use it when the case is sealed.
-
Carefully rest the display on the bottom lip of the iMac case, then re-connect the rest of the cables so you can re-test the whole system. This is easier with 4 hands.
-
-
-
If everything's working when assembled, reattach the display by following the iMac Intel 27" Retina 5K Display Adhesive Strip Replacement guide.
-
Using the adhesive standoffs, attach the board with buttons on it to the back of the iMac case so you can use it when necessary.
-
Power it up do computing.
-
If you want to mount your old/new monitor there are VESA mounting solutions like this one available.
-