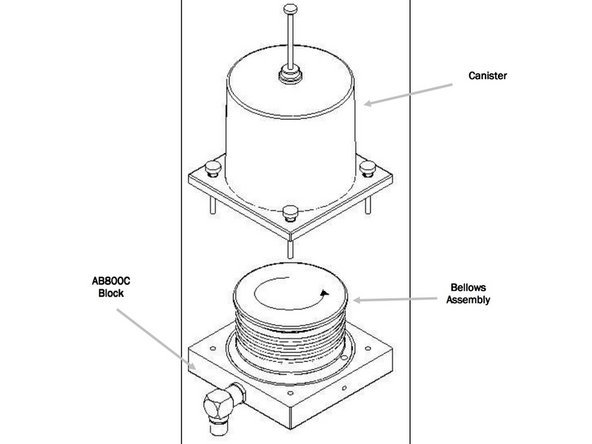
Ir para o conteúdo principal

Cleaning the Ulco Integrus PSV

Equipamento Médico
Nem o iFixit nem este guia de reparo são endossados ou afiliados ao fabricante do dispositivo médico.
  1. Cleaning the Ulco Integrus PSV, Cleaning the Ulco Integrus PSV: passo 1, imagem 1 %32 Cleaning the Ulco Integrus PSV, Cleaning the Ulco Integrus PSV: passo 1, imagem 2 %32
    • Absorber

    • Loosen the knurled screws and remove the clear lid.

  2. Cleaning the Ulco Integrus PSV: passo 2, imagem 1 %32
    • Remove the silicone shutters by gently lifting from the base, NOT from the flaps.

  3. Cleaning the Ulco Integrus PSV: passo 3, imagem 1 %32
    • To release and remove the canister(s), undo the handle latch by turning sideways.

  4. Cleaning the Ulco Integrus PSV: passo 4, imagem 1 %32
    • Push the release handle down to vertical until canisters are free.

  5. Cleaning the Ulco Integrus PSV: passo 5, imagem 1 %32
    • Push canister(s) down then out of the cradle. Then dispose of the used soda lime (see suppliers recommended procedure for disposal of soda lime).

    • Wash all the absorber components. Do NOT use caustic cleaning fluids.

    • The Canister(s) and silicone shutters can be autoclaved.

    • The Absorber head can be put through a washer at 80 deg.C

    • Dry thoroughly before assembly, low pressure warm air should be passed through the head by attaching a hose to the expiratory port of the absorber.

  6. Cleaning the Ulco Integrus PSV: passo 6, imagem 1 %32 Cleaning the Ulco Integrus PSV: passo 6, imagem 2 %32
    • Bellows Assembly

    • Loosen the four knurled screws (1) and remove the bellows canister.

  7. Cleaning the Ulco Integrus PSV: passo 7, imagem 1 %32
    • Remove the bellows assembly by rotating counter-clockwise. The bellows canister may be washed or autoclaved.

  8. Cleaning the Ulco Integrus PSV: passo 8, imagem 1 %32
    • The base disk (mushroom) should be removed from the bellows assembly before washing. Pull the latex-free rubber bag from the delrin base disk. The bellows may be washed or autoclaved. The base component (mushroom) should not be autoclaved but can be put through a washer at 80°C.

    • Dry all components thoroughly before re-assembly.

    • Low pressure warm air should be passed through the absorber head by attaching a hose to the scavenge port

Conclusão

To reassemble your device, follow these instructions in reverse order.

Uma outra pessoa concluiu este guia.

Jacob Henriksen

Membro desde: 04/15/19

232 Reputação

Autoria de 1 guia

Equipe

Cal Poly, Team S7-G13, Paton Spring 2020 Membro de Cal Poly, Team S7-G13, Paton Spring 2020

CPSU-PATON-S20S7G13

Membros da 3

Autoria de 8 guias

0 comentários

Adicione um comentário

Exibir estatísticas:

Últimas 24 horas: 0

Últimos 7 dias: 0

Últimos 30 dias: 0

Duração total: 74