Esta versão pode conter edições incorretas. Mude para o último instantâneo verificado.
O que você precisa
-
Este passo não foi traduzido. Ajude a traduzi-lo
-
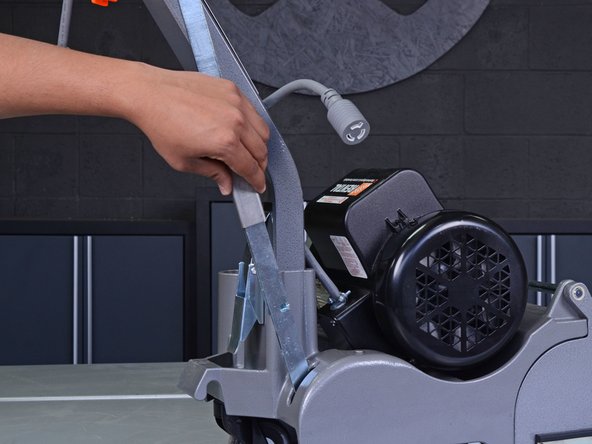
Pull on the dust bag to remove it from the dust tube.
-
-
Este passo não foi traduzido. Ajude a traduzi-lo
-
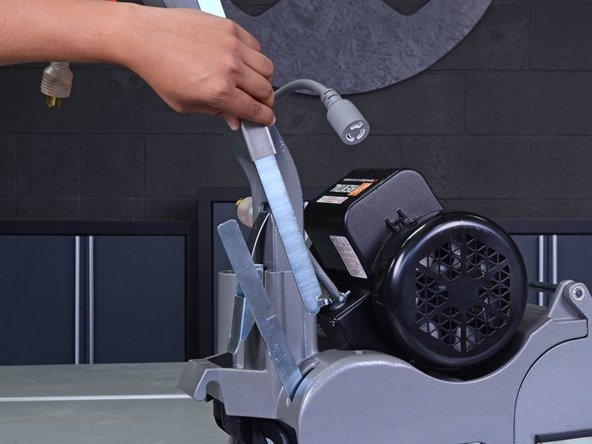
Pull up on the dust tube to remove it from the sander.
-
-
Este passo não foi traduzido. Ajude a traduzi-lo
-
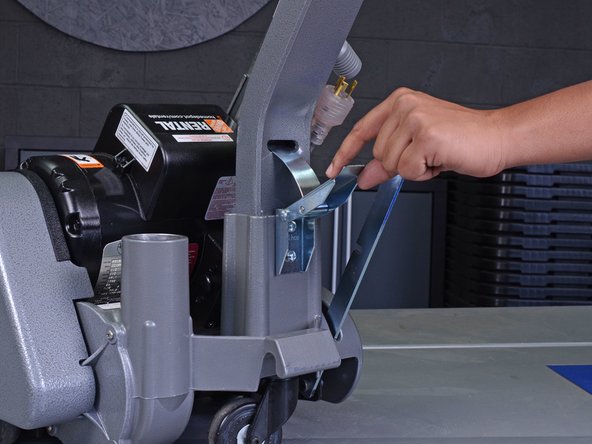
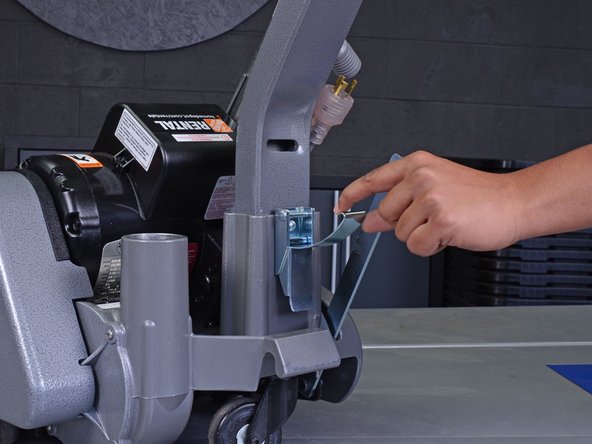
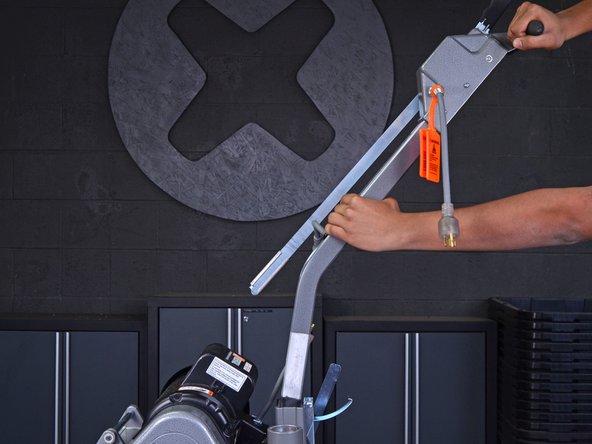
Slide the collar on the control link arm up until the two halves of the arm detach from one another.
-
-
-
Este passo não foi traduzido. Ajude a traduzi-lo
-
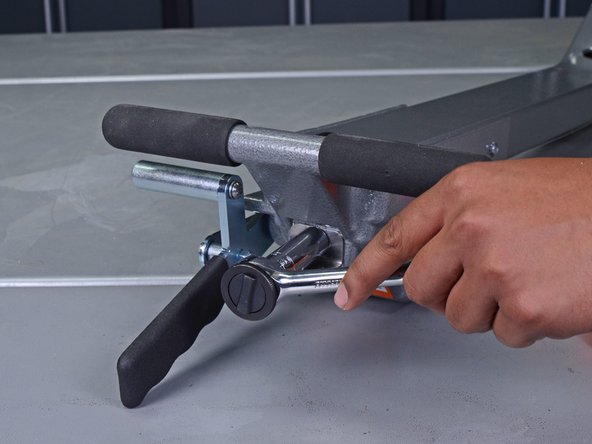
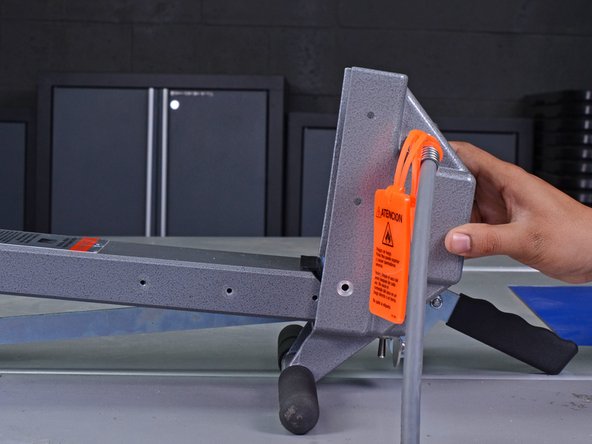
Pull up on the latch at the bottom of the handle assembly, then remove the retaining plate from its slot in the handle.
-
-
Este passo não foi traduzido. Ajude a traduzi-lo
-
Pull up on the handle assembly and remove it from the sander.
-
-
Este passo não foi traduzido. Ajude a traduzi-lo
-
Use a socket wrench with a deep 9/16" socket to remove the retaining nut and star washer from the control switch toggle.
-
-
Este passo não foi traduzido. Ajude a traduzi-lo
-
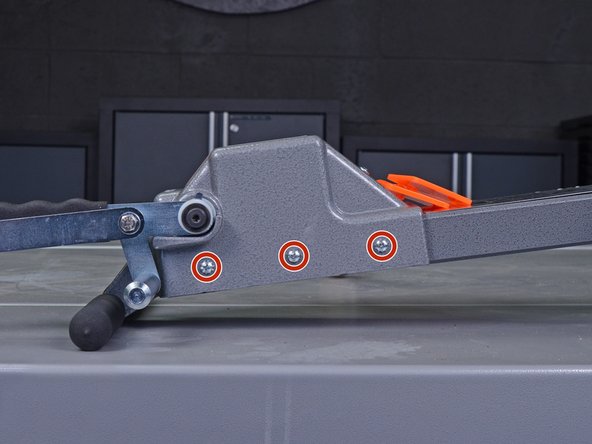
Use a Phillips #2 screwdriver to remove the six screws on the control housing—three on either side.
-
-
Este passo não foi traduzido. Ajude a traduzi-lo
-
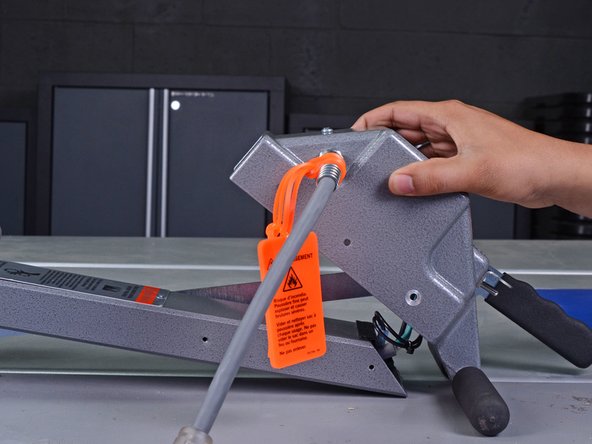
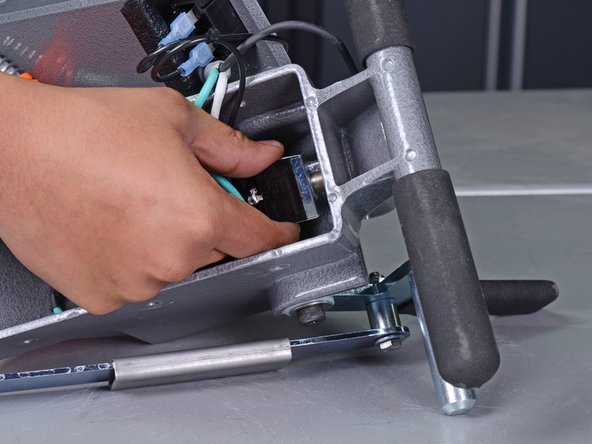
Lift the control housing up and swing it open so the wiring panel inside is accessible.
-
-
Este passo não foi traduzido. Ajude a traduzi-lo
-
Use a #2 Phillips head screwdriver to remove the following three screws from the wiring panel:
-
Two 10-32 x 3/8" screws
-
One 8-32 x 3/8" screw
-
Remove the ring and fork terminals from the screws.
-
-
Este passo não foi traduzido. Ajude a traduzi-lo
-
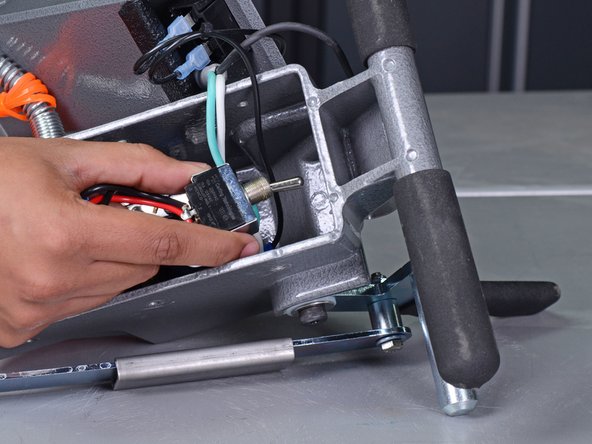
Pull and gently wiggle the control switch to remove it from its mounting hole in the control housing.
-


Cancelar: não concluí este guia.
9 outras pessoas executaram este guia.

2 comentários
Well Done, steps are clear and EZ 8 to follow!
Thank you excellent instruction