Introdução
All you need is a plastic opening tool and tweezers! With these you can change your camera!
O que você precisa
-
-
Place your Plastic Opening Tool between the screen and the case. Slowly move it around the casing while prying in a downward motion to undo the hinges holding the two together and separate the two parts.
-
-
-
After separating the case and screen, turn your screen face down so you can see the internal parts!
-
-
-
-
Using the small plastic opening tool, gently push the gray connector back to unlock the flex cable.
-
-
-
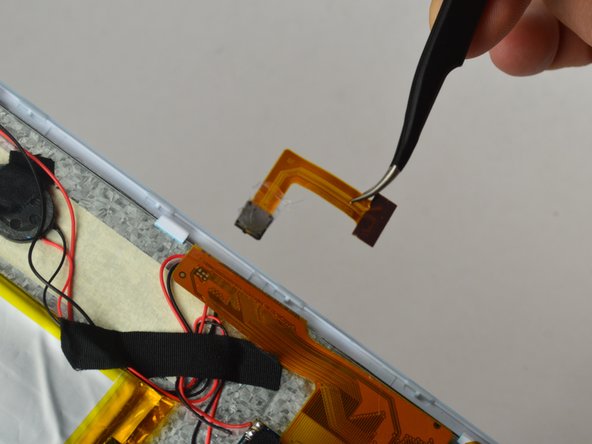
Using a pair of tweezers, gently grasp the flex cable and pull it out while using your other hand to keep the camera in place. Once removed, your camera is now free and ready for replacement!
-


To reassemble your device, follow these instructions in reverse order.
To reassemble your device, follow these instructions in reverse order.
Equipe

USF Tampa, Team 15-1, Watkins Winter 2015 Membro de USF Tampa, Team 15-1, Watkins Winter 2015
USFT-WATKINS-W15S15G1
Membros da 4
Autoria de 6 guias