Ir para o conteúdo principal
Participe da comunidade de reparos - Criar conta
Cen-Tech Seven Function Digital Multimeter Circuit Board Replacement

Cen-Tech Seven Function Digital Multimeter Circuit Board Replacement

Anna Kihm

Anna Kihm e 8 outros colaboradores

Última atualização em 1 de nov de 2018

5 - 15 minutos
Fácil

Introdução

Ir para o passo 1

In order to remove and replace the circuit board, the back panel must first be removed by taking out the two screws on the back of the device. To reduce the chances of damaging the meter, remove the battery as soon as the back cover is removed. Next, the four screws that secure the circuit board must be removed. This will free the circuit board to be removed and replaced.

O que você precisa

Peças

Ferramentas

Exibir mais…

  1. Cen-Tech Seven Function Digital Multimeter Circuit Board Replacement, Position Device: passo 1, imagem 1 %32
    • Place the meter face down, and the back panel and screws can be seen.

  2. Cen-Tech Seven Function Digital Multimeter Circuit Board Replacement, Remove Back Panel Screws: passo 2, imagem 1 %32 Cen-Tech Seven Function Digital Multimeter Circuit Board Replacement, Remove Back Panel Screws: passo 2, imagem 2 %32
    • Unscrew the two 9mm screws on the back panel using a #0 Phillips screwdriver.

  3. Cen-Tech Seven Function Digital Multimeter Circuit Board Replacement, Remove Back Panel: passo 3, imagem 1 %32
    • Remove the back panel of the device by lifting upward.

    • Remove the battery from the meter before continuing.

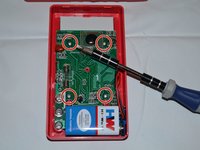
  4. Cen-Tech Seven Function Digital Multimeter Circuit Board Replacement, Unscrew Motherboard: passo 4, imagem 1 %32 Cen-Tech Seven Function Digital Multimeter Circuit Board Replacement, Unscrew Motherboard: passo 4, imagem 2 %32
    • Remove the four 7mm Phillips screws holding the circuit board in place.

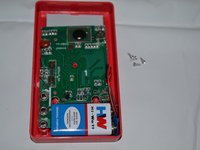
  5. Cen-Tech Seven Function Digital Multimeter Circuit Board Replacement, Remove Motherboard: passo 5, imagem 1 %32
    • Gently lift the circuit board away from the device casing.

    • Remove the battery after removing the back cover to reduce the chances of short-circuiting the circuit board.

Conclusão

To reassemble your device, follow these instructions in reverse order.

6 outras pessoas executaram este guia.

Gear Up For Future Repairs

Shop all

Anna Kihm

Membro desde: 10/13/14

956 Reputação

Autoria de 5 guias

Equipe

Clemson, Team 2-4, Benson Fall 2014 Membro de Clemson, Team 2-4, Benson Fall 2014

CLEM-BENSON-F14S2G4

4 Membros

Autoria de 6 guias

1Comentário do guia

What is the little dial on the circuit board on the upper right that has numbers 1 through 3 on it and it can be adjusted thank you

Thomas Clawson - Responder

Comentar

Visualizações:

Últimas 24 horas: 1

Últimos 7 dias: 10

Últimos 30 dias: 47

Ao todo: 2,793