Ir para o conteúdo principal

Ceiva LF2003 Internal Plastic Screen Frame Replacement

O que você precisa

  1. Ceiva LF2003 Internal Plastic Screen Frame Replacement, Exterior Frame and Matting: passo 1, imagem 1 %32
    • Lay the device on its back, and rotate so the base is facing away from you.

  2. Ceiva LF2003 Internal Plastic Screen Frame Replacement: passo 2, imagem 1 %32
    • Grip the frame with your fingers under the edge of the frame, and thumbs pushing down on the front of the device.

  3. Ceiva LF2003 Internal Plastic Screen Frame Replacement: passo 3, imagem 1 %32
    • Lift up the frame with your fingers and push down the rest of the device with your thumbs.

  4. Ceiva LF2003 Internal Plastic Screen Frame Replacement: passo 4, imagem 1 %32
    • Remove the frame and matte from the device.

  5. Ceiva LF2003 Internal Plastic Screen Frame Replacement, Internal Plastic Screen Frame: passo 5, imagem 1 %32
    • Remove the four 7mm Torx T6 screws.

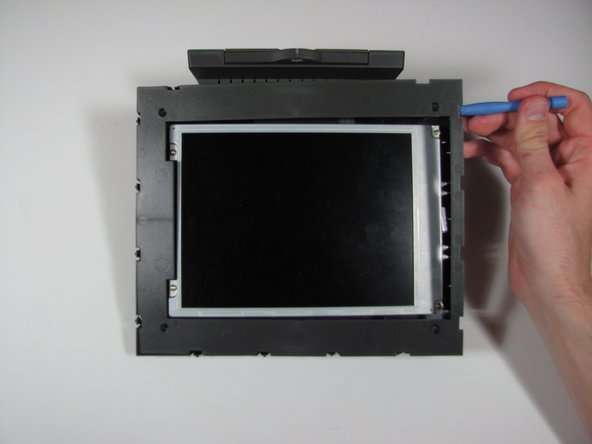
  6. Ceiva LF2003 Internal Plastic Screen Frame Replacement: passo 6, imagem 1 %32 Ceiva LF2003 Internal Plastic Screen Frame Replacement: passo 6, imagem 2 %32
    • Using the plastic opening tool or your fingers, lift up the frame from any edge.

    • Remove the frame from the device.

Conclusão

To reassemble your device, follow these instructions in reverse order.

Uma outra pessoa concluiu este guia.

Casey Glasgow

Membro desde: 01/26/14

510 Reputação

Autoria de 5 guias

Equipe

Cal Poly, Team 9-25, Maness Winter 2014 Membro de Cal Poly, Team 9-25, Maness Winter 2014

CPSU-MANESS-W14S9G25

Membros da 4

Autoria de 5 guias

0 comentários

Adicione um comentário

Exibir estatísticas:

Últimas 24 horas: 0

Últimos 7 dias: 3

Últimos 30 dias: 13

Duração total: 99