Ir para o conteúdo principal

Cardinal Health Vela Ventilator Exhalation Valve Body Replacement

Equipamento Médico
Nem o iFixit nem este guia de reparo são endossados ou afiliados ao fabricante do dispositivo médico.

O que você precisa

Documento em destaque

  1. Cardinal Health Vela Ventilator Exhalation Valve Body Replacement, Exhalation Valve Body: passo 1, imagem 1 %32
    • Use a screwdriver to remove the two Phillips #0 screws at the top of the plug guard.

    • Remove the plug guard and unplug the ventilator.

  2. Cardinal Health Vela Ventilator Exhalation Valve Body Replacement: passo 3, imagem 1 %32
    • Remove the four Phillips #0 screws on the back side of the ventilator.

  3. Cardinal Health Vela Ventilator Exhalation Valve Body Replacement: passo 4, imagem 1 %32
    • Remove all six small side panel screws along the bottom of each side of the top cover with the same screwdriver.

    • Slide the top cover towards the back side of the ventilator to remove it.

  4. Cardinal Health Vela Ventilator Exhalation Valve Body Replacement: passo 6, imagem 1 %32
    • Use your Phillips #0 screwdriver to unscrew the four Phillips screws positioned on each side of the battery tray.

    • Lift the battery tray out of the ventilator.

    • Caution: The wires connecting the batteries to the ventilator will still be connected so lift the battery tray carefully.

  5. Cardinal Health Vela Ventilator Exhalation Valve Body Replacement: passo 8, imagem 1 %32
    • Disconnect the batteries from the ventilator by pulling apart the Battery Connector.

  6. Cardinal Health Vela Ventilator Exhalation Valve Body Replacement: passo 9, imagem 1 %32
    • Remove the two Phillips countersink screws from the right side of the rear panel.

  7. Cardinal Health Vela Ventilator Exhalation Valve Body Replacement: passo 10, imagem 1 %32
    • Remove the single Phillips countersink screw in the upper front of the right panel.

  8. Cardinal Health Vela Ventilator Exhalation Valve Body Replacement: passo 11, imagem 1 %32
    • Remove the single Phillips screw in the lower center of the right panel.

  9. Cardinal Health Vela Ventilator Exhalation Valve Body Replacement: passo 12, imagem 1 %32
    • Gently lift out the panel and the power PCB. Lay the panel flat and make the following disconnections:

    • Remove the 2 Phillips countersink screws at the rear of the left panel.

    • Remove the 1 Phillips countersink screw in the upper front of the left panel.

    • Lift out the left panel.

    • Disconnect the following from the main PCB:

    • JP2 40-pin ribbon cable to JP1 on the SVGA out PCB

    • J301 12-pin to J301 on the blender PCB

  10. Cardinal Health Vela Ventilator Exhalation Valve Body Replacement: passo 15, imagem 1 %32
    • Disconnect the green oxygen nebulizer tube

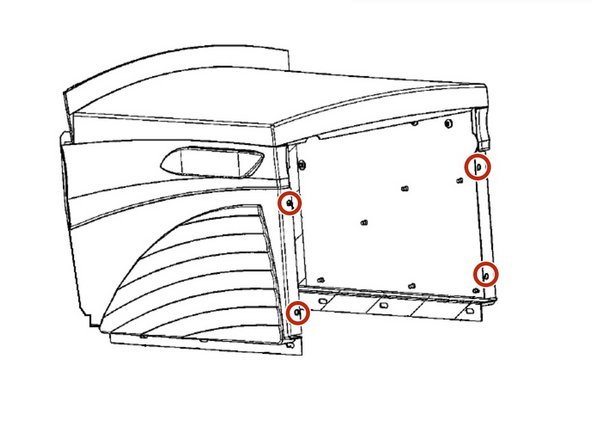
    • Remove the 2 Phillips pan-head screws behind the front panel at the lower left and right.

    • Disconnect the 1/8” silicone tube #4 from P2 on the exhalation differential transducer.

    • Disconnect the 1/8” silicone tube #5 from P1 on the exhalation differential transducer.

    • Disconnect the 1/8” silicone tube #1 from the turbine.

    • Disconnect the 1/16” silicone tube from the front ports of the turbine outlet auto-zero solenoid that goes to the main tubing harness.

    • Disconnect the 1/16” silicone tube from the turbine inlet auto-zero solenoid that goes to the turbine.

    • Disconnect the 1/16” silicone tube from the airway pressure auto-zero solenoid that goes to the exhalation valve receptacle.

  11. Cardinal Health Vela Ventilator Exhalation Valve Body Replacement: passo 17, imagem 1 %32
    • Disconnect the following from the main PCB:

    • Disconnect the following from the FIO2 monitoring PCB:

    • J2 2-pin (clear conn.) to oxygen sensor

    • J3 2-pin (blue conn.) to oxygen inlet solenoid on blender assembly

    • J4 2-pin (red conn.) to nebulizer solenoid assembly on upper rear of blender

  12. Cardinal Health Vela Ventilator Exhalation Valve Body Replacement: passo 19, imagem 1 %32
    • Remove two Phillips pan-head screws on the valve cover.

    • Lift out the exhalation valve assembly.

Conclusão

To reassemble your device, follow these instructions in reverse order.

Documentos anexados

Ethan Nikcevich

Membro desde: 04/07/20

649 Reputação

Autoria de 2 guias

Equipe

Cal Poly, Team S11-G22, Paton Spring 2020 Membro de Cal Poly, Team S11-G22, Paton Spring 2020

CPSU-PATON-S20S11G22

Membros da 2

Autoria de 3 guias

0 comentários

Adicione um comentário

Exibir estatísticas:

Últimas 24 horas: 0

Últimos 7 dias: 0

Últimos 30 dias: 2

Duração total: 286