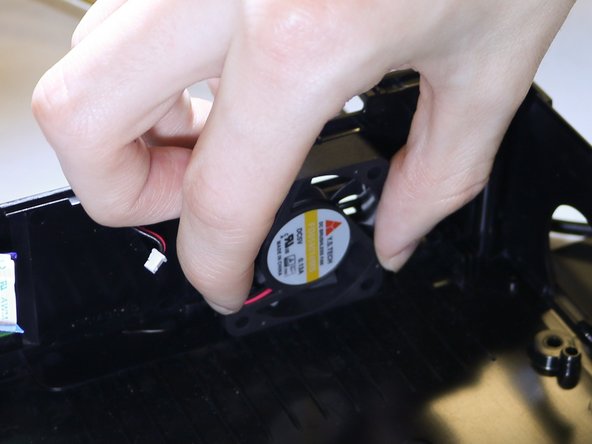
Ir para o conteúdo principal

Canon Selphy CP1200 Cooling Fan Replacement

O que você precisa

  1. Canon Selphy CP1200 Cooling Fan Replacement, LCD/Buttons: passo 1, imagem 1 %32
    • Unscrew the four 6mm PH000 corner screws.

    • This will require a screwdriver with a long, narrow shaft.

  2. Canon Selphy CP1200 Cooling Fan Replacement: passo 2, imagem 1 %32
    • Unscrew the three 4mm PH1 screws on the bottom of the printer.

  3. Canon Selphy CP1200 Cooling Fan Replacement: passo 3, imagem 1 %32
    • Gently pry open the top of the case from either the front or back.

    • A plastic opening tool may help.

    • Be careful in lifting the top assembly as it is attached to the motherboard at this point.

  4. Canon Selphy CP1200 Cooling Fan Replacement: passo 4, imagem 1 %32
    • Keeping the top assembly elevated, detach the ribbon cables connecting the LCD and buttons to the motherboard from the motherboard.

    • Tweezers may be useful given the limited space between the top assembly and motherboard.

    • The top assembly, containing both the LCD and buttons, will now be completely free

  5. Canon Selphy CP1200 Cooling Fan Replacement, Motherboard: passo 5, imagem 1 %32
    • Detach the fan cable from the motherboard.

  6. Canon Selphy CP1200 Cooling Fan Replacement: passo 6, imagem 1 %32
    • Detach the ribbon cable leading to the DC in port and battery leads.

    • Tweezers may be useful.

  7. Canon Selphy CP1200 Cooling Fan Replacement: passo 7, imagem 1 %32
    • Unscrew the three 3mm PH000 screws from the motherboard.

  8. Canon Selphy CP1200 Cooling Fan Replacement: passo 8, imagem 1 %32
    • Disconnect the bundled cables leading to the printing mechanism.

  9. Canon Selphy CP1200 Cooling Fan Replacement: passo 9, imagem 1 %32
    • Gently lift the motherboard and detach the ribbon cables leading to the print mechanism.

    • Tweezers may be useful due to the limited amount of space.

  10. Canon Selphy CP1200 Cooling Fan Replacement, Print Mechanism: passo 10, imagem 1 %32 Canon Selphy CP1200 Cooling Fan Replacement, Print Mechanism: passo 10, imagem 2 %32
    • Open the side door and depress the ink cassette release.

    • Slide out and remove the ink cassette.

  11. Canon Selphy CP1200 Cooling Fan Replacement: passo 11, imagem 1 %32
    • Unscrew the three 3mm PH000 screws securing the metal plate to the printing mechanism.

  12. Canon Selphy CP1200 Cooling Fan Replacement: passo 12, imagem 1 %32
    • Lift out the print mechanism of the printer case.

  13. Canon Selphy CP1200 Cooling Fan Replacement, Cooling Fan: passo 13, imagem 1 %32
    • Lift out the back case plate.

  14. Canon Selphy CP1200 Cooling Fan Replacement: passo 14, imagem 1 %32 Canon Selphy CP1200 Cooling Fan Replacement: passo 14, imagem 2 %32
    • Remove the fan by tilting it forward slightly and then lifting upwards.

Conclusão

To reassemble your device, follow these instructions in reverse order.

Uma outra pessoa concluiu este guia.

Um comentário

Where can I get a new cooling fan for Selphy 1200

Roy johannessen - Responder

Adicione um comentário

Exibir estatísticas:

Últimas 24 horas: 0

Últimos 7 dias: 0

Últimos 30 dias: 1

Duração total: 284