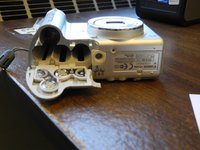
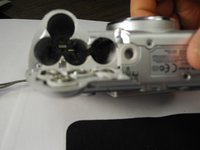
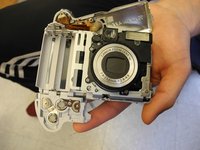
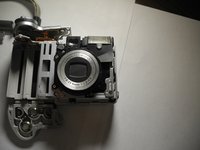
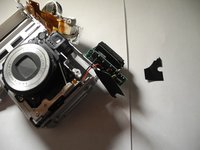
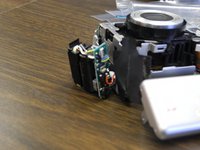
Ir para o conteúdo principal

Canon Powershot A95 Flash Unit Replacement

O que você precisa

  1. Canon Powershot A95 Flash Unit Replacement, Flash Unit: passo 1, imagem 1 %32 Canon Powershot A95 Flash Unit Replacement, Flash Unit: passo 1, imagem 2 %32 Canon Powershot A95 Flash Unit Replacement, Flash Unit: passo 1, imagem 3 %32
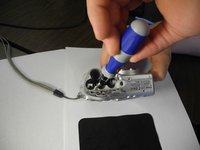
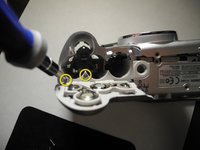
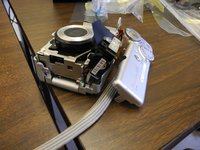
    • Have a small Phillips-head screwdriver and extender, an opening tool, and a soldering iron to complete the following steps.
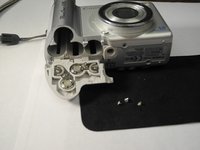
    • Keep the screws organized and separated as you remove them.

  2. Canon Powershot A95 Flash Unit Replacement: passo 2, imagem 1 %32
    • Locate the memory card slot on the far right with the screen facing toward you.

    • Remove the memory card.

  3. Canon Powershot A95 Flash Unit Replacement: passo 3, imagem 1 %32 Canon Powershot A95 Flash Unit Replacement: passo 3, imagem 2 %32
    • With the screen facing toward you, the battery slot can be found under the right side of the camera.

    • Remove all batteries and leave the slot open.

  4. Canon Powershot A95 Flash Unit Replacement: passo 4, imagem 1 %32 Canon Powershot A95 Flash Unit Replacement: passo 4, imagem 2 %32 Canon Powershot A95 Flash Unit Replacement: passo 4, imagem 3 %32
    • There are two screws to the right of the battery slot.

    • Take the #00 Phillips-head screwdriver and remove the two screws.

  5. Canon Powershot A95 Flash Unit Replacement: passo 5, imagem 1 %32 Canon Powershot A95 Flash Unit Replacement: passo 5, imagem 2 %32
    • Inside the battery slot, there are another 3 screws located at the very bottom of each slot.

    • To reach these screws and remove them, attach the screwdriver extender to the #00 Phillips-head screwdriver.

  6. Canon Powershot A95 Flash Unit Replacement: passo 6, imagem 1 %32 Canon Powershot A95 Flash Unit Replacement: passo 6, imagem 2 %32
    • At the base of the battery flap, there are 2 screws located next to the hinges of the opening.

    • Remove both screws.

  7. Canon Powershot A95 Flash Unit Replacement: passo 7, imagem 1 %32 Canon Powershot A95 Flash Unit Replacement: passo 7, imagem 2 %32
    • Using the pry tool, pry the top of the camera open.

    • Be sure not to apply too much force and damage the wires under the lid.

    • The top should dangle loosely from the camera and not be fully detached.

  8. Canon Powershot A95 Flash Unit Replacement: passo 8, imagem 1 %32 Canon Powershot A95 Flash Unit Replacement: passo 8, imagem 2 %32
    • Once the top is loose, locate the 2 screws near the AV outlet.

    • Remove both screws.

    • The removal of the 2 screws will allow you to remove the plastic AV covering.

    • Once the AV cover is removed, there will be 1 more screw left to remove.

  9. Canon Powershot A95 Flash Unit Replacement: passo 9, imagem 1 %32 Canon Powershot A95 Flash Unit Replacement: passo 9, imagem 2 %32
    • Using the pry tool, gently remove the front cover of the camera in order to expose the flash and the lens.

  10. Canon Powershot A95 Flash Unit Replacement: passo 10, imagem 1 %32 Canon Powershot A95 Flash Unit Replacement: passo 10, imagem 2 %32
    • Locate the black film under the flash unit and remove the screw holding it in place.

    • Once the screw is removed, gently wiggle the flash out of place without damaging any internal parts.

  11. Canon Powershot A95 Flash Unit Replacement: passo 11, imagem 1 %32 Canon Powershot A95 Flash Unit Replacement: passo 11, imagem 2 %32
    • There will be a second black film which is covering the flash wires.

    • Remove the film to reveal the wires.

  12. Canon Powershot A95 Flash Unit Replacement: passo 12, imagem 1 %32
    • Once the second film is removed and has revealed the flash wires, proceed to unsolder the necessary wires in order to detach the flash.

    • Take the new flash and solder it where the old one was removed.

Conclusão

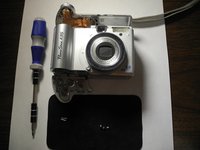
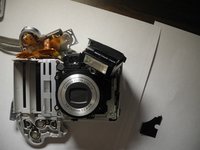
To reassemble, follow the disassemble steps in reverse order.

Amber

Membro desde: 02/12/13

3 Reputação

Autoria de 1 guia

Equipe

Ohio State, Team 1-4, Buehl Spring 2013 Membro de Ohio State, Team 1-4, Buehl Spring 2013

OSU-BUEHL-S13S1G4

Membros da 4

Autoria de 2 guias

0 comentários

Adicione um comentário

Exibir estatísticas:

Últimas 24 horas: 0

Últimos 7 dias: 1

Últimos 30 dias: 7

Duração total: 832