Esta versão pode conter edições incorretas. Mude para o último instantâneo verificado.
O que você precisa
-
Este passo não foi traduzido. Ajude a traduzi-lo
-
Turn the camera over so that the battery compartment is visible. The compartment should read "Card/Batt. Open".
-
Open the compartment.
-
Lightly push the compartment lid down and outward. The arrow next to "Card/Batt. Open" indicates the direction you should be pushing.
-
-
Este passo não foi traduzido. Ajude a traduzi-lo
-
Once the lid is open, the battery and SD card compartments become visible.
-
Notice the red tab on the right side of the battery.
-
Slide this tab off the battery.
-
The battery is now free to slide out of the compartment.
-
-
Este passo não foi traduzido. Ajude a traduzi-lo
-
To remove the SD card push it down and it will eject out. (SD card not shown)
-
-
-
Este passo não foi traduzido. Ajude a traduzi-lo
-
There are six 3mm exterior screws that will need to be removed in order to remove the exterior frame.
-
Two screws near the tripod mount on the underside of the camera.
-
Two screws on the camera left hand side (the face with nothing but screws on it).
-
Two screws on the camera right hand side, by the wrist strap attachment.
-
Remove the screws using the screwdriver.
-
-
Este passo não foi traduzido. Ajude a traduzi-lo
-
Remove the wrist strap attachment.
-
Use the spudger to pry it open.
-
Remove the small circular cover underneath the wrist strap attachment.
-
-
Este passo não foi traduzido. Ajude a traduzi-lo
-
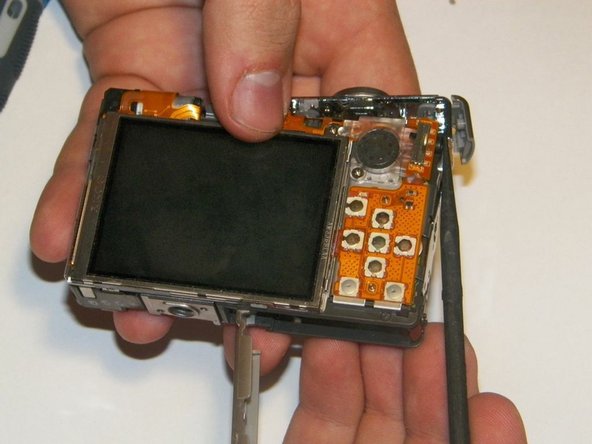
Carefully pull apart the two parts of the exterior frame.
-
Use the spudger to pry apart the two frame components.
-
Once disconnected, the two parts of the frame can be easily separated by using your fingers.
-
The rear frame should be removed first.
-
There should be an O-ring on the front face of the camera. Ensure to keep the O-ring with the front part of the frame.
-
-
Este passo não foi traduzido. Ajude a traduzi-lo
-
The power and shutter buttons are located on the top of the camera and are removed as a single unit.
-
Use the spudger to lift the power/shutter buttons from the camera.
-


Equipe

Clemson, Team 13-5, Benson Spring 2013 Membro de Clemson, Team 13-5, Benson Spring 2013
CLEM-BENSON-S13S13G5
Membros da 3
Autoria de 11 guias