Ir para o conteúdo principal

Esta versão pode conter edições incorretas. Mude para o último instantâneo verificado.

O que você precisa

  1. Este passo não foi traduzido. Ajude a traduzi-lo

    : passo 1, imagem 1 %32
    • Using a Phillips #00 screwdriver, remove the two 2.9 mm screws on the side of the LCD screen.

  2. Este passo não foi traduzido. Ajude a traduzi-lo

    : passo 2, imagem 1 %32 : passo 2, imagem 2 %32
    • Using a Phillips #00 screwdriver, remove the 2.9 mm screws on the other side of the screen to separate the front and back covers.

    • To access the second screw, rotate the screen 90° so that it faces upwards.

  3. Este passo não foi traduzido. Ajude a traduzi-lo

    : passo 3, imagem 1 %32 : passo 3, imagem 2 %32 : passo 3, imagem 3 %32
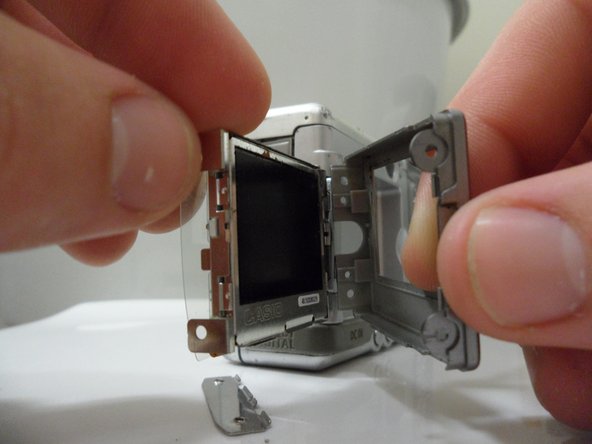
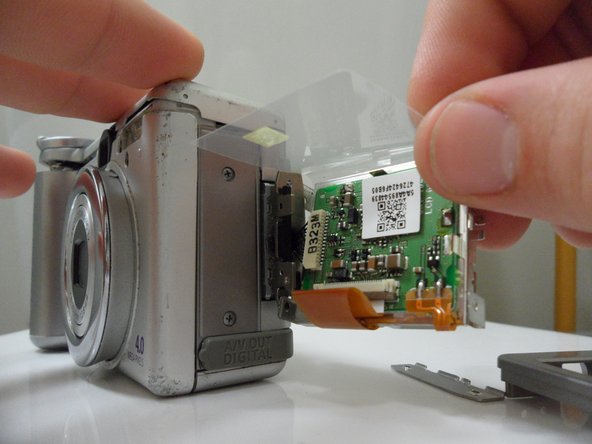
    • Gently remove the front and back covers from the screen.

    • Peel back the plastic circuit cover.

  4. Este passo não foi traduzido. Ajude a traduzi-lo

    : passo 4, imagem 1 %32
    • Pull the screen away from the base.

    • This will take some force, but remember to handle with care.

    • If a small metal piece between the screen cover and the screen falls out during repair, replace it with the rounded corners facing away from the screen during reassembly.

  5. Este passo não foi traduzido. Ajude a traduzi-lo

    : passo 5, imagem 1 %32
    • Unplug the ribbon cable connected to the circuit board latch.

Linha de Chegada

4 outras pessoas executaram este guia.

konrad

Membro desde: 01/11/11

220 Reputação

Autoria de 3 guias

Equipe

Cal Poly, Team 7-31, Regan Winter 2011 Membro de Cal Poly, Team 7-31, Regan Winter 2011

CPSU-REGAN-W11S7G31

Membros da 6

Autoria de 12 guias

Um comentário

MY screen is dark after touched water, do I need to change this screen? Where can I buy this screen? How much?

Thank you for the guidance.

jennifer

yu123xi@yahoo.com

yu123xi - Responder

Adicione um comentário

Exibir estatísticas:

Últimas 24 horas: 1

Últimos 7 dias: 10

Últimos 30 dias: 31

Duração total: 4,116