Ir para o conteúdo principal

Canon PowerShot A75 Flash Unit Replacement

O que você precisa

  1. Canon PowerShot A75 Flash Unit Replacement, Batteries: passo 1, imagem 1 %32
    • Turn the camera over and locate the "BATT OPEN" sliding switch.

  2. Canon PowerShot A75 Flash Unit Replacement: passo 2, imagem 1 %32 Canon PowerShot A75 Flash Unit Replacement: passo 2, imagem 2 %32 Canon PowerShot A75 Flash Unit Replacement: passo 2, imagem 3 %32
    • Slide the switch to the right.

    • The battery cover should slide down and spring open.

  3. Canon PowerShot A75 Flash Unit Replacement: passo 3, imagem 1 %32 Canon PowerShot A75 Flash Unit Replacement: passo 3, imagem 2 %32 Canon PowerShot A75 Flash Unit Replacement: passo 3, imagem 3 %32
    • Remove the 4 AA batteries.

    • Watch for the orientation of the batteries as they slide out.

    • The battery orientation is shown under the battery flap itself and on a sticker next to the battery flap.

  4. Canon PowerShot A75 Flash Unit Replacement, Casing: passo 4, imagem 1 %32
    • Remove the three 2.5mm screws on the bottom of the camera.

  5. Canon PowerShot A75 Flash Unit Replacement: passo 5, imagem 1 %32
    • Remove the 3.8mm screw underneath the flap that covers the A/V port.

  6. Canon PowerShot A75 Flash Unit Replacement: passo 6, imagem 1 %32 Canon PowerShot A75 Flash Unit Replacement: passo 6, imagem 2 %32
    • Remove the 2.4mm screw located underneath the cover of the memory card slot.

  7. Canon PowerShot A75 Flash Unit Replacement: passo 7, imagem 1 %32 Canon PowerShot A75 Flash Unit Replacement: passo 7, imagem 2 %32
    • Open the memory card slot by sliding it laterally until you hear a click.

    • Remove the 5.9mm screw in the upper corner of the memory card slot.

  8. Canon PowerShot A75 Flash Unit Replacement: passo 8, imagem 1 %32
    • Remove the two 4.1mm screws at the bottom of the battery flap.

  9. Canon PowerShot A75 Flash Unit Replacement: passo 9, imagem 1 %32 Canon PowerShot A75 Flash Unit Replacement: passo 9, imagem 2 %32
    • Lift the shutter button and speaker part from the top of the camera.

    • DO NOT pull the part too hard because there is a plug connecting the speaker to the camera.

  10. Canon PowerShot A75 Flash Unit Replacement: passo 10, imagem 1 %32 Canon PowerShot A75 Flash Unit Replacement: passo 10, imagem 2 %32 Canon PowerShot A75 Flash Unit Replacement: passo 10, imagem 3 %32
    • Using a pair of tweezers, grab the plug that connects the speaker to the camera and gently pull it out.

  11. Canon PowerShot A75 Flash Unit Replacement: passo 11, imagem 1 %32
    • Remove the rightmost 4.2mm screw underneath the battery cover, not the center screw.

  12. Canon PowerShot A75 Flash Unit Replacement: passo 12, imagem 1 %32 Canon PowerShot A75 Flash Unit Replacement: passo 12, imagem 2 %32 Canon PowerShot A75 Flash Unit Replacement: passo 12, imagem 3 %32
    • Separate the back casing and front casing of the camera using your hands.

    • Pulling the two halves apart can be difficult, especially at the top. Use a moderate amount of force.

  13. Canon PowerShot A75 Flash Unit Replacement: passo 13, imagem 1 %32 Canon PowerShot A75 Flash Unit Replacement: passo 13, imagem 2 %32 Canon PowerShot A75 Flash Unit Replacement: passo 13, imagem 3 %32
    • On the front of the camera, press the button on the lower left of the lens.

    • Twist the outer lens casing counter-clockwise and slide it out.

  14. Canon PowerShot A75 Flash Unit Replacement: passo 14, imagem 1 %32 Canon PowerShot A75 Flash Unit Replacement: passo 14, imagem 2 %32 Canon PowerShot A75 Flash Unit Replacement: passo 14, imagem 3 %32
    • Take off the front casing.

    • There is a black rubber washer around the lens that comes out after you take the casing off. Make sure to replace it when putting the camera back together.

  15. Canon PowerShot A75 Flash Unit Replacement, Flash Unit: passo 15, imagem 1 %32 Canon PowerShot A75 Flash Unit Replacement, Flash Unit: passo 15, imagem 2 %32 Canon PowerShot A75 Flash Unit Replacement, Flash Unit: passo 15, imagem 3 %32
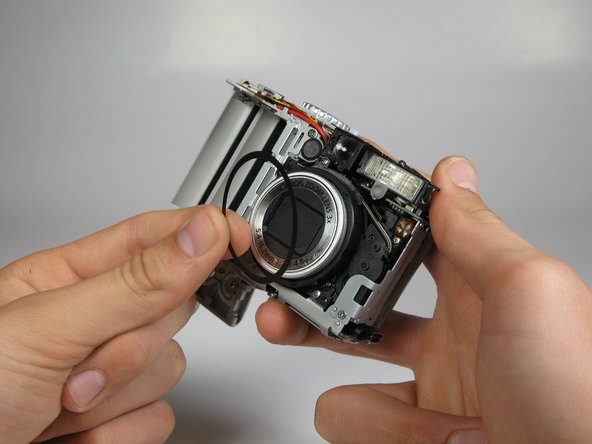
    • Rotate the camera such that the flash unit and capacitor are facing you.

    • DO NOT touch the capacitor because it may shock you.

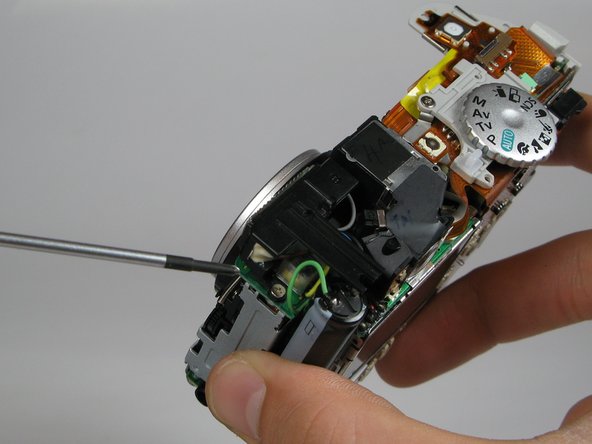
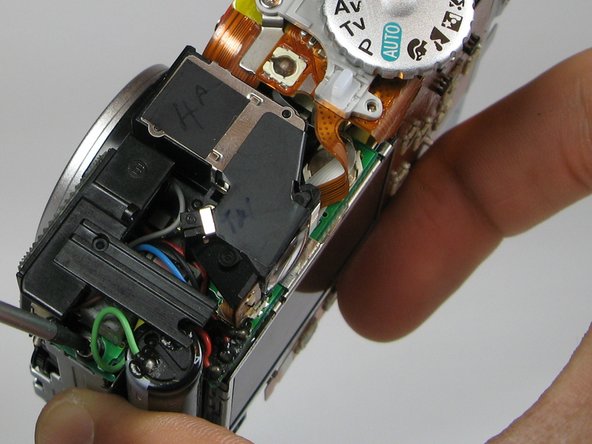
    • Remove the 3.5mm screw located between the flash unit and the capacitor.

  16. Canon PowerShot A75 Flash Unit Replacement: passo 16, imagem 1 %32 Canon PowerShot A75 Flash Unit Replacement: passo 16, imagem 2 %32
    • Snap flash unit out of place with your fingers.

    • Do not proceed to the next step unless you have previous soldering experience because you can damage the flash unit if you are not careful.

    • Unsolder the five wires connected to the flash unit in order to remove it.

Conclusão

To reassemble your device, follow these instructions in reverse order.

Chris Miyahira

Membro desde: 04/12/12

38 Reputação

Autoria de 1 guia

Equipe

Cal Poly, Team 17-30, Amido Spring 2012 Membro de Cal Poly, Team 17-30, Amido Spring 2012

CPSU-AMIDO-S12S17G30

Membros da 5

Autoria de 12 guias

0 comentários

Adicione um comentário

Exibir estatísticas:

Últimas 24 horas: 0

Últimos 7 dias: 0

Últimos 30 dias: 4

Duração total: 817