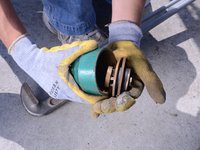
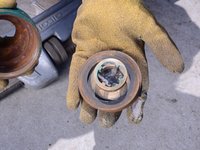
Ir para o conteúdo principal

Bush Pump Foot Valve Replacement

O que você precisa

  1. Bush Pump Foot Valve Replacement, Head and Handle: passo 1, imagem 1 %32 Bush Pump Foot Valve Replacement, Head and Handle: passo 1, imagem 2 %32
    • Test pump performance by pumping 40 strokes.

    • An effective pump should return at least 10 liters.

  2. Bush Pump Foot Valve Replacement: passo 2, imagem 1 %32 Bush Pump Foot Valve Replacement: passo 2, imagem 2 %32
    • Remove the two pins connecting the handle to the slider.

  3. Bush Pump Foot Valve Replacement: passo 3, imagem 1 %32 Bush Pump Foot Valve Replacement: passo 3, imagem 2 %32
    • Pull the two lever arms away from the slider.

  4. Bush Pump Foot Valve Replacement: passo 4, imagem 1 %32 Bush Pump Foot Valve Replacement: passo 4, imagem 2 %32
    • Lift the two pins attaching the pump frame to the head and handle up, off of the pump frame.

  5. Bush Pump Foot Valve Replacement: passo 5, imagem 1 %32 Bush Pump Foot Valve Replacement: passo 5, imagem 2 %32 Bush Pump Foot Valve Replacement: passo 5, imagem 3 %32
    • Throughout this step, make sure you support the handle and head with at least three hands.

    • Slide the bearing rod out of the head.

    • Inspect the bearing rod and head for any wear or tear.

  6. Bush Pump Foot Valve Replacement: passo 6, imagem 1 %32
    • Remove the head and handle, and place them on a clean surface to prevent contamination.

  7. Bush Pump Foot Valve Replacement, Riser Main Slider: passo 7, imagem 1 %32 Bush Pump Foot Valve Replacement, Riser Main Slider: passo 7, imagem 2 %32
    • Firmly lift the riser main slider with two hands.

    • Use caution not to drop the riser main, as this can damage the pump cylinder.

  8. Bush Pump Foot Valve Replacement: passo 8, imagem 1 %32 Bush Pump Foot Valve Replacement: passo 8, imagem 2 %32 Bush Pump Foot Valve Replacement: passo 8, imagem 3 %32
    • Use a pipe wrench to fully loosen the above grade riser pipe.

  9. Bush Pump Foot Valve Replacement: passo 9, imagem 1 %32 Bush Pump Foot Valve Replacement: passo 9, imagem 2 %32 Bush Pump Foot Valve Replacement: passo 9, imagem 3 %32
    • Lift the slider and riser main pipe.

    • Place a pump rod clamp around the rod, and tighten it securely against the pump rod.

    • Carefully lower the riser main and slider to allow it to rest on the rod clamp.

  10. Bush Pump Foot Valve Replacement: passo 10, imagem 1 %32 Bush Pump Foot Valve Replacement: passo 10, imagem 2 %32 Bush Pump Foot Valve Replacement: passo 10, imagem 3 %32
    • Loosen and remove both the pump rod jam nut and pump rod nut on the top of the slider.

  11. Bush Pump Foot Valve Replacement: passo 11, imagem 1 %32 Bush Pump Foot Valve Replacement: passo 11, imagem 2 %32
    • Remove the riser main slider, and inspect it for wear and tear.

    • Set the slider in a sanitary place to prevent contamination.

  12. Bush Pump Foot Valve Replacement, Above Grade Riser Pipe: passo 12, imagem 1 %32 Bush Pump Foot Valve Replacement, Above Grade Riser Pipe: passo 12, imagem 2 %32 Bush Pump Foot Valve Replacement, Above Grade Riser Pipe: passo 12, imagem 3 %32
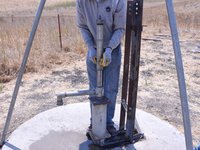
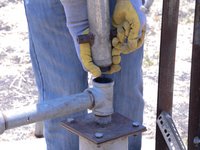
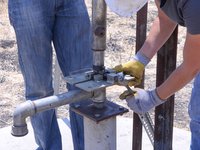
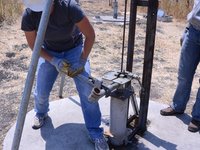
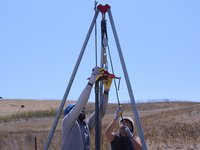
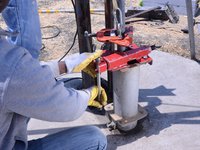
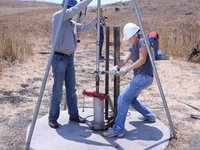
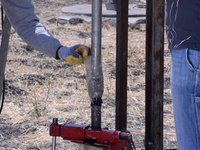
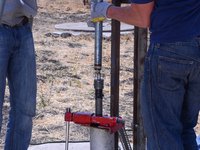
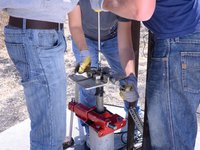
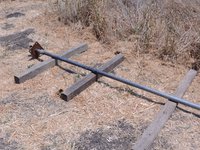
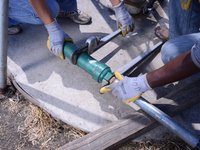
    • Remove the above grade riser pipe.

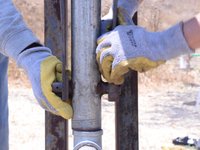
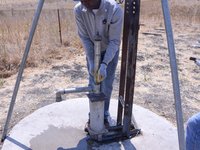
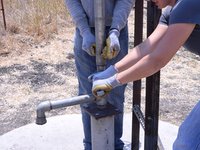
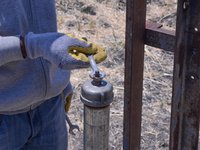
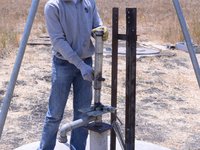
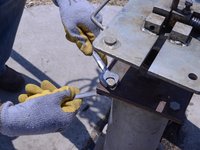
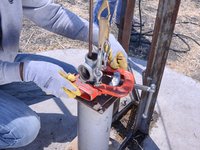
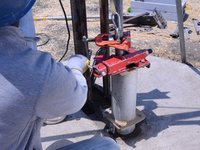
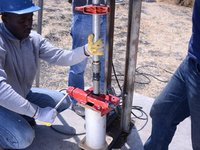
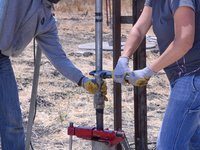
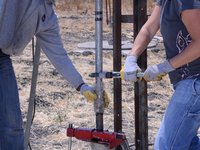
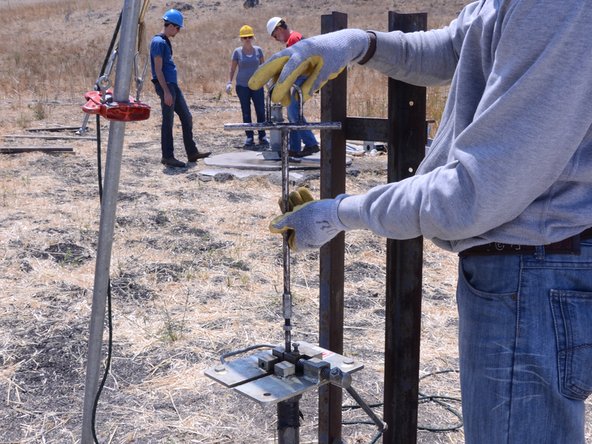
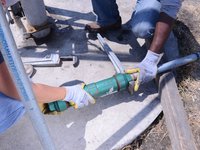
    • Firmly screw a T-handle onto the pump rod.

    • If you are replacing the above ground riser main, leave the T-handle attached until you are ready to install the replacement part.

  13. Bush Pump Foot Valve Replacement, Spout: passo 13, imagem 1 %32 Bush Pump Foot Valve Replacement, Spout: passo 13, imagem 2 %32 Bush Pump Foot Valve Replacement, Spout: passo 13, imagem 3 %32
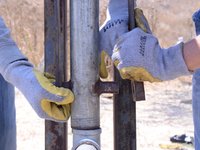
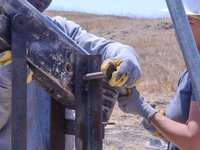
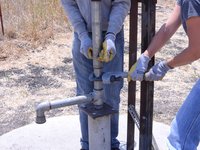
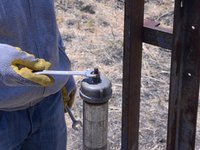
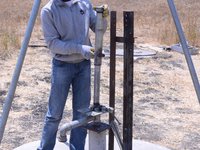
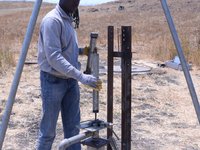
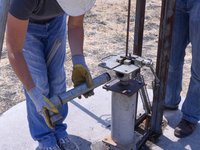
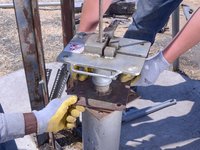
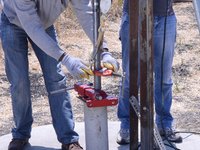
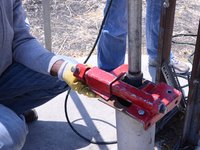
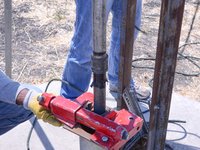
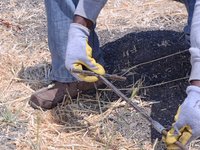
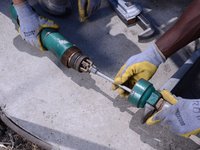
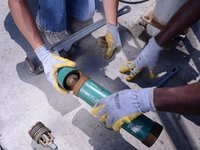
    • Use a pipe wrench to loosen and remove the pump spout.

    • Inspect the spout for obstructions or potential contaminants.

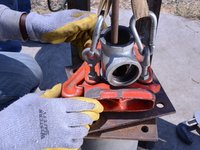
    • Place the spout on a clean surface to prevent any contamination.

  14. Bush Pump Foot Valve Replacement, Riser Main: passo 14, imagem 1 %32 Bush Pump Foot Valve Replacement, Riser Main: passo 14, imagem 2 %32 Bush Pump Foot Valve Replacement, Riser Main: passo 14, imagem 3 %32
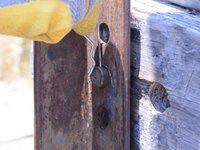
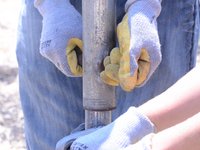
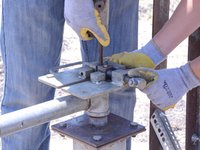
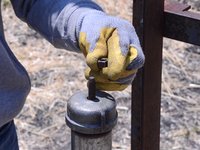
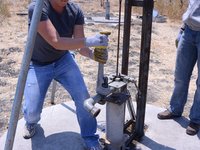
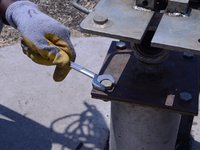
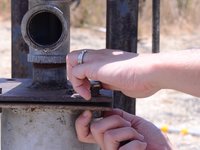
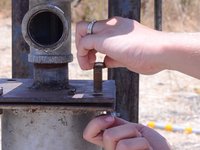
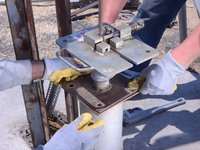
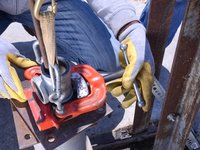
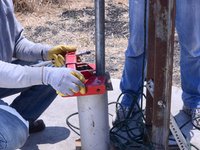
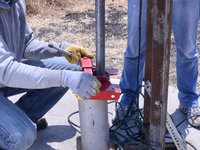
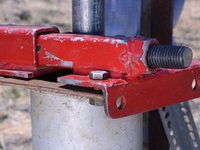
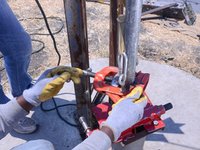
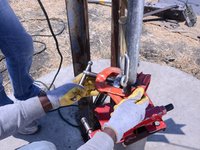
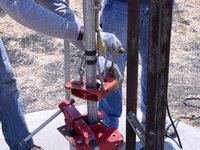
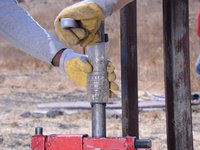
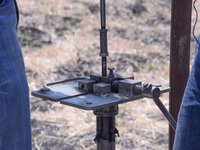
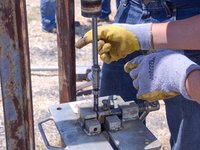
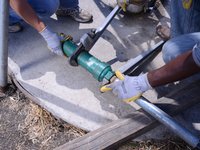
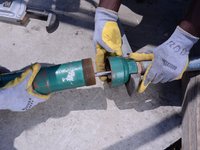
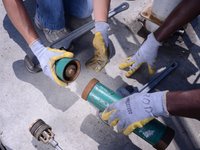
    • Place one wrench on the top of one of the pump riser plate bolts.

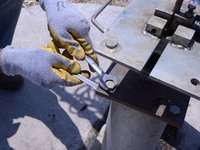
    • Place another wrench around the bottom of the bolt.

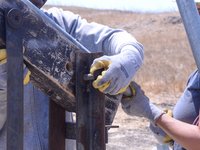
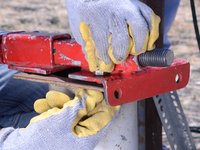
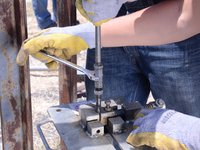
    • Pull the wrenches apart to loosen the bolt.

    • Repeat this procedure for the remaining three bolts.

  15. Bush Pump Foot Valve Replacement: passo 15, imagem 1 %32 Bush Pump Foot Valve Replacement: passo 15, imagem 2 %32
    • Remove the four nuts and bolts securing the pump riser plate, and store them in a sanitary container such as a bucket.

  16. Bush Pump Foot Valve Replacement: passo 16, imagem 1 %32 Bush Pump Foot Valve Replacement: passo 16, imagem 2 %32
    • Rotate the pump plate 45 degrees. This will allow for a better grasp when lifting the plate.

  17. Bush Pump Foot Valve Replacement: passo 17, imagem 1 %32 Bush Pump Foot Valve Replacement: passo 17, imagem 2 %32 Bush Pump Foot Valve Replacement: passo 17, imagem 3 %32
    • Securely lift the T-handle several inches.

    • While 2 people support the T-handle, remove the pump rod clamp.

    • Lower the T-handle gently until the pump rod is supporting itself.

  18. Bush Pump Foot Valve Replacement: passo 18, imagem 1 %32 Bush Pump Foot Valve Replacement: passo 18, imagem 2 %32 Bush Pump Foot Valve Replacement: passo 18, imagem 3 %32
    • This particular pump is using a tripod with a block and tackle to lift the riser main. C-wrenches may also be used to lift the riser main.

    • Securely clamp and tighten the pipe elevator to the riser main below the spout exit.

  19. Bush Pump Foot Valve Replacement: passo 19, imagem 1 %32 Bush Pump Foot Valve Replacement: passo 19, imagem 2 %32
    • Being careful not to let the rope slip, use the block and tackle to lift the riser main until the pipe elevator reaches the block and tackle.

  20. Bush Pump Foot Valve Replacement: passo 20, imagem 1 %32 Bush Pump Foot Valve Replacement: passo 20, imagem 2 %32 Bush Pump Foot Valve Replacement: passo 20, imagem 3 %32
    • Once the riser main has reached the block and tackle, tighten the base clamp against the riser main.

  21. Bush Pump Foot Valve Replacement: passo 21, imagem 1 %32 Bush Pump Foot Valve Replacement: passo 21, imagem 2 %32 Bush Pump Foot Valve Replacement: passo 21, imagem 3 %32
    • Secure the base clamp to the frame base using a bolt.

    • One bolt is typically sufficient to keep the base clamp in place, but you can add another bolt if you wish to further secure it.

  22. Bush Pump Foot Valve Replacement: passo 22, imagem 1 %32 Bush Pump Foot Valve Replacement: passo 22, imagem 2 %32 Bush Pump Foot Valve Replacement: passo 22, imagem 3 %32
    • While supporting the top portion of the pipe, carefully move the elevator clamp off of the pipe.

    • Lower the elevator clamp while providing tension towards the ground to prevent the ropes from tangling in the block and tackle.

  23. Bush Pump Foot Valve Replacement: passo 23, imagem 1 %32 Bush Pump Foot Valve Replacement: passo 23, imagem 2 %32 Bush Pump Foot Valve Replacement: passo 23, imagem 3 %32
    • Attach and tighten the elevator clamp to the riser main as close to the bottom as possible.

  24. Bush Pump Foot Valve Replacement: passo 24, imagem 1 %32 Bush Pump Foot Valve Replacement: passo 24, imagem 2 %32
    • Once the elevator clamp is tight, provide tension on the rope.

    • While keeping tension on the rope to support the riser, loosen the base clamp.

  25. Bush Pump Foot Valve Replacement: passo 25, imagem 1 %32 Bush Pump Foot Valve Replacement: passo 25, imagem 2 %32 Bush Pump Foot Valve Replacement: passo 25, imagem 3 %32
    • Use the rope to pull the riser main up as far as comfortable.

    • Be sure to keep the rope within the confines of the tripod to prevent the tripod from pulling over.

    • Watch the top of the tripod to align the riser main in the support slot.

  26. Bush Pump Foot Valve Replacement: passo 26, imagem 1 %32 Bush Pump Foot Valve Replacement: passo 26, imagem 2 %32 Bush Pump Foot Valve Replacement: passo 26, imagem 3 %32
    • Remove the clamp from the riser main, and repeat steps 23-25 until first joint is exposed.

  27. Bush Pump Foot Valve Replacement: passo 27, imagem 1 %32 Bush Pump Foot Valve Replacement: passo 27, imagem 2 %32 Bush Pump Foot Valve Replacement: passo 27, imagem 3 %32
    • Once the first joint is exposed, tighten the base clamp below the joint.

  28. Bush Pump Foot Valve Replacement: passo 28, imagem 1 %32
    • Remove the elevator clamp from the riser main, and secure it to the tripod to keep it out of the way.

  29. Bush Pump Foot Valve Replacement: passo 29, imagem 1 %32 Bush Pump Foot Valve Replacement: passo 29, imagem 2 %32
    • Keep the pipe wrench a few inches above the joint in this step.

    • Using a pipe wrench, unscrew the first section of the riser main from the connection.

  30. Bush Pump Foot Valve Replacement: passo 30, imagem 1 %32 Bush Pump Foot Valve Replacement: passo 30, imagem 2 %32 Bush Pump Foot Valve Replacement: passo 30, imagem 3 %32
    • Secure a splash guard over the joint to prevent water from spraying out of the connection when separated.

    • Using the pipe wrench, loosen the riser main until water begins to spray into the splash guard.

    • Do not loosen it any further until the water has stopped spraying.

  31. Bush Pump Foot Valve Replacement: passo 31, imagem 1 %32 Bush Pump Foot Valve Replacement: passo 31, imagem 2 %32 Bush Pump Foot Valve Replacement: passo 31, imagem 3 %32
    • Remove the splash guard, and finish loosening the riser main.

    • Remove the first section of the riser main by lifting it straight up, while supporting the top of the section and keeping the pipe within the support slot on the top of the tripod.

  32. Bush Pump Foot Valve Replacement: passo 32, imagem 1 %32 Bush Pump Foot Valve Replacement: passo 32, imagem 2 %32 Bush Pump Foot Valve Replacement: passo 32, imagem 3 %32
    • Attach and tighten the rod clamp a few inches below the first pump rod connection.

  33. Bush Pump Foot Valve Replacement: passo 33, imagem 1 %32 Bush Pump Foot Valve Replacement: passo 33, imagem 2 %32 Bush Pump Foot Valve Replacement: passo 33, imagem 3 %32
    • Using two crescent wrenches, unscrew the pump rod from the remaining portion.

    • When the joint is separated, carefully lower the riser main to the ground.

  34. Bush Pump Foot Valve Replacement: passo 34, imagem 1 %32 Bush Pump Foot Valve Replacement: passo 34, imagem 2 %32 Bush Pump Foot Valve Replacement: passo 34, imagem 3 %32
    • Carefully lower the riser main, horizontally, and place it in a sanitary place, preferably resting above the ground, to prevent contamination.

  35. Bush Pump Foot Valve Replacement: passo 35, imagem 1 %32 Bush Pump Foot Valve Replacement: passo 35, imagem 2 %32 Bush Pump Foot Valve Replacement: passo 35, imagem 3 %32
    • Remove the T-handle from the separated pump rod.

    • Attach the T-handle to the remaining pump rod.

    • Remove the rod clamp and repeat steps 29-35 until the riser main is completely removed, or until the broken section is reached.

  36. Bush Pump Foot Valve Replacement, Cylinder: passo 36, imagem 1 %32
    • Make sure to keep the cylinder off the ground to prevent contamination.

  37. Bush Pump Foot Valve Replacement: passo 37, imagem 1 %32 Bush Pump Foot Valve Replacement: passo 37, imagem 2 %32 Bush Pump Foot Valve Replacement: passo 37, imagem 3 %32
    • Using two pipe wrenches, unscrew the cylinder from the riser main.

  38. Bush Pump Foot Valve Replacement: passo 38, imagem 1 %32 Bush Pump Foot Valve Replacement: passo 38, imagem 2 %32
    • Slowly pull the cylinder off of the pump rod, exposing the traveling valve and foot valve.

  39. Bush Pump Foot Valve Replacement, Foot Valve: passo 39, imagem 1 %32 Bush Pump Foot Valve Replacement, Foot Valve: passo 39, imagem 2 %32 Bush Pump Foot Valve Replacement, Foot Valve: passo 39, imagem 3 %32
    • Using two pipe wrenches, remove the end cap from the cylinder.

  40. Bush Pump Foot Valve Replacement: passo 40, imagem 1 %32 Bush Pump Foot Valve Replacement: passo 40, imagem 2 %32
    • Remove the foot valve from the end cap.

    • Take note of the direction of the foot valve in the end cap. This is extremely important for reassembly, as the pump will not work if the valve is facing the wrong direction.

  41. Bush Pump Foot Valve Replacement: passo 41, imagem 1 %32 Bush Pump Foot Valve Replacement: passo 41, imagem 2 %32
    • Check the foot valve components for signs of wear.

Conclusão

To reassemble your device, follow these instructions in reverse order.

Jake Devincenzi

Membro desde: 04/18/11

117.225 Reputação

Autoria de 57 guias

0 comentários

Adicione um comentário

Exibir estatísticas:

Últimas 24 horas: 0

Últimos 7 dias: 1

Últimos 30 dias: 8

Duração total: 530