Esta versão pode conter edições incorretas. Mude para o último instantâneo verificado.
O que você precisa
-
Este passo não foi traduzido. Ajude a traduzi-lo
-
Using a Spanner 4.0 screwdriver, unscrew the 1.5mm screw from the exterior of the hairdryer.
-
-
Este passo não foi traduzido. Ajude a traduzi-lo
-
Begin at the cord end of the product. Gently pry the two halves of the external casing open with the help of a Jimmy and push the front cap up and away from the external casing. The snap-fit should come loose.
-
After opening the first snap-fit, remove the gray cord protector by slightly pulling it backwards while keeping the gap open with your other hand.
-
Slide the cord protector down the electrical cord and out of the way.
-
-
Este passo não foi traduzido. Ajude a traduzi-lo
-
Continue loosening the front cap from the external casing using the Jimmy. The snap-fits tend to snap back in place, so to prevent that use opening picks to keep the separated halves from snapping back closed.
-
Work your way around the product, opening one snap-fit at a time.
-
-
Este passo não foi traduzido. Ajude a traduzi-lo
-
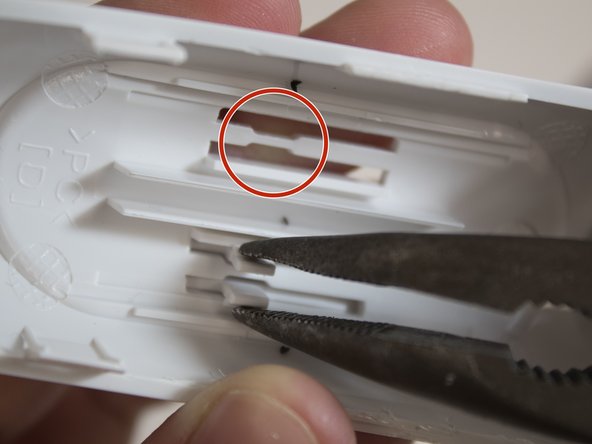
Places where the snap-fits are located. Those are the most important points for opening it.
-
-
-
Este passo não foi traduzido. Ajude a traduzi-lo
-
After opening the last snap-fit of the front cap, it comes loose from the external case halves. Slide the front cap off the external casing and put it aside.
-
-
Este passo não foi traduzido. Ajude a traduzi-lo
-
Using the same driver as before, remove the 1.5mm Spanner 4.0 screw that becomes accessible after removal of the front cap.
-
-
Este passo não foi traduzido. Ajude a traduzi-lo
-
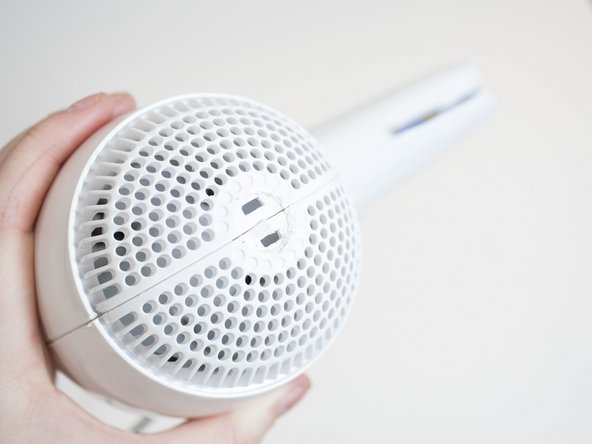
At the back of the product, the two halves of the case are connected with a snap-fit cap. Loosen this cap by putting a screwdriver or other opening tool under the cap using it as a lever.
-
-
Este passo não foi traduzido. Ajude a traduzi-lo
-
Using the same tools and methods as before, pry the two external halves open the rest of the way.
-
-
Este passo não foi traduzido. Ajude a traduzi-lo
-
Unscrew the third and last 1.5mm spanner 4.0 screw keeping the fan down, using the same spanner driver again.
-
Unscrew the 1.3mm Phillips #2 screw holding the circuit board down, using a Phillips #2 screwdriver or bit.
-
Slide out the inner components as a whole.
-
-
Este passo não foi traduzido. Ajude a traduzi-lo
-
Separate the black inner casing from the other parts by removing the three 1.4mm Phillips #1 screws with a Phillips #1 screwdriver or bit and sliding it off.
-
-
Este passo não foi traduzido. Ajude a traduzi-lo
-
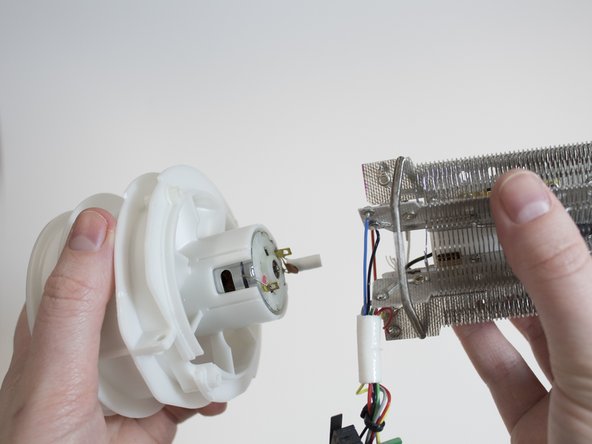
Pull apart the fan from the heating element and the circuit board.
-


Cancelar: não concluí este guia.
8 outras pessoas executaram este guia.
Equipe

Delft University of Technology, Team S2-G6, Flipsen Winter 2018 Membro de Delft University of Technology, Team S2-G6, Flipsen Winter 2018
TUD-FLIPSEN-W18S2G6
Membros da 5
Autoria de 2 guias
8 comentários
Thanks a lot. It’s hard to disassemble without cosmetic damage(
Thanks a lot for the great description. I succeeded in repairing my hairdryer. The fan stopped spinning at the highest speed due to hairs caught in it. I removed them. Btw. I used tools for reparing a mobile phone which were very useful. I will add some pictures where I put crosses on the casing just to get an idea where the snap-fit caps are located. It helps to concentrate on these areas. I also succeeded in not breaking the snap-fit cap : )