Ir para o conteúdo principal

BlackBerry World Edition 8830 Motherboard Replacement

O que você precisa

  1. BlackBerry World Edition 8830 Motherboard Replacement, Battery: passo 1, imagem 1 %32 BlackBerry World Edition 8830 Motherboard Replacement, Battery: passo 1, imagem 2 %32 BlackBerry World Edition 8830 Motherboard Replacement, Battery: passo 1, imagem 3 %32
    • Before beginning this installation, make sure phone is powered off .

    • Turn phone over to the backside.

    • Press down on the lower portion of the back cover.

    • Slide the lower portion down to remove the cover and reveal the battery.

  2. BlackBerry World Edition 8830 Motherboard Replacement: passo 2, imagem 1 %32
    • Remove the battery from the phone.

  3. BlackBerry World Edition 8830 Motherboard Replacement, Front and Back Casing: passo 3, imagem 1 %32 BlackBerry World Edition 8830 Motherboard Replacement, Front and Back Casing: passo 3, imagem 2 %32
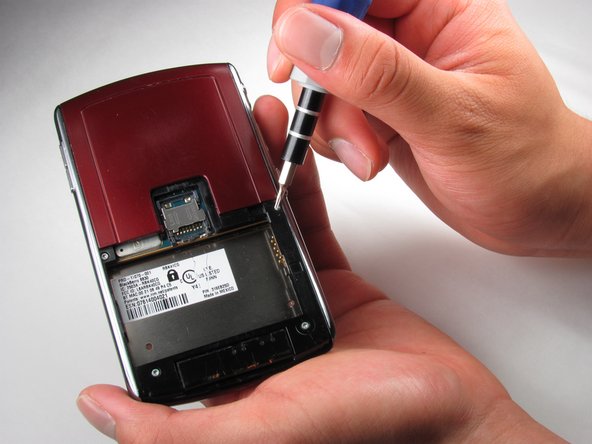
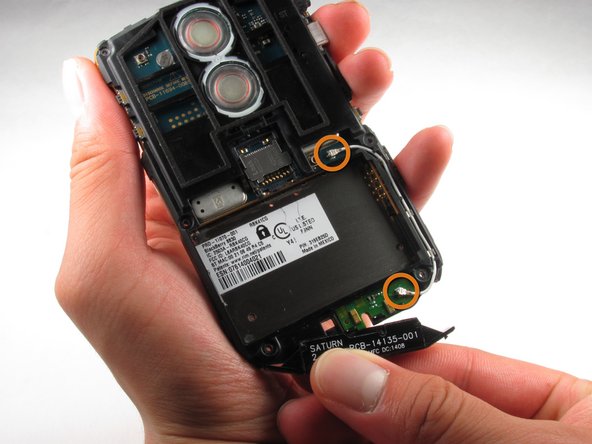
    • Once the battery is removed, remove the four 9.2 mm screws with the T4 Torx Screwdriver.

  4. BlackBerry World Edition 8830 Motherboard Replacement: passo 4, imagem 1 %32 BlackBerry World Edition 8830 Motherboard Replacement: passo 4, imagem 2 %32 BlackBerry World Edition 8830 Motherboard Replacement: passo 4, imagem 3 %32
    • Remove side panels with the Plastic Opening Tool by sliding it along the edge of the panel until you can pry it off with the tool.

  5. BlackBerry World Edition 8830 Motherboard Replacement: passo 5, imagem 1 %32 BlackBerry World Edition 8830 Motherboard Replacement: passo 5, imagem 2 %32
    • Remove the back casing using the Plastic Opening Tool

    • Once the back casing is removed the top two buttons are likely to pop out.

  6. BlackBerry World Edition 8830 Motherboard Replacement: passo 6, imagem 1 %32 BlackBerry World Edition 8830 Motherboard Replacement: passo 6, imagem 2 %32 BlackBerry World Edition 8830 Motherboard Replacement: passo 6, imagem 3 %32
    • Locate the two 9.2mm screws on the upper inside casing

    • Remove them using the T4 Torx Screwdriver

    • Slide off the front casing once the screws are removed.

    • Trackball will fall out once the casing is removed.

  7. BlackBerry World Edition 8830 Motherboard Replacement, LCD Screen: passo 7, imagem 1 %32 BlackBerry World Edition 8830 Motherboard Replacement, LCD Screen: passo 7, imagem 2 %32 BlackBerry World Edition 8830 Motherboard Replacement, LCD Screen: passo 7, imagem 3 %32
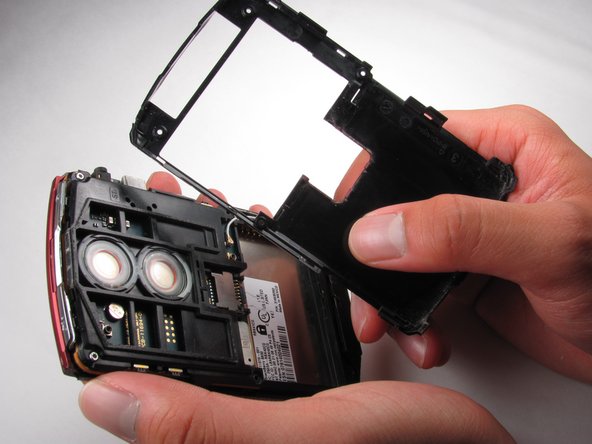
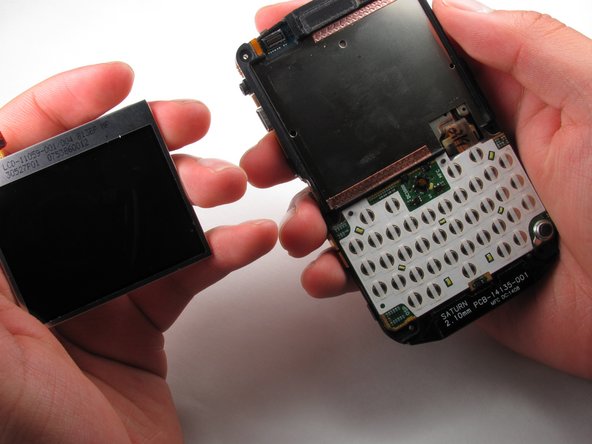
    • Disconnect the tab attached to the interior casing from the LCD Screen by gently pulling the tab up and away from the phone.

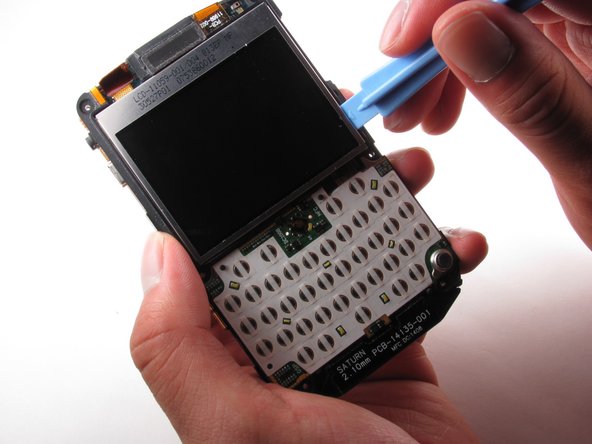
    • Use the Plastic Opening Tool to pry the LCD Screen out.

  8. BlackBerry World Edition 8830 Motherboard Replacement, Motherboard: passo 8, imagem 1 %32 BlackBerry World Edition 8830 Motherboard Replacement, Motherboard: passo 8, imagem 2 %32 BlackBerry World Edition 8830 Motherboard Replacement, Motherboard: passo 8, imagem 3 %32
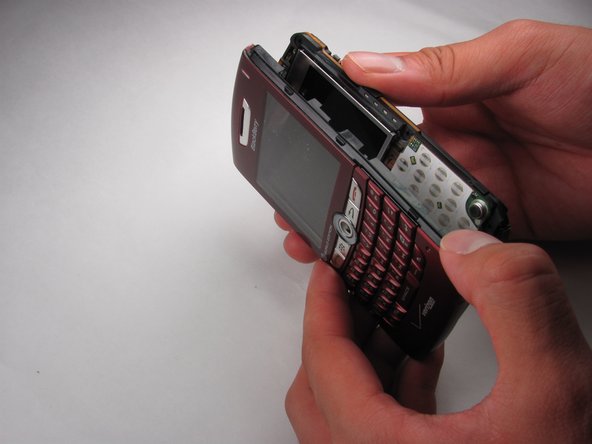
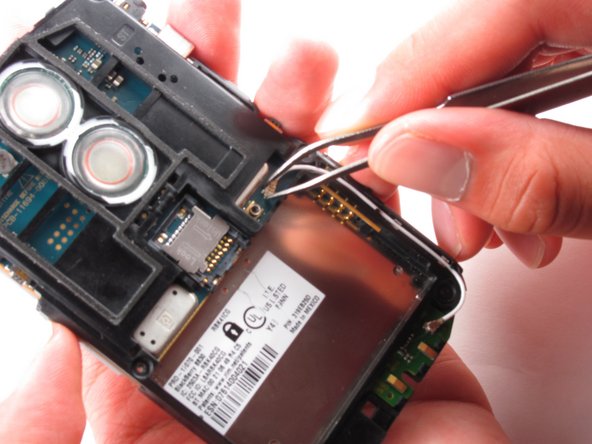
    • Grab and remove the middle bar located on the bottom of the phone.

    • Once the bar is removed, a small wire will be revealed. Remove the wire using your tweezers.

    • There are two places that wire is clipped in. To disconnect the wire, gently pull up on the wire until it pops off of the connector.

  9. BlackBerry World Edition 8830 Motherboard Replacement: passo 9, imagem 1 %32 BlackBerry World Edition 8830 Motherboard Replacement: passo 9, imagem 2 %32 BlackBerry World Edition 8830 Motherboard Replacement: passo 9, imagem 3 %32
    • Once the wire is removed, locate the six clips located along the phones edges. There are two on each side, and two on the top.

    • Carefully unhook the clips by hand or with the plastic opening tool to allow the back cover to come off.

  10. BlackBerry World Edition 8830 Motherboard Replacement: passo 10, imagem 1 %32 BlackBerry World Edition 8830 Motherboard Replacement: passo 10, imagem 2 %32
    • With the motherboard revealed, slowly lift it off of the casing.

Conclusão

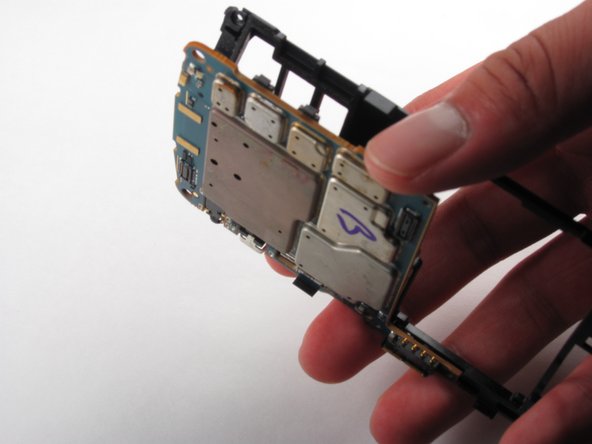
To reassemble your device, follow these instructions in reverse order.

3 outras pessoas executaram este guia.

Equipe

Cal Poly, Team 17-27, Amido Spring 2012 Membro de Cal Poly, Team 17-27, Amido Spring 2012

CPSU-AMIDO-S12S17G27

Membros da 4

Autoria de 8 guias

0 comentários

Adicione um comentário

Exibir estatísticas:

Últimas 24 horas: 0

Últimos 7 dias: 0

Últimos 30 dias: 0

Duração total: 1,576