Ir para o conteúdo principal

Black and Decker BDEDMT Motor Replacement

O que você precisa

  1. Black and Decker BDEDMT Motor Replacement, Detach Matrix Attachment: passo 1, imagem 1 %32 Black and Decker BDEDMT Motor Replacement, Detach Matrix Attachment: passo 1, imagem 2 %32
    • Remember to disconnect the device from all external power sources.

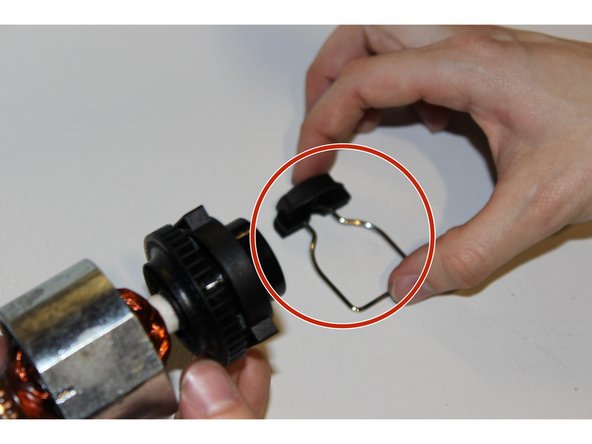
    • To detach the matrix attachment piece, press down on the attachment release button located at the top of the device.

    • Leaving your finger pressed down on the button, simply pull on the attachment to release it.

  2. Black and Decker BDEDMT Motor Replacement, Remove Mounting Hardware: passo 2, imagem 1 %32 Black and Decker BDEDMT Motor Replacement, Remove Mounting Hardware: passo 2, imagem 2 %32 Black and Decker BDEDMT Motor Replacement, Remove Mounting Hardware: passo 2, imagem 3 %32
    • Using a JIS 1 screwdriver, unscrew seven 19mm outer screws located on the armature.

    • Using the same screwdriver, unscrew the 12mm outer screw located on the armature.

  3. Black and Decker BDEDMT Motor Replacement, Motor: passo 3, imagem 1 %32
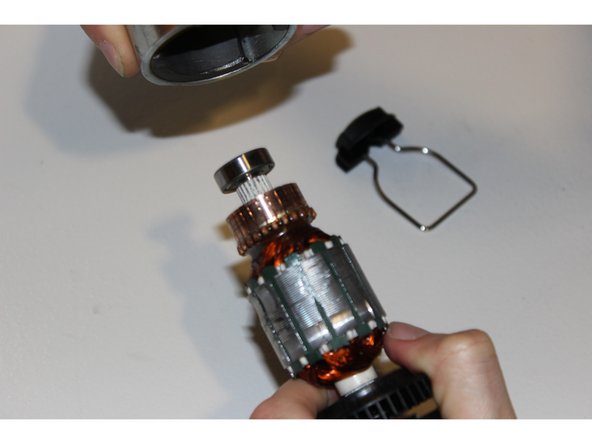
    • Gently pull up the motor and other components at the top of the device except the handle.

    • Watch out for the wires. They are connected to two compressed magnets in the black framework.

  4. Black and Decker BDEDMT Motor Replacement: passo 4, imagem 1 %32 Black and Decker BDEDMT Motor Replacement: passo 4, imagem 2 %32
    • Slide off the the black framework on the barring side.

    • You may have to compress the magnets in order to slide the framework off of the barring.

  5. Black and Decker BDEDMT Motor Replacement: passo 5, imagem 1 %32 Black and Decker BDEDMT Motor Replacement: passo 5, imagem 2 %32
    • Remove the release button attached at the front of the motor.

    • It may have already come off during Step 3.

  6. Black and Decker BDEDMT Motor Replacement: passo 6, imagem 1 %32 Black and Decker BDEDMT Motor Replacement: passo 6, imagem 2 %32
    • Work the silver magnetic ring off of the motor through the barring end.

    • The motor is now free.

Conclusão

To reassemble your device, follow these instructions in reverse order.

Uma outra pessoa concluiu este guia.

Tyler Yurina

Membro desde: 02/01/16

419 Reputação

Autoria de 2 guias

Equipe

UW Tacoma, Team 1-2, Rose Winter 2016 Membro de UW Tacoma, Team 1-2, Rose Winter 2016

UWT-ROSE-W16S1G2

Membros da 4

Autoria de 11 guias

3 comentários

Hi,

Please can you tell me where to find the motor replacement part for this tool?

Thank you

Renato - Responder

I have this tool and the attachments and I absolutely love it…but I'm pretty sure the gears are stripped…do you know anything about replacing those?

cwilson0713@gmail.com - Responder

Adicione um comentário

Exibir estatísticas:

Últimas 24 horas: 2

Últimos 7 dias: 7

Últimos 30 dias: 34

Duração total: 2,545