Ir para o conteúdo principal

Bissell Pet Hair Eraser Power Button Replacement

O que você precisa

  1. Bissell Pet Hair Eraser Power Button Replacement, Dirt Cup: passo 1, imagem 1 %32 Bissell Pet Hair Eraser Power Button Replacement, Dirt Cup: passo 1, imagem 2 %32
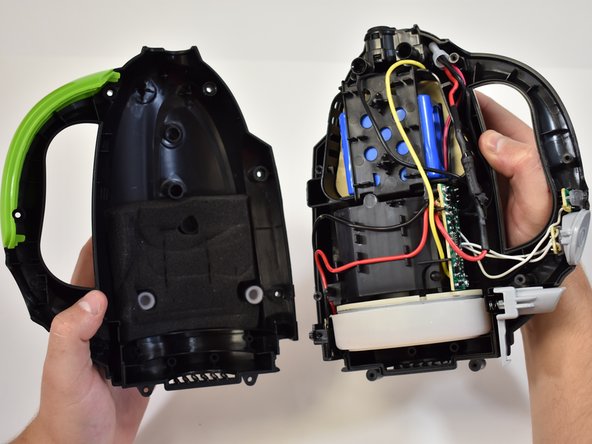
    • Firmly grasp the handle and press the release button.

    • Gently pull the dirt cup down and away from the vacuum body.

  2. Bissell Pet Hair Eraser Power Button Replacement, Power Button: passo 2, imagem 1 %32 Bissell Pet Hair Eraser Power Button Replacement, Power Button: passo 2, imagem 2 %32
    • Remove the six 1.2 mm Philips #2 screws from the handle and base.

  3. Bissell Pet Hair Eraser Power Button Replacement: passo 3, imagem 1 %32 Bissell Pet Hair Eraser Power Button Replacement: passo 3, imagem 2 %32
    • Grasp each half of the body and gently pull apart.

    • The green handle, power button, charge light lens, and dirt cup release are not fastened in place.

    • Once the case is split apart these items may come dislodged.

  4. Bissell Pet Hair Eraser Power Button Replacement: passo 4, imagem 1 %32 Bissell Pet Hair Eraser Power Button Replacement: passo 4, imagem 2 %32 Bissell Pet Hair Eraser Power Button Replacement: passo 4, imagem 3 %32
    • The power button can be removed by gently lifting it off the circuitry.

Conclusão

To reassemble your device, follow these instructions in reverse order.

Uma outra pessoa concluiu este guia.

0 comentários

Adicione um comentário

Exibir estatísticas:

Últimas 24 horas: 0

Últimos 7 dias: 2

Últimos 30 dias: 11

Duração total: 675