Ir para o conteúdo principal

Este guia tem alterações mais recentes. Mudar para a última versão não verificada.

Behringer BCD3000 Disassembly

O que você precisa

  1. Behringer BCD3000 Disassembly, Behringer BCD3000 Disassembly: passo 1, imagem 1 %32
    • Unplug from all cables

  2. Behringer BCD3000 Disassembly, opening the sides: passo 2, imagem 1 %32 Behringer BCD3000 Disassembly, opening the sides: passo 2, imagem 2 %32
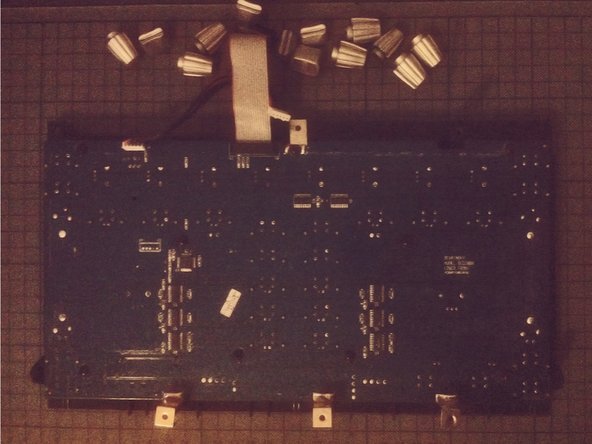
    • unscrew two Phillips screws on each side of the BCD3000

    • If the screws sit too tight, you can use the extension for better torque

  3. Behringer BCD3000 Disassembly, loosening the top part: passo 3, imagem 1 %32 Behringer BCD3000 Disassembly, loosening the top part: passo 3, imagem 2 %32
    • unscrew another two Phillips screws on each side

  4. Behringer BCD3000 Disassembly: passo 4, imagem 1 %32 Behringer BCD3000 Disassembly: passo 4, imagem 2 %32 Behringer BCD3000 Disassembly: passo 4, imagem 3 %32
    • Lift the upper control part.

    • Be careful, there are still some cables connected to the lower section.

    • Disconnect the cables by walking them out of their sockets.

  5. Behringer BCD3000 Disassembly: passo 5, imagem 1 %32
    • Remove the upper part completely.

  6. Behringer BCD3000 Disassembly: passo 6, imagem 1 %32
    • Disconnect the two cables from the lower section to the connector board.

  7. Behringer BCD3000 Disassembly: passo 7, imagem 1 %32 Behringer BCD3000 Disassembly: passo 7, imagem 2 %32 Behringer BCD3000 Disassembly: passo 7, imagem 3 %32
    • Slide the lower section to the front.

    • Now you can lift it and take it aside.

  8. Behringer BCD3000 Disassembly: passo 8, imagem 1 %32 Behringer BCD3000 Disassembly: passo 8, imagem 2 %32 Behringer BCD3000 Disassembly: passo 8, imagem 3 %32
    • Disconnect the separate boards.

    • Now you can take the modules out by unscrewing them from the case.

  9. Behringer BCD3000 Disassembly: passo 9, imagem 1 %32 Behringer BCD3000 Disassembly: passo 9, imagem 2 %32
    • The jog wheels on the front panel can be taken off by using a spudger and levering them out.

  10. Behringer BCD3000 Disassembly: passo 10, imagem 1 %32 Behringer BCD3000 Disassembly: passo 10, imagem 2 %32
    • The knobs can easy be removed just by pulling.

  11. Behringer BCD3000 Disassembly: passo 11, imagem 1 %32 Behringer BCD3000 Disassembly: passo 11, imagem 2 %32 Behringer BCD3000 Disassembly: passo 11, imagem 3 %32
    • Same goes for the knobs on the top section of the front panel.

Conclusão

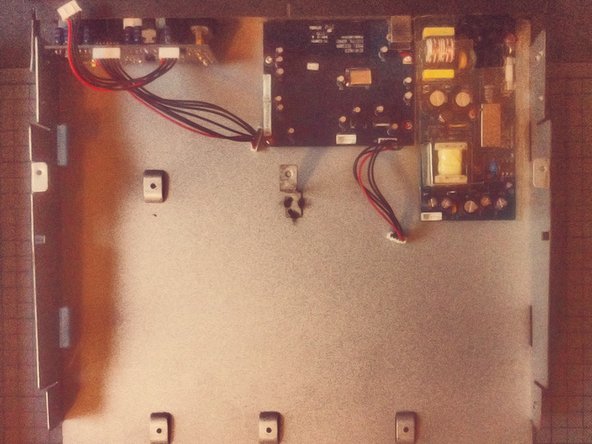
To reassemble your device, follow these instructions in reverse order.

4 outras pessoas executaram este guia.

Tobias Isakeit

Membro desde: 03/31/14

117.296 Reputação

Autoria de 188 guias

Equipe

Master Techs Membro de Master Techs

Community

Membros da 322

Autoria de 2.521 guias

2 comentários

Pensaba que serviría para la BCD2000… pero es algo distinta.

Antonio - Responder

great stuff, with better quality pictures would be better

csipapicsa - Responder

Adicione um comentário

Exibir estatísticas:

Últimas 24 horas: 1

Últimos 7 dias: 8

Últimos 30 dias: 25

Duração total: 2,358