Esta versão pode conter edições incorretas. Mude para o último instantâneo verificado.
O que você precisa
-
Este passo não foi traduzido. Ajude a traduzi-lo
-
Using the T5 Torx screwdriver, remove the black screws on both sides of the outside of the headband.
-
4 (2 per side) Torx type T5, 3.5mm long screws.
-
-
Este passo não foi traduzido. Ajude a traduzi-lo
-
Use the plastic opening tool to gently pry the black plastic hinge piece directly away from the headband as shown.
-
-
Este passo não foi traduzido. Ajude a traduzi-lo
-
Remove the small metal hinges from their housings. There are a total of 4 hinges, two per side of the headphones.
-
-
Este passo não foi traduzido. Ajude a traduzi-lo
-
Using a T5 Torx screwdriver, remove the silver screws from the silver segment of the headband.
-
4 (2 per side) Torx type T5, 4.0mm long screws.
-
-
-
Este passo não foi traduzido. Ajude a traduzi-lo
-
Using the plastic opening tool, gently pry the headband cushion directly away from the plastic portion of the headband as shown. Pry the plastic portion a small amount and then move the opening tool sideways along on the headband. Repeat on both sides until the cushion separates from the top plastic part of the headband.
-
-
Este passo não foi traduzido. Ajude a traduzi-lo
-
Carefully remove the metal band from each of the hinge housings on each side. These should come off quite easily, provided that you have removed the hinges as instructed in step 3.
-
Congratulations, you have completely removed the headband! This will allow for ease of accessibility to the speakers should you choose to delve further into the depths of your headphones.
-
-
Este passo não foi traduzido. Ajude a traduzi-lo
-
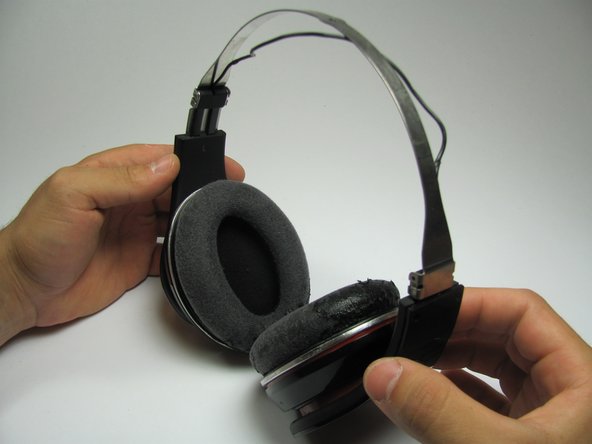
Pinch the ear cushion between your thumb and forefinger.
-
Carefully pull the cushion directly away from the earpiece.
-
Repeat for the other ear cushion.
-
-
Este passo não foi traduzido. Ajude a traduzi-lo
-
Use the plastic opening tool to remove the black ring from the speaker. This will allow you to access the screws on the metal ring.
-
Congratulations, you now have access to the rest of the speaker!
-
The black lip is located on the back side of the ear cushion.
-
-
Este passo não foi traduzido. Ajude a traduzi-lo
-
Use a 00 Phillips head scewdriver to remove the screws holding down the metal ring.
-
Set aside the metal ring.
-
7 Phillips type 00, 3.9mm long screws.
-
-
Este passo não foi traduzido. Ajude a traduzi-lo
-
Using the 0 Phillips head screwdriver, remove the 3 screws holding down the red speaker assembly.
-
3 Phillips type 0, 8.0mm long screws.
-
-
Este passo não foi traduzido. Ajude a traduzi-lo
-
Use the 00 screwdriver to remove the screw holding down the headphone jack PCB board.
-
1 Phillips type 00, 5.0mm long screw.
-
-
Este passo não foi traduzido. Ajude a traduzi-lo
-
Use a plastic opening tool to gently pry the headphone jack and board up and out as shown.
-
Inspect the wires and ensure that they are all appropriately attached and not shorted or frayed.
-
If necessary, the board can be de-soldered and replaced with a new jack and board assembly.
-


Cancelar: não concluí este guia.
13 outras pessoas executaram este guia.
Equipe

Cal Poly, Team 9-18, Regan Spring 2014 Membro de Cal Poly, Team 9-18, Regan Spring 2014
CPSU-REGAN-S14S9G18
Membros da 4
Autoria de 11 guias
11 comentários
These instructions are ridiculously over complicated! You can completely skip steps 1-6. You can also skip step 9 (no need to remove the metal ring). On my son's set the soldering job was sloppy and the wires had shorted causing the left side to stop working. I very gently lifted, separated, bent and repositioned the wires and it worked. But what you should actually do if you have ANY sense is to not buy this pile of overpriced plastic crap to begin with. My 30 yr old Sony MDR-V600's sound better, dont need batteries, and aren't falling apart.
Totally agreed. This person’s guides all show the unnecessary steps 1-6 and 9 which are definitely not needed.
Me gustaría que me proporcionarán el diagrama o como van conectados los cables ya que se me de soltaron y no se como van gracias