Ir para o conteúdo principal

Este guia tem alterações mais recentes. Mudar para a última versão não verificada.

BLU Studio 5.5 Motherboard Replacement

O que você precisa

  1. BLU Studio 5.5 Motherboard Replacement, Battery: passo 1, imagem 1 %32 BLU Studio 5.5 Motherboard Replacement, Battery: passo 1, imagem 2 %32 BLU Studio 5.5 Motherboard Replacement, Battery: passo 1, imagem 3 %32
    • Locate the notch to remove the back panel at the lower left corner of the panel.

    • Insert the plastic opening tool or a fingernail into the notch.

    • Apply force upwards until back panel becomes loosened.

  2. BLU Studio 5.5 Motherboard Replacement: passo 2, imagem 1 %32 BLU Studio 5.5 Motherboard Replacement: passo 2, imagem 2 %32
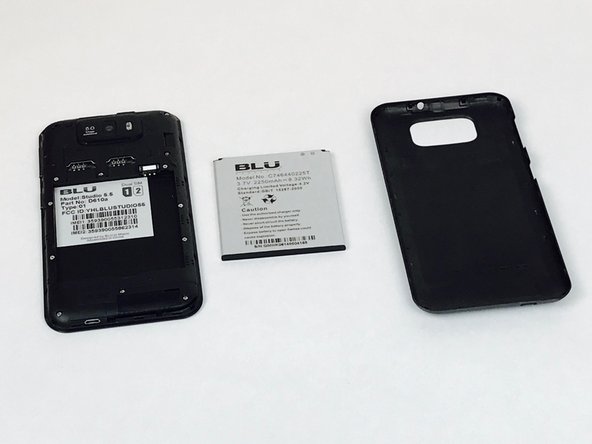
    • Remove the loosened back panel and set aside.

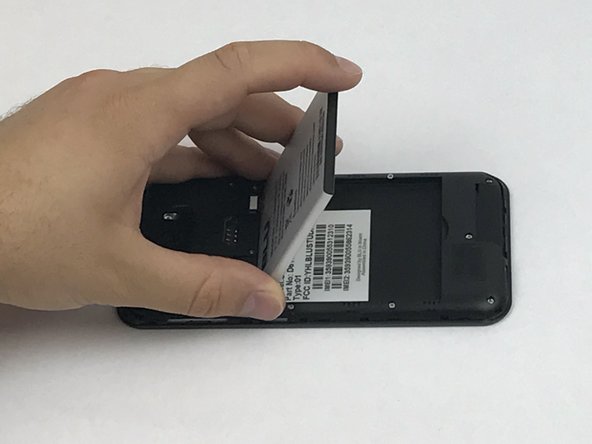
    • Locate the notch to remove the battery.

  3. BLU Studio 5.5 Motherboard Replacement: passo 3, imagem 1 %32 BLU Studio 5.5 Motherboard Replacement: passo 3, imagem 2 %32 BLU Studio 5.5 Motherboard Replacement: passo 3, imagem 3 %32
    • Insert a plastic opening tool or your fingernail into the notch and apply force upwards until the battery is loosened.

    • Remove the battery and set aside.

  4. BLU Studio 5.5 Motherboard Replacement, Back Panel Assembly: passo 4, imagem 1 %32 BLU Studio 5.5 Motherboard Replacement, Back Panel Assembly: passo 4, imagem 2 %32
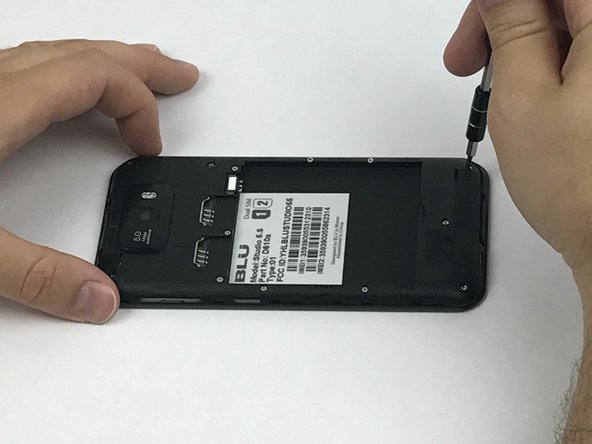
    • Locate all twelve screws along the back panel:

    • Seven 5mm screws.

    • Five 3.5mm screws.

    • Using a Phillips #000 screwdriver, remove all twelve screws.

  5. BLU Studio 5.5 Motherboard Replacement: passo 5, imagem 1 %32 BLU Studio 5.5 Motherboard Replacement: passo 5, imagem 2 %32 BLU Studio 5.5 Motherboard Replacement: passo 5, imagem 3 %32
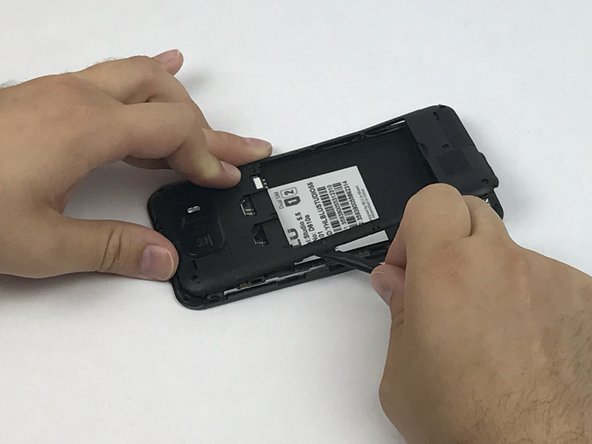
    • Now that all the screws have been removed, use a plastic opening tool to carefully pry at each of the corners until loosened.

    • Be extra careful when prying open as it may damage or snap the thin sides of the panel.

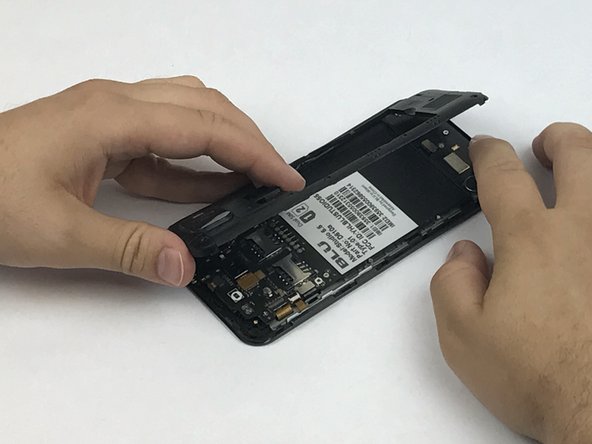
    • Place the plastic opening tool inside the loosened panel and gently push upwards and move along the phone to remove the back panel.

    • Remove the panel as if you were turning the page of a book.

  6. BLU Studio 5.5 Motherboard Replacement, Motherboard: passo 6, imagem 1 %32 BLU Studio 5.5 Motherboard Replacement, Motherboard: passo 6, imagem 2 %32 BLU Studio 5.5 Motherboard Replacement, Motherboard: passo 6, imagem 3 %32
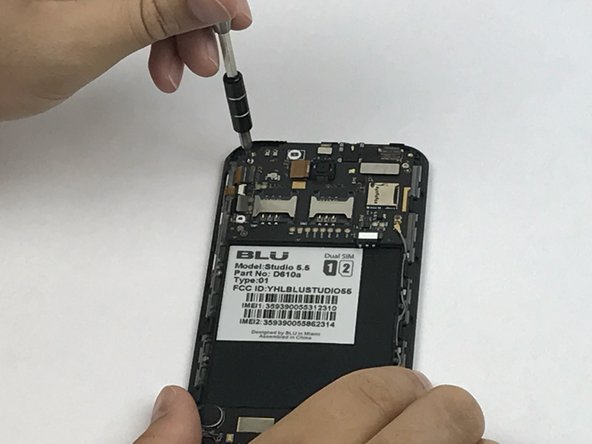
    • Locate the motherboard that is above where the battery was removed.

    • Remove the three screws holding down the motherboard to the phone.

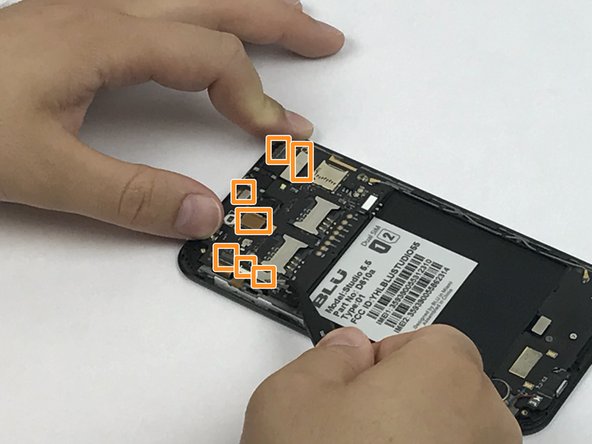
    • Locate all 7 flex cable connectors that are attached to the motherboard.

  7. BLU Studio 5.5 Motherboard Replacement: passo 7, imagem 1 %32 BLU Studio 5.5 Motherboard Replacement: passo 7, imagem 2 %32 BLU Studio 5.5 Motherboard Replacement: passo 7, imagem 3 %32
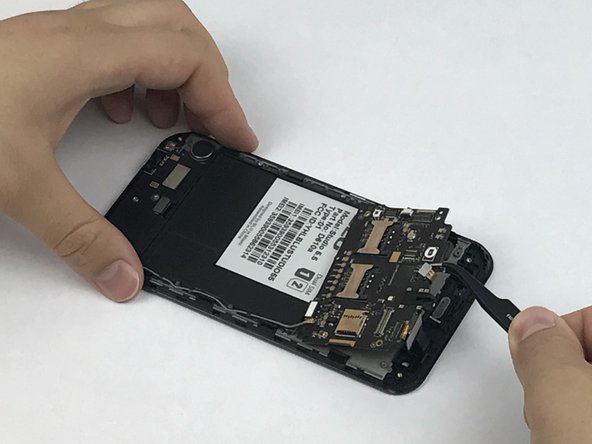
    • Use tweezers to carefully grasp and unhook all 7 flex cable connectors.

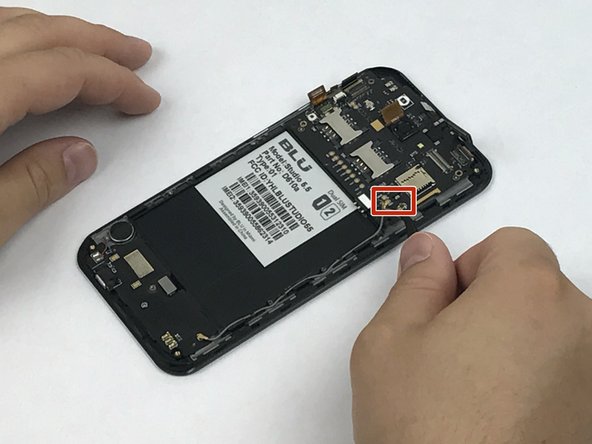
    • With the same tweezers, pry off the cable clasp that connects the motherboard to the sub PCBA.

    • Once the motherboard is disconnected from all components, use the tweezers or your fingers to remove it from the phone assembly.

    • Use the Anti-Static Wrist Strap to eliminate the possibility of introducing a static force that may damage the motherboard components.

Conclusão

To reassemble your device, follow these instructions in reverse order.

Uma outra pessoa concluiu este guia.

Equipe

USF Tampa, Team S1-G6, Nance Spring 2017 Membro de USF Tampa, Team S1-G6, Nance Spring 2017

USFT-NANCE-S17S1G6

Membros da 3

Autoria de 8 guias

Um comentário

Can you do a BLU vivo XL4 Teardown?

Michael18751 - Responder

Adicione um comentário

Exibir estatísticas:

Últimas 24 horas: 0

Últimos 7 dias: 0

Últimos 30 dias: 4

Duração total: 1,490