Ir para o conteúdo principal

Audiovox CDM-8910 Motherboard Replacement

O que você precisa

  1. Audiovox CDM-8910 Motherboard Replacement, Battery: passo 1, imagem 1 %32
    • Locate the back side of the phone.

    • The battery is the large main compartment (red box).

  2. Audiovox CDM-8910 Motherboard Replacement: passo 2, imagem 1 %32
    • Use your finger to slide the latch (circled) upwards.

    • While holding the latch up, pull the battery off the phone.

  3. Audiovox CDM-8910 Motherboard Replacement: passo 3, imagem 1 %32
    • The back of the phone will look like this when the battery is correctly removed.

  4. Audiovox CDM-8910 Motherboard Replacement, Rear Case: passo 4, imagem 1 %32
    • Peel the rubber indicated toward the top of the phone

  5. Audiovox CDM-8910 Motherboard Replacement: passo 5, imagem 1 %32
    • Remove the screw that sits underneath the rubber covering.

  6. Audiovox CDM-8910 Motherboard Replacement: passo 6, imagem 1 %32
    • Remove the five (5) total screws using a Philips head screwdriver.

  7. Audiovox CDM-8910 Motherboard Replacement: passo 7, imagem 1 %32
    • Use spudger and insert it towards the bottom of the phone as pictured.

    • Carefully working yourself around the phone with the spudger, pry it open. This may require a bit of force.

    • The volume control button will be loose, so make sure to take it out once the rear case is fully removed.

  8. Audiovox CDM-8910 Motherboard Replacement: passo 8, imagem 1 %32
    • The back case should now be completely removed and the motherboard will be visible.

  9. Audiovox CDM-8910 Motherboard Replacement, Motherboard: passo 9, imagem 1 %32 Audiovox CDM-8910 Motherboard Replacement, Motherboard: passo 9, imagem 2 %32 Audiovox CDM-8910 Motherboard Replacement, Motherboard: passo 9, imagem 3 %32
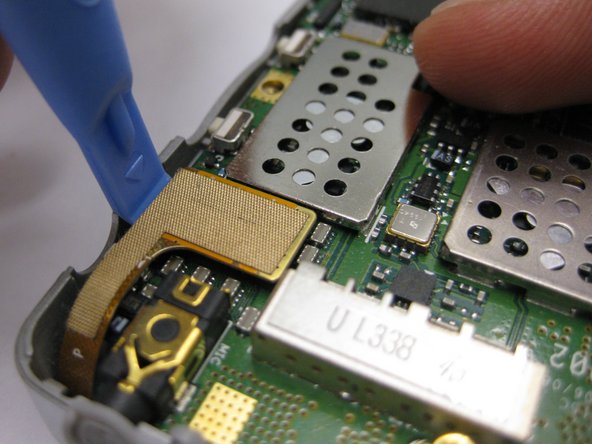
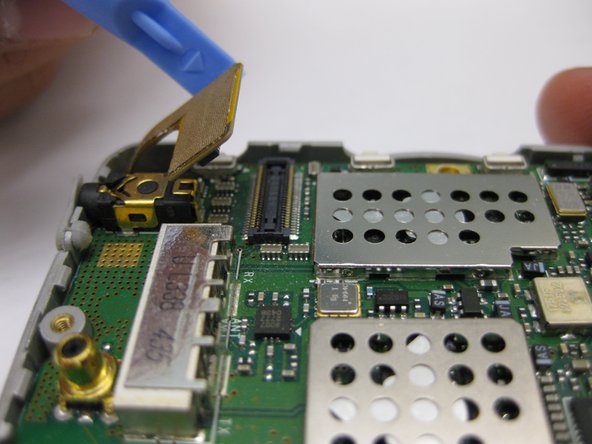
    • Disconnect the gold connection patch

    • Use a spudger or finger to disconnect the piece.

  10. Audiovox CDM-8910 Motherboard Replacement: passo 10, imagem 1 %32
    • Using a spudger, lift the motherboard out of the phone case as pictured.

  11. Audiovox CDM-8910 Motherboard Replacement: passo 11, imagem 1 %32
    • The motherboard should now be completely removed from the phone.

Conclusão

To reassemble your device, follow these instructions in reverse order.

Sean Green

Membro desde: 10/04/10

29 Reputação

Autoria de 2 guias

Equipe

Cal Poly, Team 3-24, Regan Fall 2010 Membro de Cal Poly, Team 3-24, Regan Fall 2010

CPSU-REGAN-F10S3G24

Membros da 4

Autoria de 12 guias

Um comentário

Where on this phone’s motherboard is the memory card located? I’d like to try and remove mine to download the data from it.

Ernie Freeman - Responder

Adicione um comentário

Exibir estatísticas:

Últimas 24 horas: 1

Últimos 7 dias: 9

Últimos 30 dias: 12

Duração total: 2,223