Introdução
Replacing a computer’s RAM is a necessary process for both upgrading the amount of available memory a computer has and for replacing any malfunctioning sticks of RAM. This guide will step you through the replacement process for replacing the DDR3L stick of RAM found within the ASUS Zenbook UX303L.
O que você precisa
-
-
-
Unscrew the eight 3 mm long screws on the bottom of the laptop along the parameter using a T5 Torx screwdriver.
-
Unscrew the one 8 mm long screw at the bottom of the laptop panel using a T5 Torx screwdriver.
-
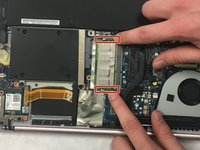
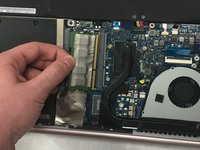
Once all screws have been removed, carefully lift the bottom panel to reveal the RAM.
-


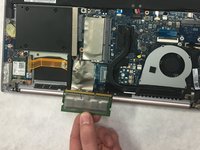
To reassemble your device, follow these instructions in reverse order.
To reassemble your device, follow these instructions in reverse order.
Cancelar: não concluí este guia.
Uma outra pessoa concluiu este guia.
Equipe

IUPUI, Team S1-G6, Harley Spring 2019 Membro de IUPUI, Team S1-G6, Harley Spring 2019
IUPUI-HARLEY-S19S1G6
3 Membros
Autoria de 7 guias
Um comentário
This is incomplete. There are two screws more hidden behind the rubber support points (on the hinges side) of the computer.
And you need some adhesive to fix this rubber squares in place after you fix the lid in place.