Esta versão pode conter edições incorretas. Mude para o último instantâneo verificado.
O que você precisa
-
Este passo não foi traduzido. Ajude a traduzi-lo
-
Make sure the device is turned off and disconnected from the battery charger.
-
-
Este passo não foi traduzido. Ajude a traduzi-lo
-
Remove all the nine screws from the bottom of the device using a T5 screwdriver.
-
Carefully remove the bottom cover.
-
-
Este passo não foi traduzido. Ajude a traduzi-lo
-
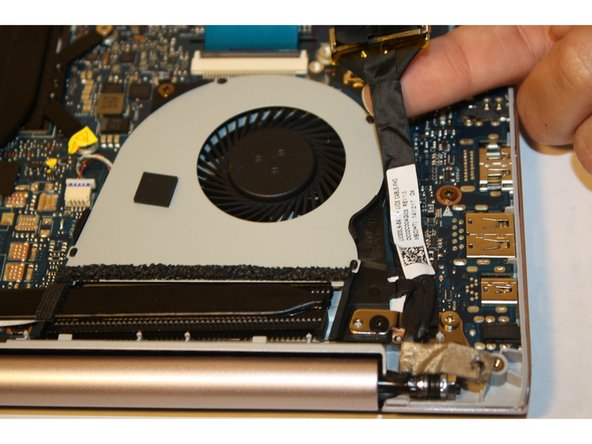
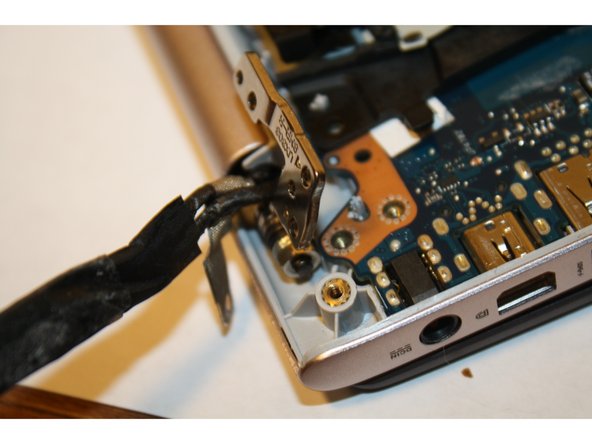
Remove the three screws from the hinges using a PH-1 screwdriver.
-
Open the device at a 90 degree angle to free the hinges.
-
-
Este passo não foi traduzido. Ajude a traduzi-lo
-
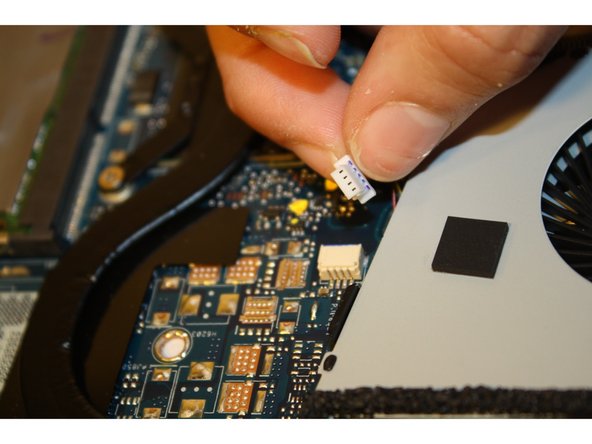
Remove the screw attaching the cooling fan to the motherboard by using a PH-1 screwdriver.
-
Disconnect the wire attaching the cooling fan to the motherboard.
-
Gently lift and pull out the cooling fan.
-
-
-
Este passo não foi traduzido. Ajude a traduzi-lo
-
Remove the four screws attached to the black covered copper bar next to the cooling fan using a PH-1 screwdriver.
-
Gently lift and remove the copper bar.
-
-
Este passo não foi traduzido. Ajude a traduzi-lo
-
Remove the five screws from the battery pack using a PH-1 screwdriver.
-
-
Este passo não foi traduzido. Ajude a traduzi-lo
-
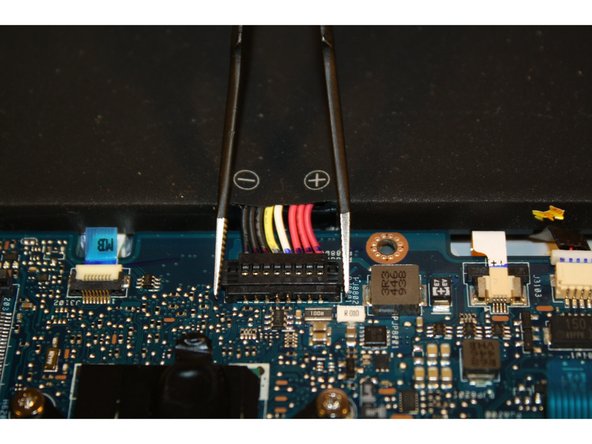
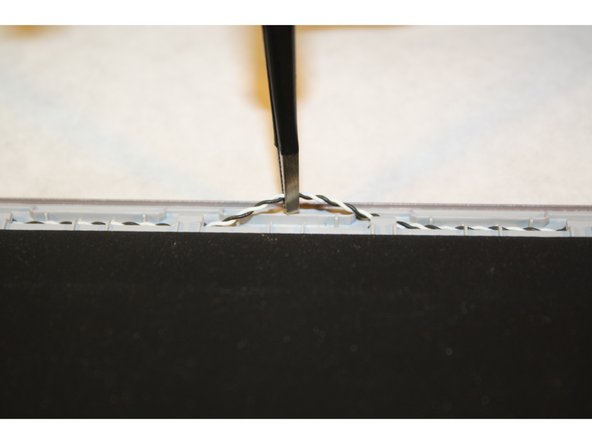
Unhook the black, red, and white switch using the tweezers.
-
Detach the positive and negative red, white, yellow, and black switch.
-
Unhook the black and white coiled wire.
-
Lift and remove the battery pack.
-
-
Este passo não foi traduzido. Ajude a traduzi-lo
-
Remove the three screws attaching the drive to the motherboard using a PH-1 screwdriver.
-
Gently lift and pull out the drive.
-
-
Este passo não foi traduzido. Ajude a traduzi-lo
-
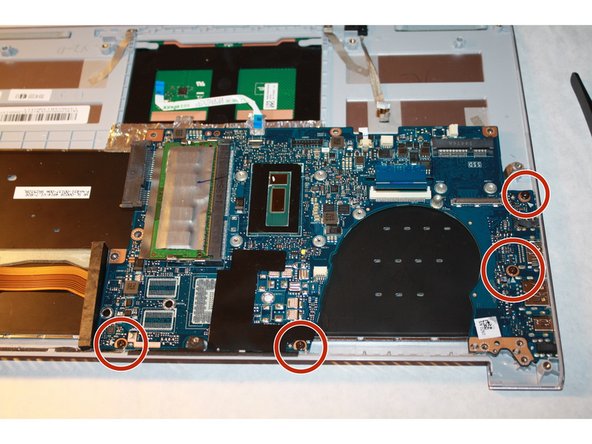
Remove the silver tape to free the fourth screw attaching the motherboard.
-
Remove the four screws attaching the motherboard using a PH-1 screwdriver.
-
-
Este passo não foi traduzido. Ajude a traduzi-lo
-
Detach the four wires connected to the motherboard using tweezers.
-
Gently lift up and pull out the motherboard.
-
-
Este passo não foi traduzido. Ajude a traduzi-lo
-
Remove the small piece of the motherboard on the lower left hand corner by removing the four screws using a PH-1 screwdriver.
-
Detach the black and red coiled wire from the motherboard using tweezers.
-
Gently lift and remove the small piece of the motherboard.
-
-
Este passo não foi traduzido. Ajude a traduzi-lo
-
Place the plastic opening tool under the corners of the keyboard and use it to detach the keyboard all around.
-
Gently lift and remove the keyboard from its place.
-


Cancelar: não concluí este guia.
7 outras pessoas executaram este guia.
Equipe

Sam Houston State, Team 1-3, Blackburne Fall 2015 Membro de Sam Houston State, Team 1-3, Blackburne Fall 2015
SHSU-BLACKBURNE-F15S1G3
Membros da 3
Autoria de 4 guias
8 comentários
Step 2: There are screws under the rubber pads (at least on the UX303L).
Step 9: Its removing the hard drive/SSD not RAM.
Step 13: Please show me how to remove the keyboard out. It will break some plastic to pull the keyboard out.
Thanks,
Quang
Battery pack should be removed first (at least before step 3) in order to avoid possible power surge