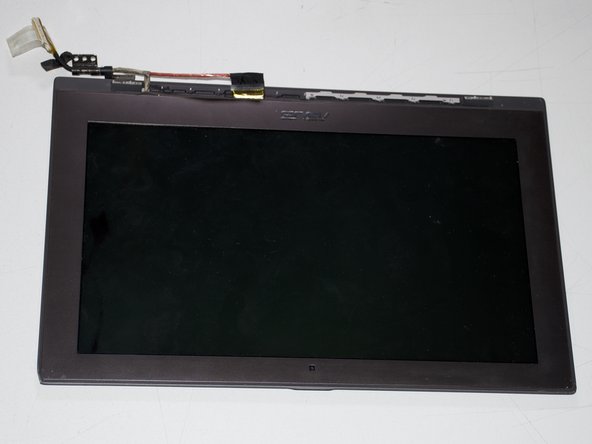
Ir para o conteúdo principal

Asus Zenbook UX21e LCD Screen Replacement

O que você precisa

  1. Asus Zenbook UX21e LCD Screen Replacement, Battery: passo 1, imagem 1 %32 Asus Zenbook UX21e LCD Screen Replacement, Battery: passo 1, imagem 2 %32 Asus Zenbook UX21e LCD Screen Replacement, Battery: passo 1, imagem 3 %32
    • Using a T4 Torx screwdriver, unscrew the ten screws lining the bottom cover. Then, proceed to remove the bottom cover by sliding it out parallel toward the back of the computer.

    • There are two length of screws. Eight screws are 3mm and two are 5mm. The two 5mm screws always go into the two center holes along the back edge.

  2. Asus Zenbook UX21e LCD Screen Replacement: passo 2, imagem 1 %32 Asus Zenbook UX21e LCD Screen Replacement: passo 2, imagem 2 %32 Asus Zenbook UX21e LCD Screen Replacement: passo 2, imagem 3 %32
    • Using an iFixit opening tool and your other hand, gently lift the connector up from the tape wrapped around the connector wires and pry the connector from the motherboard.

  3. Asus Zenbook UX21e LCD Screen Replacement: passo 3, imagem 1 %32
    • Remove the battery by unscrewing the five 3mm screws using a Phillips #1 screwdriver.

    • One at each corner and one in the center.

  4. Asus Zenbook UX21e LCD Screen Replacement: passo 4, imagem 1 %32 Asus Zenbook UX21e LCD Screen Replacement: passo 4, imagem 2 %32
    • Lift the battery directly up and remove it from the device.

  5. Asus Zenbook UX21e LCD Screen Replacement, LCD Screen: passo 5, imagem 1 %32 Asus Zenbook UX21e LCD Screen Replacement, LCD Screen: passo 5, imagem 2 %32 Asus Zenbook UX21e LCD Screen Replacement, LCD Screen: passo 5, imagem 3 %32
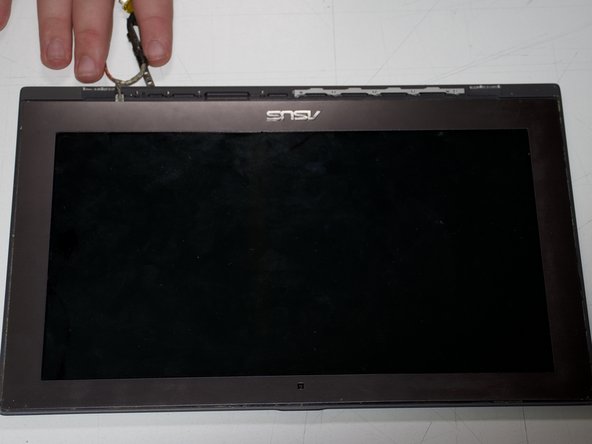
    • Remove the tape wrapped around the LCD connector by pulling it towards the screen hinges of the computer.

    • Disconnect the LCD connector by sliding it out of its socket.

  6. Asus Zenbook UX21e LCD Screen Replacement: passo 6, imagem 1 %32 Asus Zenbook UX21e LCD Screen Replacement: passo 6, imagem 2 %32 Asus Zenbook UX21e LCD Screen Replacement: passo 6, imagem 3 %32
    • Using a Phillis #1 screwdriver, remove the four 3 mm screws at the screen hinges to allow the screen to pull off of the device.

    • If the hinges are too hard to remove by hand, use the leverage of the keyboard to slide them out.

  7. Asus Zenbook UX21e LCD Screen Replacement: passo 7, imagem 1 %32 Asus Zenbook UX21e LCD Screen Replacement: passo 7, imagem 2 %32
    • Remove the plastic vent from screen by using an iFixit opening tool to pry the vent from the screen edge.

    • Exercise caution when prying the vent off. Too much deflection can cause the vent to snap. Work both ends.

  8. Asus Zenbook UX21e LCD Screen Replacement: passo 8, imagem 1 %32 Asus Zenbook UX21e LCD Screen Replacement: passo 8, imagem 2 %32 Asus Zenbook UX21e LCD Screen Replacement: passo 8, imagem 3 %32
    • Remove the nine 3 mm screws along the base of the screen using a Phillips #1 screwdriver.

    • Remove four 5 mm screws along the two internal hinges using a Phillips #1 screwdriver.

    • These four screws are hidden by cables and need to be removed in order to see the screws.

  9. Asus Zenbook UX21e LCD Screen Replacement: passo 9, imagem 1 %32 Asus Zenbook UX21e LCD Screen Replacement: passo 9, imagem 2 %32 Asus Zenbook UX21e LCD Screen Replacement: passo 9, imagem 3 %32
    • Remove the rubber o-ring (the thin rubber strip that lines the bezel edge) by peeling it off.

    • Heat the bezel using any heating tool such as a hair dryer, etc.

    • Use a metal spudger to help rip off the bezel and the rubber-o-ring.

  10. Asus Zenbook UX21e LCD Screen Replacement: passo 10, imagem 1 %32 Asus Zenbook UX21e LCD Screen Replacement: passo 10, imagem 2 %32
    • Disconnect the LCD connector from the screen housing by pulling the connector.

  11. Asus Zenbook UX21e LCD Screen Replacement: passo 11, imagem 1 %32 Asus Zenbook UX21e LCD Screen Replacement: passo 11, imagem 2 %32
    • Unscrew the two 2 mmm screws that line the screen control board using a Phillips #1 screwdriver.

  12. Asus Zenbook UX21e LCD Screen Replacement: passo 12, imagem 1 %32 Asus Zenbook UX21e LCD Screen Replacement: passo 12, imagem 2 %32 Asus Zenbook UX21e LCD Screen Replacement: passo 12, imagem 3 %32
    • Remove the cable connecting the screen housing to the control board by pulling the cable.

Conclusão

To reassemble your device, follow these instructions in reverse order.

Uma outra pessoa concluiu este guia.

Zachary Eslick

Membro desde: 04/23/18

756 Reputação

Autoria de 5 guias

Equipe

Cal Poly, Team S22-G1, Maness Spring 2018 Membro de Cal Poly, Team S22-G1, Maness Spring 2018

CPSU-MANESS-S18S22G1

Membros da 3

Autoria de 5 guias

0 comentários

Adicione um comentário

Exibir estatísticas:

Últimas 24 horas: 0

Últimos 7 dias: 0

Últimos 30 dias: 13

Duração total: 2,139