Introdução
This guide will show you how to replace the hard drive on your Asus Zen AiO Pro Z240IC to increase total memory storage and improve boot times.
O que você precisa
-
-
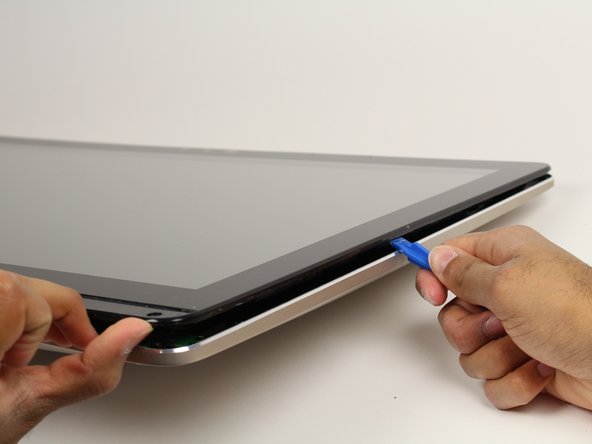
Use the plastic opening tool to pry off the black plastic strip at the bottom of the screen by wiggling the tool between the strip and the screen.
-
Run the opening tool slowly along the base of the screen, peeling the black strip back, until the opposite end of the screen is reached.
-
-
-
Place the computer on its back, facing up.
-
Wedge the plastic opening tool in between the screen and the bezel of the aluminum computer casing.
-
Move the tool along the entire edge of the screen with an up-and-down prying motion to loosen the screen from the casing. Do not lift the entire screen away from the computer yet.
-
-
-
-
Use a Phillips #0 to remove the four (4) 3.2 mm screws on the metal casing enclosing the hard drive.
-
Remove the metal casing by lifting it up.
-


To reassemble your device, follow these instructions in reverse order.
To reassemble your device, follow these instructions in reverse order.
Cancelar: não concluí este guia.
17 outras pessoas executaram este guia.
Equipe

Cal Poly, Team S4-G1, Livingston Fall 2017 Membro de Cal Poly, Team S4-G1, Livingston Fall 2017
CPSU-LIVINGSTON-F17S4G1
Membros da 5
Autoria de 25 guias
18 comentários
Does the black strip help in place with adhesive go back on easily or do you need to use new tape to help back in place?
Pas de souci pour remettre la bande adhésive, elle reste collante.
I have reused adhesive strip without any special
After step 5 its possible to raise screen and unscrew hard
dose it has space for 2 hdd or only one