Introdução
If your laptop fan gets clogged with too much dust or is spinning too loud, you might want to clean or replace it. This guide will show you how to get to the fan and remove it to do so.
O que você precisa
-
-
Turn off the laptop and flip it face down.
-
Using a Phillips #0 screwdriver, remove the seven 9mm screws circled in red.
-
With the same screwdriver, remove the four 5mm screws circled in orange.
 Pergunte ao FixBot
-
-
-
Flip the laptop face up and open the lid.
-
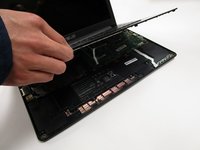
Use the plastic opening tool to pry around the entire edge of the keyboard panel to loosen the panel from the base.
-
-
-
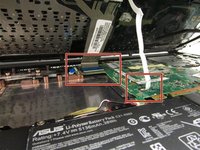
Partially lift the panel up, revealing the two cables connected to the motherboard.
-
-
-
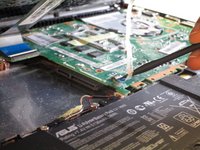
Disconnect the first ZIF cable by lifting the tab using the spuger tool or your fingernail and gently pull the cable out.
-
Disconnect the second ZIF cable by lifting the tab using your fingernail and gently pull the cable out. This one is more difficult to reach with the spudger.
-
-
-
Remove the keyboard panel completely and set it aside. The internal components of the laptop are now exposed.
-
-
-
-
Remove the four 5mm screws from the hard drive mounting bracket using the Phillips #0 screwdriver.
-
-
-
Slide the hard drive in the direction away from the connector and lift it up to remove it.
-
-
-
Unplug the battery from the laptop by lifting the connector up with the flat end of the spudger.
-
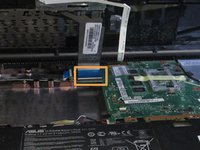
Unplug the two ZIF cables by lifting the tab using the spudger tool or your fingernail then pulling the cable out gently.
-
-
-
Unplug the bundled cable by pulling it away from the connector with a bit of force.
-
Unplug the display cable connector by lifting the tape and pulling it away from the connector.
-
Unplug the two antenna cables connected to the network interface card by prying it off with the flat end of the spudger.
-
-
-
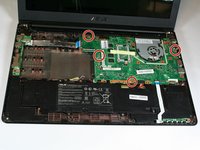
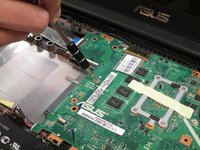
Disconnect the fan from the motherboard by pulling the power cable connector.
-
-
-
Remove the two 5.5mm screws using a Phillips #0 head screwdriver.
-








To reassemble your device, follow these instructions in reverse order.
Cancelar: não concluí este guia.
2 outras pessoas executaram este guia.

Equipe

UC Davis, Team 1-5, Rodger Winter 2017 Membro de UC Davis, Team 1-5, Rodger Winter 2017
UCD-RODGER-W17S1G5
4 Membros
Autoria de 6 guias
1Comentário do guia
Great guide. Re: STEP 11 - my Asus notebook had 5 screws securing the mb.
