Ir para o conteúdo principal

Asus X200MA Screen Replacement

O que você precisa

  1. Asus X200MA Screen Replacement, Back Panel: passo 1, imagem 1 %32
    • Remove the following six screws:

    • Six 4 mm screws using a Phillips #0 screwdriver.

    • Remove the following one screw:

    • One 14 mm screw using a Phillips #0 screwdriver.

    • The 14mm screw goes in the center.

  2. Asus X200MA Screen Replacement: passo 2, imagem 1 %32
    • Use a plastic or metal spudger to separate the keyboard from the back panel and lift the keyboard out of place.

  3. Asus X200MA Screen Replacement, Battery: passo 3, imagem 1 %32
    • Take two rubber caps off the back side of the laptop.

  4. Asus X200MA Screen Replacement: passo 4, imagem 1 %32
    • Remove the following two screws under the rubber caps.

    • Two 14 mm screws using the Phillips #0 screw driver.

  5. Asus X200MA Screen Replacement: passo 5, imagem 1 %32
    • Flip up the following:

    • The two latches holding the two cables shown(white and black)

    • Pull the cables free from the latches

    • Lift the keyboard from the computer

  6. Asus X200MA Screen Replacement: passo 6, imagem 1 %32
    • Remove the following screws from the inside of the laptop:

    • Two 4 mm screws using the Phillips #0 phillips screwdriver.

    • One 5 mm screw using the Phillips #0 Phillips screwdriver located in the center a little below the battery.

  7. Asus X200MA Screen Replacement: passo 7, imagem 1 %32
    • Slide the battery up and out.

  8. Asus X200MA Screen Replacement, Screen: passo 8, imagem 1 %32
    • Remove the following four 3 mm screws using the Phillips #0 screwdriver.

  9. Asus X200MA Screen Replacement: passo 9, imagem 1 %32 Asus X200MA Screen Replacement: passo 9, imagem 2 %32
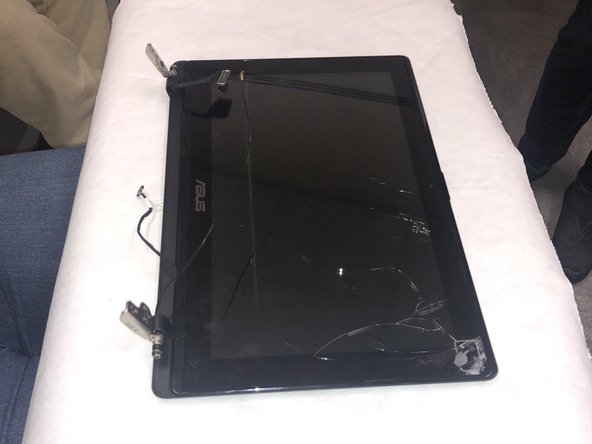
    • Lift and separate the screen from the base plate.

  10. Asus X200MA Screen Replacement: passo 10, imagem 1 %32 Asus X200MA Screen Replacement: passo 10, imagem 2 %32
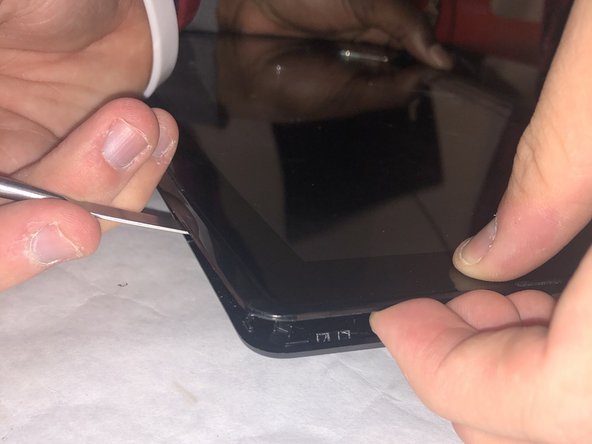
    • Insert the metal spudger into the side of the screen casing. Work the spudger around the perimeter of the casing in a rowing motion in order to release the plastic clips holding the casing together.

    • Place a finger in the space between the casing while undoing the clips to keep the casing from re-closing.

  11. Asus X200MA Screen Replacement: passo 11, imagem 1 %32
    • Lift the half of the casing with the screen away from the other half of the casing and place the screen half on a work space by itself.

  12. Asus X200MA Screen Replacement: passo 12, imagem 1 %32
    • Remove the following six 3 mm screws using the Phillips #0 screwdriver.

  13. Asus X200MA Screen Replacement: passo 13, imagem 1 %32 Asus X200MA Screen Replacement: passo 13, imagem 2 %32 Asus X200MA Screen Replacement: passo 13, imagem 3 %32
    • Use the jimmy tool to peel the following stickers from the screen:

    • The silver sticker near the bottom.

    • The information sticker near the top.

  14. Asus X200MA Screen Replacement: passo 14, imagem 1 %32 Asus X200MA Screen Replacement: passo 14, imagem 2 %32 Asus X200MA Screen Replacement: passo 14, imagem 3 %32
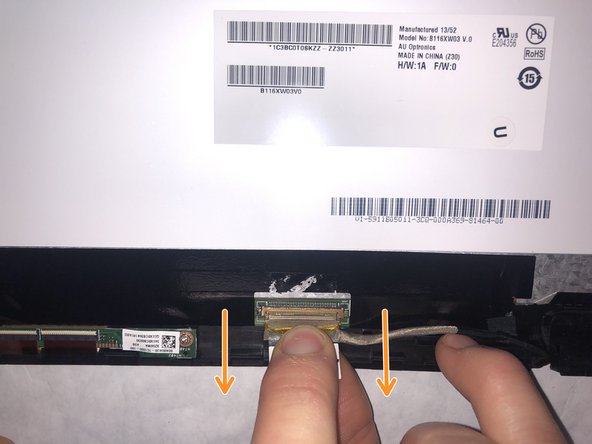
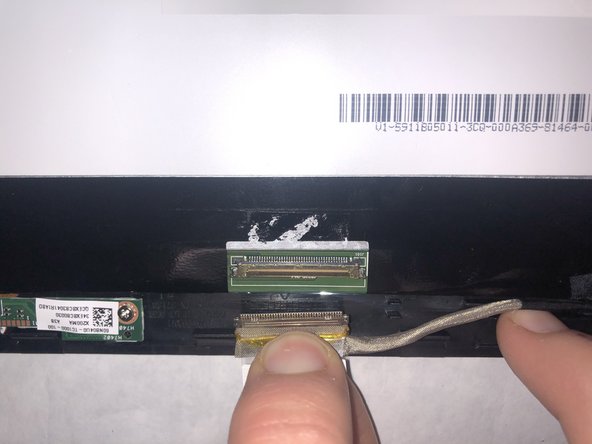
    • Lift the latch holding the component in place.

    • Remove the component by pulling in the direction of the arrows.

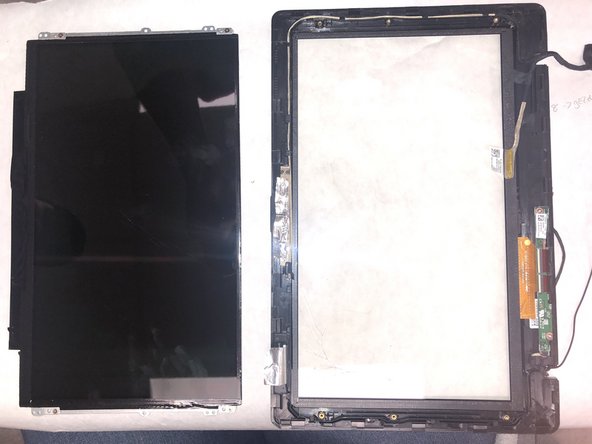
  15. Asus X200MA Screen Replacement: passo 15, imagem 1 %32 Asus X200MA Screen Replacement: passo 15, imagem 2 %32
    • Lift the screen from the casing and place the two next to one another.

Conclusão

To reassemble your device, follow these instructions in reverse order.

Alli Krininger

Membro desde: 11/11/19

391 Reputação

Autoria de 3 guias

Equipe

IUPUI, Team S2-G4, Stella Fall 2019 Membro de IUPUI, Team S2-G4, Stella Fall 2019

IUPUI-STELLA-F19S2G4

Membros da 4

Autoria de 3 guias

0 comentários

Adicione um comentário

Exibir estatísticas:

Últimas 24 horas: 0

Últimos 7 dias: 0

Últimos 30 dias: 5

Duração total: 760