Ir para o conteúdo principal

Asus V500CA-DB51T Screen Replacement

O que você precisa

  1. Asus V500CA-DB51T Screen Replacement, Battery: passo 1, imagem 1 %32 Asus V500CA-DB51T Screen Replacement, Battery: passo 1, imagem 2 %32
    • Remove the following ten screws securing the lower case to the upper case:

    • The top left and right corners have .7 cm screws.

    • The two top-middle and four bottom are .4 cm screws.

    • The middle left and right are .8 cm screws.

    • Remove the screws using the Phillips #00 screwdriver.

  2. Asus V500CA-DB51T Screen Replacement: passo 2, imagem 1 %32 Asus V500CA-DB51T Screen Replacement: passo 2, imagem 2 %32
    • Wedge your fingers between the upper case and the lower case.

    • Gently pull the lower case away from the upper case.

    • Remove the lower case and set it aside.

  3. Asus V500CA-DB51T Screen Replacement: passo 3, imagem 1 %32
    • Use the flat end of the blue plastic opening tool to lift the battery connector up out of its socket on the motherboard.

  4. Asus V500CA-DB51T Screen Replacement: passo 4, imagem 1 %32 Asus V500CA-DB51T Screen Replacement: passo 4, imagem 2 %32
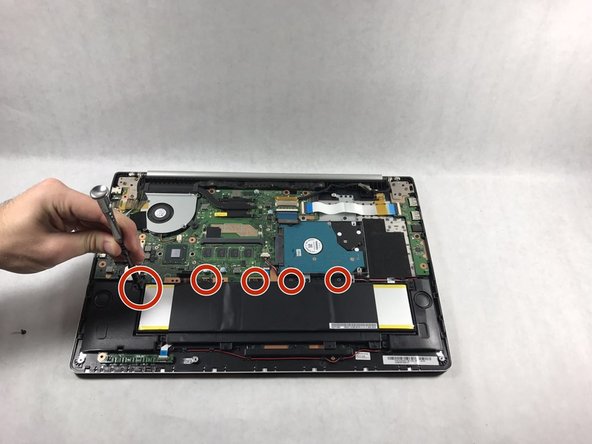
    • Remove the tri-point screws that secure the battery to the casing.

    • All screws securing the battery in place are .5 cm tri-point screws.

  5. Asus V500CA-DB51T Screen Replacement: passo 5, imagem 1 %32 Asus V500CA-DB51T Screen Replacement: passo 5, imagem 2 %32 Asus V500CA-DB51T Screen Replacement: passo 5, imagem 3 %32
    • Use the opening tool to pop up the battery away from the casing.

  6. Asus V500CA-DB51T Screen Replacement, WiFi Card: passo 6, imagem 1 %32 Asus V500CA-DB51T Screen Replacement, WiFi Card: passo 6, imagem 2 %32
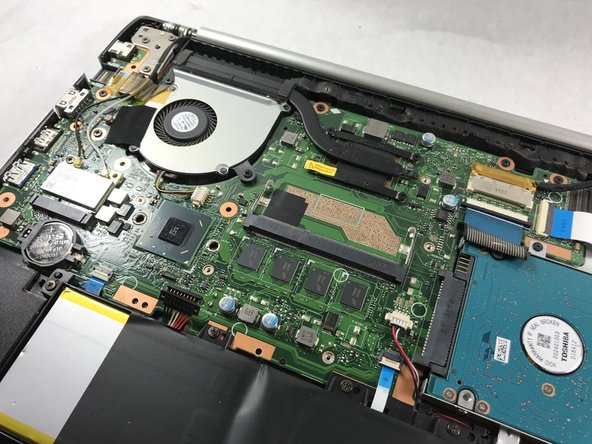
    • Locate the section of the device that houses the WiFi Card.

    • This should be a white, square-shaped object located just above the left end of the battery.

  7. Asus V500CA-DB51T Screen Replacement: passo 7, imagem 1 %32 Asus V500CA-DB51T Screen Replacement: passo 7, imagem 2 %32
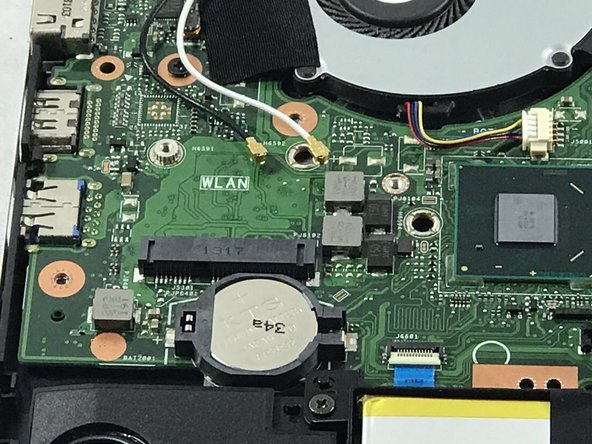
    • Disconnect the black and white wires that are connected to the WiFi card by gently pulling them upward with a pair of tweezers.

    • Using the tweezers, gently pull the WiFi card out away from yourself.

    • If you try pulling up you could cause damage, so be sure to slowly and gently pull the card away from yourself.

  8. Asus V500CA-DB51T Screen Replacement, Screen: passo 8, imagem 1 %32 Asus V500CA-DB51T Screen Replacement, Screen: passo 8, imagem 2 %32 Asus V500CA-DB51T Screen Replacement, Screen: passo 8, imagem 3 %32
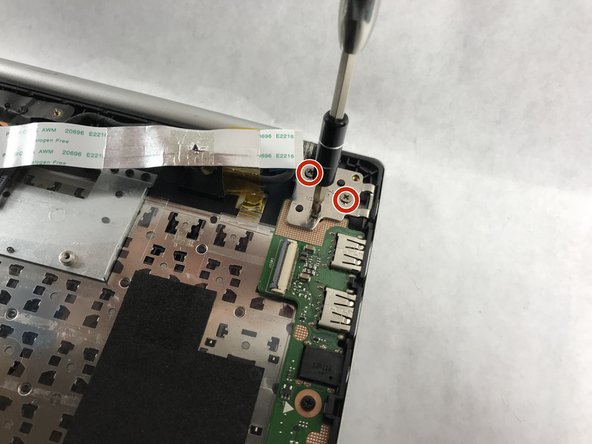
    • Gently remove the ribbon cable using tweezers.

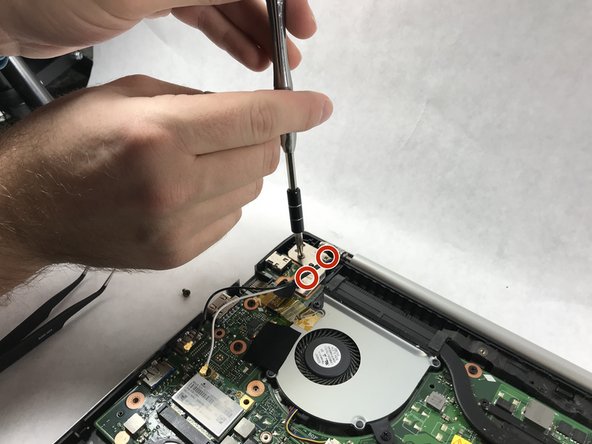
    • Using the Phillips #00 screwdriver remove the six .4 cm screws from the screen brackets.

  9. Asus V500CA-DB51T Screen Replacement: passo 9, imagem 1 %32 Asus V500CA-DB51T Screen Replacement: passo 9, imagem 2 %32 Asus V500CA-DB51T Screen Replacement: passo 9, imagem 3 %32
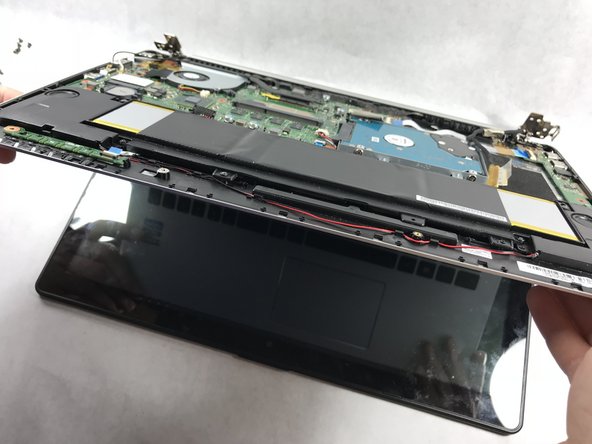
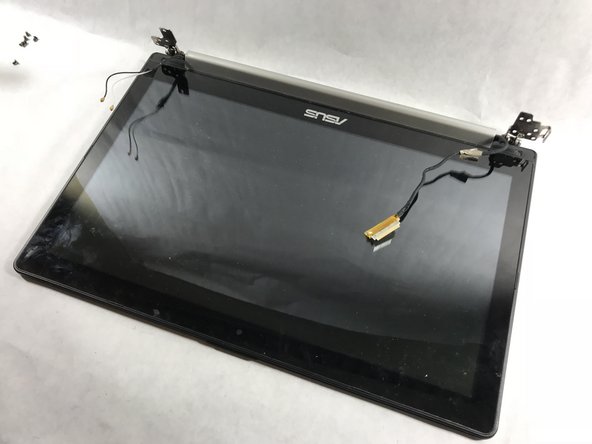
    • Slowly lift up on the main case of the laptop.

    • Gently pull the laptop from the screen when it is perpendicular with the screen.

Conclusão

To reassemble your device, follow these instructions in reverse order.

Uma outra pessoa concluiu este guia.

Galen P Garofalo

Membro desde: 10/17/17

670 Reputação

Autoria de 6 guias

Equipe

UMass Dartmouth, Team S6-G2, Rockett Fall 2017 Membro de UMass Dartmouth, Team S6-G2, Rockett Fall 2017

UMASSD-ROCKETT-F17S6G2

Membros da 3

Autoria de 6 guias

0 comentários

Adicione um comentário

Exibir estatísticas:

Últimas 24 horas: 0

Últimos 7 dias: 2

Últimos 30 dias: 2

Duração total: 614