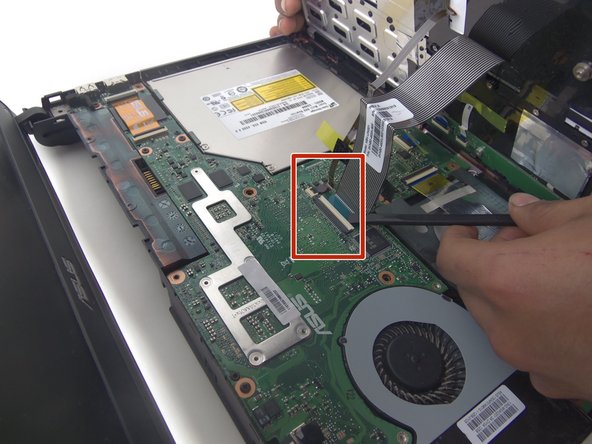
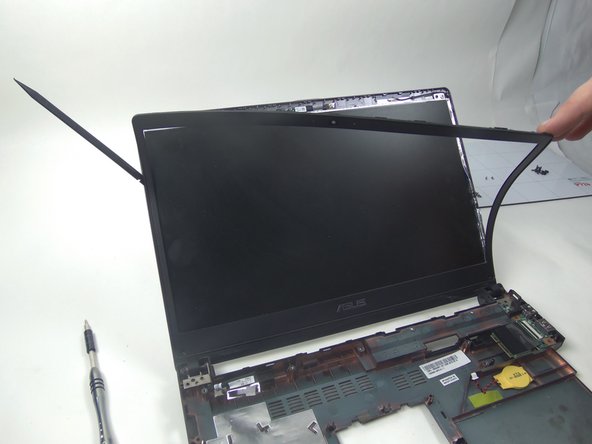
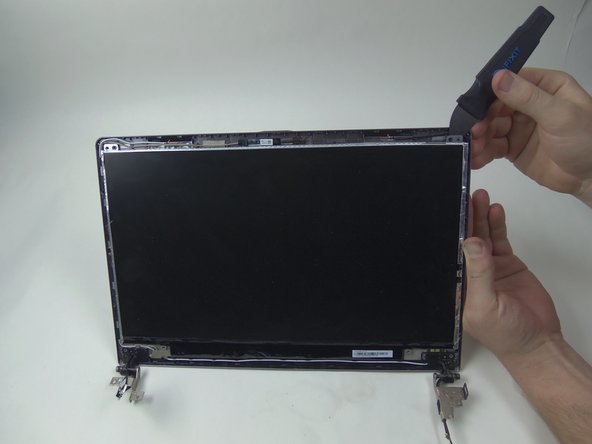
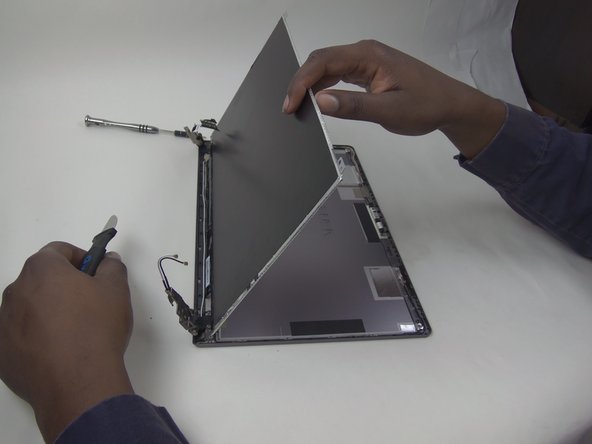
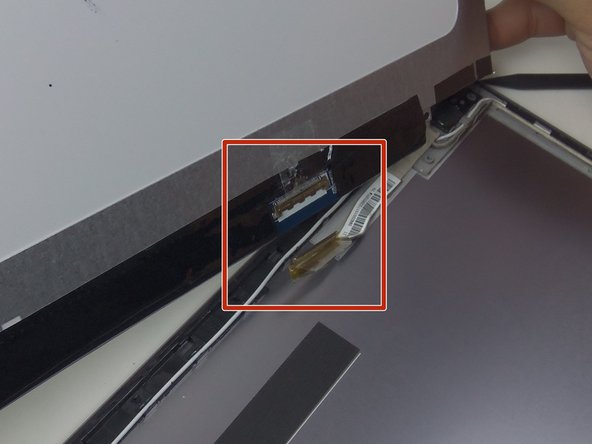
Ir para o conteúdo principal

Asus U47VC-DS51 LCD Screen Replacement

O que você precisa

  1. Asus U47VC-DS51 LCD Screen Replacement, Keyboard: passo 1, imagem 1 %32 Asus U47VC-DS51 LCD Screen Replacement, Keyboard: passo 1, imagem 2 %32
    • Remove 9 screws from bottom of notebook using PH00 bit + 1 under hard drive bay.

    • Remove 3 screws from bottom of notebook using PH00 bit. 1 is same screw spec as the other 9, and 2 are shorter.

  2. Asus U47VC-DS51 LCD Screen Replacement: passo 2, imagem 1 %32 Asus U47VC-DS51 LCD Screen Replacement: passo 2, imagem 2 %32
    • Using the black spudger, insert its flat end between the crevice where the color changes from grey to black.

    • The keyboard is very tightly secured.

    • Carefully ease the spudger's end along the crevice, going around the entire frame.

    • The back connectors are short, so be careful when lifting.

  3. Asus U47VC-DS51 LCD Screen Replacement: passo 3, imagem 1 %32 Asus U47VC-DS51 LCD Screen Replacement: passo 3, imagem 2 %32
    • Lift the keyboard from the front where it is closest to the screen.

    • Disconnect the large and small ZIF connectors attached to the motherboard by flipping the light-colored part of the switch.

  4. Asus U47VC-DS51 LCD Screen Replacement: passo 4, imagem 1 %32 Asus U47VC-DS51 LCD Screen Replacement: passo 4, imagem 2 %32
    • Remove the third and last ZIF connector on the motherboard by flipping up the dark-colored part of the switch.

    • Now, the component should come completely free.

  5. Asus U47VC-DS51 LCD Screen Replacement, LCD Screen: passo 5, imagem 1 %32
    • Unscrew the two 4mm phillips head #00 screws.

  6. Asus U47VC-DS51 LCD Screen Replacement: passo 6, imagem 1 %32 Asus U47VC-DS51 LCD Screen Replacement: passo 6, imagem 2 %32 Asus U47VC-DS51 LCD Screen Replacement: passo 6, imagem 3 %32
    • Use the black spudger to pry the face plate off.

    • The face plate is attached with adhesive.

    • Gently peel the face plate from the base.

  7. Asus U47VC-DS51 LCD Screen Replacement: passo 7, imagem 1 %32 Asus U47VC-DS51 LCD Screen Replacement: passo 7, imagem 2 %32 Asus U47VC-DS51 LCD Screen Replacement: passo 7, imagem 3 %32
    • Unscrew the four 3mm Phillips head #00 screws holding the screen to the base.

    • When sitting upright, the screen should fall forward from the top.

  8. Asus U47VC-DS51 LCD Screen Replacement: passo 8, imagem 1 %32 Asus U47VC-DS51 LCD Screen Replacement: passo 8, imagem 2 %32
    • Unease the yellow connecting tape with the spudger at the bottom of the screen.

    • Pull the connector straight down and it will disconnect fairly easy.

    • The screen should then be free to be removed.

Conclusão

To reassemble your device, follow these instructions in reverse order.

0 comentários

Adicione um comentário

Exibir estatísticas:

Últimas 24 horas: 0

Últimos 7 dias: 0

Últimos 30 dias: 2

Duração total: 442