Ir para o conteúdo principal

Asus ROG G750JM-BSI7N23 Soundbar/speaker Replacement

O que você precisa

  1. Asus ROG G750JM-BSI7N23 Soundbar/speaker Replacement, Soundbar/speaker: passo 1, imagem 1 %32 Asus ROG G750JM-BSI7N23 Soundbar/speaker Replacement, Soundbar/speaker: passo 1, imagem 2 %32
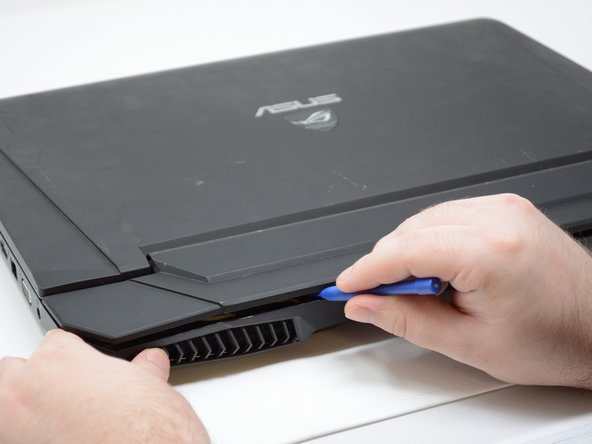
    • Using a plastic opening tool, remove the two rubber tabs circled in red.

  2. Asus ROG G750JM-BSI7N23 Soundbar/speaker Replacement: passo 2, imagem 1 %32 Asus ROG G750JM-BSI7N23 Soundbar/speaker Replacement: passo 2, imagem 2 %32
    • Remove both of the 8mm Phillips #2 screws from these slots where the rubber caps were removed.

  3. Asus ROG G750JM-BSI7N23 Soundbar/speaker Replacement: passo 3, imagem 1 %32 Asus ROG G750JM-BSI7N23 Soundbar/speaker Replacement: passo 3, imagem 2 %32
    • Slide the tab to pop the battery out of its holder.

    • Pull the battery out of its slot.

  4. Asus ROG G750JM-BSI7N23 Soundbar/speaker Replacement: passo 4, imagem 1 %32 Asus ROG G750JM-BSI7N23 Soundbar/speaker Replacement: passo 4, imagem 2 %32
    • Remove the three 4mm Phillips #2 screws from the open battery slot as shown.

    • Remove the two 5mm Phillips #2 screws.

  5. Asus ROG G750JM-BSI7N23 Soundbar/speaker Replacement: passo 5, imagem 1 %32 Asus ROG G750JM-BSI7N23 Soundbar/speaker Replacement: passo 5, imagem 2 %32 Asus ROG G750JM-BSI7N23 Soundbar/speaker Replacement: passo 5, imagem 3 %32
    • Begin prying up on the plate as shown in the pictures.

  6. Asus ROG G750JM-BSI7N23 Soundbar/speaker Replacement: passo 6, imagem 1 %32
    • Detach the single connector using your plastic opening tool.

    • Remove the speaker bar.

Conclusão

To reassemble your device, follow these instructions in reverse order.

0 comentários

Adicione um comentário

Exibir estatísticas:

Últimas 24 horas: 0

Últimos 7 dias: 2

Últimos 30 dias: 4

Duração total: 387