Esta versão pode conter edições incorretas. Mude para o último instantâneo verificado.
O que você precisa
-
Este passo não foi traduzido. Ajude a traduzi-lo
-
Unscrew the 10 screws around the edge of the back panel. Eight of the screws are 0.0793mm T5 , two of them are 0.0793 JIS #0.
-
-
Este passo não foi traduzido. Ajude a traduzi-lo
-
Use the plastic opening tool to pry the back panel off the base of the laptop.
-
-
-
Este passo não foi traduzido. Ajude a traduzi-lo
-
Un-clip both wire clips on the upper and right side of the battery.
-
Lift the battery out of the device.
-
-
Este passo não foi traduzido. Ajude a traduzi-lo
-
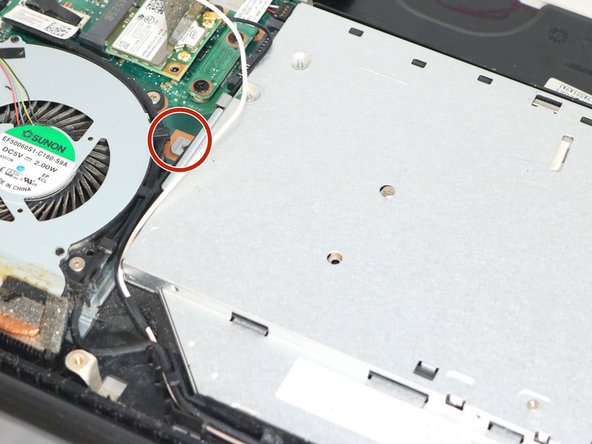
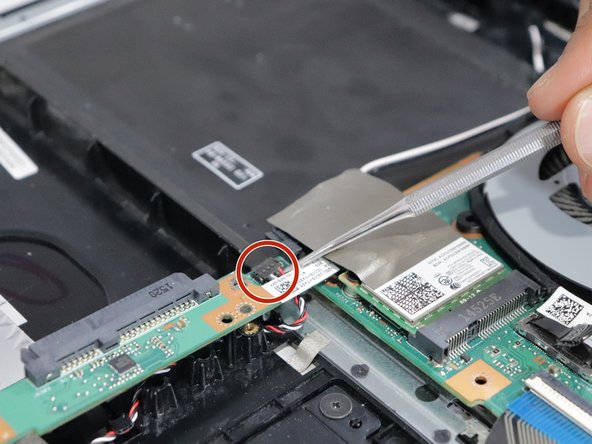
Lift up the sticker that sticks between the motherboard and the optical drive. Then, unscrew the one screw where it is marked and slide it out gently.
-
-
Este passo não foi traduzido. Ajude a traduzi-lo
-
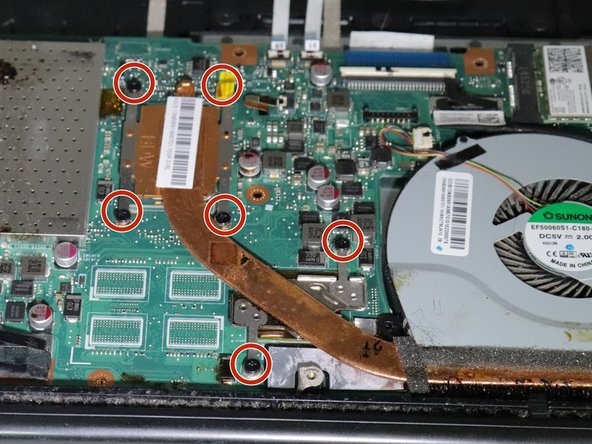
Remove the fan by unscrewing the nine screws shown in the images.
-
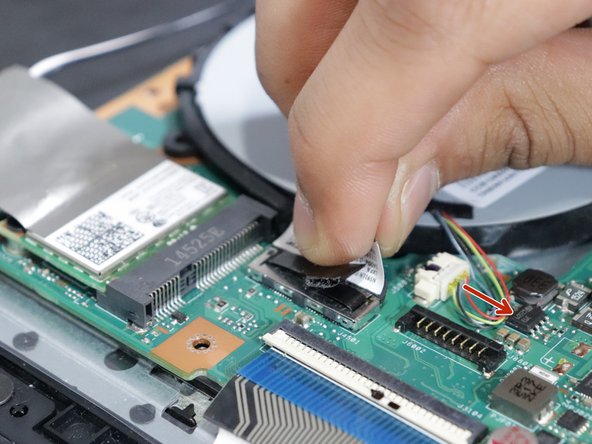
The four colored wire and the black cable need to be pulled out gently.
-
-
Este passo não foi traduzido. Ajude a traduzi-lo
-
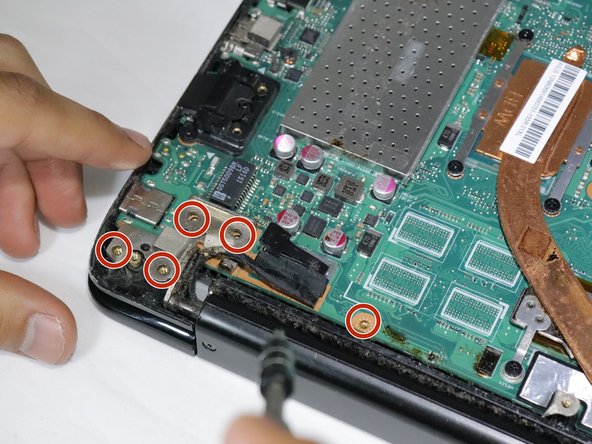
Unscrew the seven screws Phillips Head 0.0793 MM on the edges of the motherboard.
-
-
Este passo não foi traduzido. Ajude a traduzi-lo
-
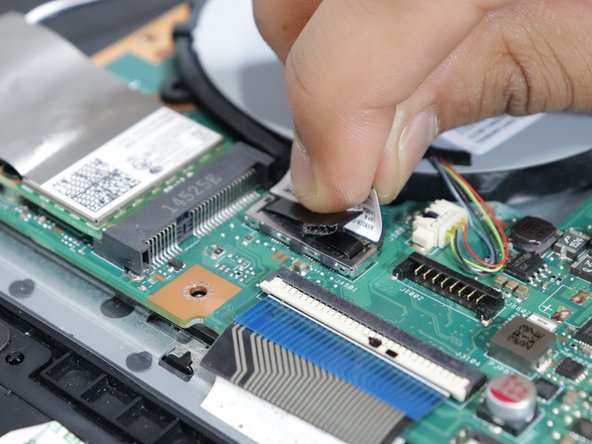
Disconnect any cables that hold the motherboard.
-
Open up the white adjustable latch first to pull out the tapes.
-


Cancelar: não concluí este guia.
2 outras pessoas executaram este guia.
Equipe

Eastern Washington University, Team S3-G3, Rowley Spring 2018 Membro de Eastern Washington University, Team S3-G3, Rowley Spring 2018
EWU-ROWLEY-S18S3G3
Membros da 6
Autoria de 6 guias
Um comentário
Thanks for posting this guide. Helped me to fix this model computer for a friend. Very well done!