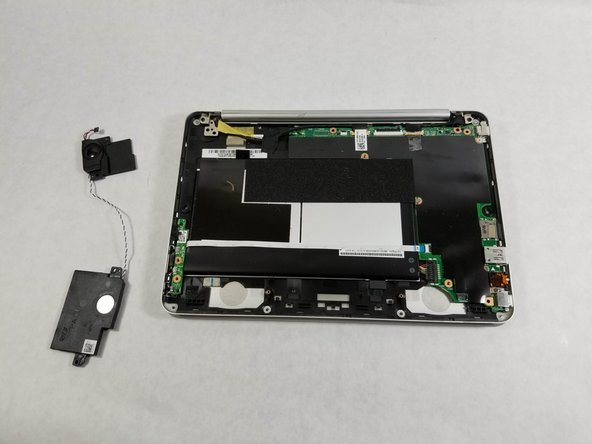
Ir para o conteúdo principal

Asus Chromebook C101P Speakers Replacement

O que você precisa

  1. Asus Chromebook C101P Speakers Replacement, Keyboard: passo 1, imagem 1 %32
    • Flip the Chromebook so that the bottom is facing up.

    • Remove the nine T5 Torx screws.

  2. Asus Chromebook C101P Speakers Replacement: passo 2, imagem 1 %32
    • Remove the four rubber grips on the bottom side of the Chromebook using an opening tool.

  3. Asus Chromebook C101P Speakers Replacement: passo 3, imagem 1 %32
    • Remove the four black screws where the rubber grips were.

  4. Asus Chromebook C101P Speakers Replacement: passo 4, imagem 1 %32 Asus Chromebook C101P Speakers Replacement: passo 4, imagem 2 %32
    • Reorient the Chromebook so the right side is facing upwards.

    • Wedge an opening tool or spudger between the keyboard (upper case) and the lower case of the bottom portion of the Chromebook.

  5. Asus Chromebook C101P Speakers Replacement: passo 5, imagem 1 %32 Asus Chromebook C101P Speakers Replacement: passo 5, imagem 2 %32 Asus Chromebook C101P Speakers Replacement: passo 5, imagem 3 %32
    Ferramenta utilizada nesse passo:
    Tweezers
    $4.99
    Comprar
    • Pull back the black lever on the base of the cable. While pulling back, take your tweezers and pull back on the large ribbon cable.

    • Pull back the black lever on the base of the cable. While pulling back, take your tweezers and pull back on the small ribbon cable.

    • Separate the keyboard from the rest of the laptop.

  6. Asus Chromebook C101P Speakers Replacement, Speakers: passo 6, imagem 1 %32
    • Remove the four Phillips #0 screws from the speakers.

  7. Asus Chromebook C101P Speakers Replacement: passo 7, imagem 1 %32
    Ferramenta utilizada nesse passo:
    Tweezers
    $4.99
    Comprar
    • Remove the yellow speaker tape using tweezers.

  8. Asus Chromebook C101P Speakers Replacement: passo 8, imagem 1 %32 Asus Chromebook C101P Speakers Replacement: passo 8, imagem 2 %32
    • Detach the right speaker using tweezers.

    • The right speaker has its own set of cables connecting to the motherboard. Simply tug on the cables.

Conclusão

To reassemble your device, follow these instructions in reverse order.

Bryan Acosta

Membro desde: 10/25/19

329 Reputação

Autoria de 3 guias

Equipe

UMass Dartmouth, Team S1-G2, O'Connell Fall 2019 Membro de UMass Dartmouth, Team S1-G2, O'Connell Fall 2019

UMASSD-O'CONNELL-F19S1G2

Membros da 2

Autoria de 5 guias

0 comentários

Adicione um comentário

Exibir estatísticas:

Últimas 24 horas: 0

Últimos 7 dias: 2

Últimos 30 dias: 7

Duração total: 399