Ir para o conteúdo principal

Asus A53U-ES21 Hard Drive Replacement

O que você precisa

  1. Asus A53U-ES21 Hard Drive Replacement, Battery: passo 1, imagem 1 %32 Asus A53U-ES21 Hard Drive Replacement, Battery: passo 1, imagem 2 %32
    • Make sure the laptop is off.

    • Flip the laptop upside down so that the battery is facing you.

  2. Asus A53U-ES21 Hard Drive Replacement: passo 2, imagem 1 %32 Asus A53U-ES21 Hard Drive Replacement: passo 2, imagem 2 %32
    • Move the two sliders towards the outer edge of the laptop.

    • Pull the battery out with your left hand while holding the right slider.

  3. Asus A53U-ES21 Hard Drive Replacement, Hard Drive: passo 3, imagem 1 %32 Asus A53U-ES21 Hard Drive Replacement, Hard Drive: passo 3, imagem 2 %32
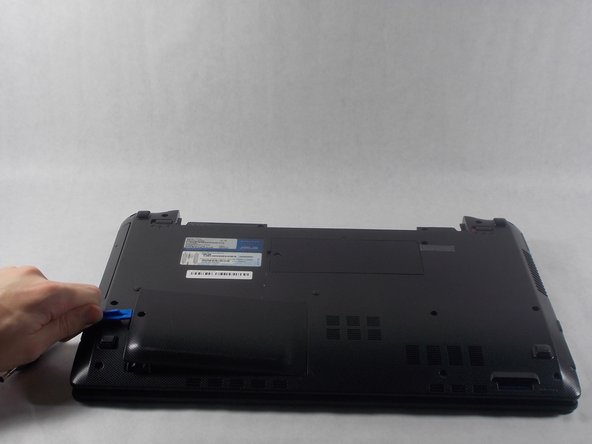
    • Remove the 5mm screw using a Phillips #1 screwdriver.

    • Use the iFixit opening tools to remove the hard drive panel.

  4. Asus A53U-ES21 Hard Drive Replacement: passo 4, imagem 1 %32 Asus A53U-ES21 Hard Drive Replacement: passo 4, imagem 2 %32
    • Pull upwards on the black ribbon on the end of the hard drive.

    • Pull the hard drive out from its socket and remove it from the device.

Conclusão

To reassemble your device, follow these instructions in reverse order.

Uma outra pessoa concluiu este guia.

Chase Poirier

Membro desde: 10/23/18

544 Reputação

Autoria de 5 guias

Equipe

UMass Dartmouth, Team S1-G3, Simcock Fall 2018 Membro de UMass Dartmouth, Team S1-G3, Simcock Fall 2018

UMASSD-SIMCOCK-F18S1G3

Membros da 3

Autoria de 7 guias

0 comentários

Adicione um comentário

Exibir estatísticas:

Últimas 24 horas: 0

Últimos 7 dias: 2

Últimos 30 dias: 13

Duração total: 482