Ir para o conteúdo principal

Asus A52F XE2 Lower Case Replacement

O que você precisa

  1. Asus A52F XE2 Lower Case Replacement, Battery: passo 1, imagem 1 %32 Asus A52F XE2 Lower Case Replacement, Battery: passo 1, imagem 2 %32
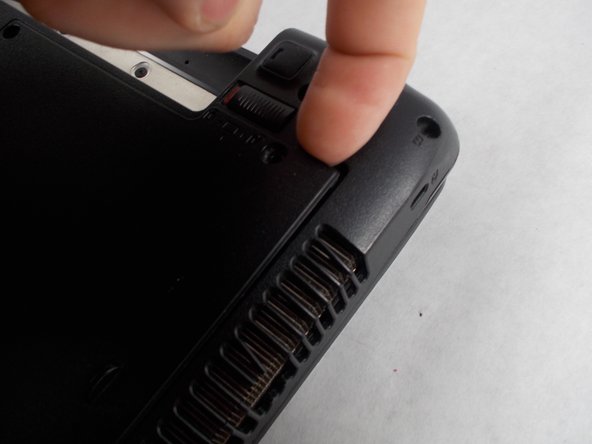
    • Place the laptop face down with the battery facing away from you.

    • Locate the two buttons next to the battery.

    • Slide the right slider to the unlocked (red) position.

  2. Asus A52F XE2 Lower Case Replacement: passo 2, imagem 1 %32 Asus A52F XE2 Lower Case Replacement: passo 2, imagem 2 %32
    • Hold the left button to the left.

    • Slide the battery with your other hand away from you and it should disconnect.

  3. Asus A52F XE2 Lower Case Replacement, Lower Case: passo 3, imagem 1 %32 Asus A52F XE2 Lower Case Replacement, Lower Case: passo 3, imagem 2 %32 Asus A52F XE2 Lower Case Replacement, Lower Case: passo 3, imagem 3 %32
    • Remove the five Phillips # 0 screws from the back panel.

    • Using your finger or a plastic spudger start to carefully pry up the back planel.

  4. Asus A52F XE2 Lower Case Replacement: passo 4, imagem 1 %32 Asus A52F XE2 Lower Case Replacement: passo 4, imagem 2 %32
    • Slide the back panel away and remove the panel.

Conclusão

To reassemble your device, follow these instructions in reverse order.

Uma outra pessoa concluiu este guia.

Michael Benson

Membro desde: 03/08/17

149 Reputação

Autoria de 1 guia

Equipe

0 comentários

Adicione um comentário

Exibir estatísticas:

Últimas 24 horas: 1

Últimos 7 dias: 2

Últimos 30 dias: 5

Duração total: 396