Introdução
- Deconstruct the iMac keyboard
- Clean the PCB Membrane
- Repair any faulty connections
- Re-construct the keyboard
O que você precisa
-
-
You will need 1 conductive pen and a small crosshead screwdriver
-
-
-
Once you've removed all the screws from the metal holder, carefully lift and pull all the top elements of the keyboard backwards together, leaving the white key holder on the floor.
-
Gently place the white key holder to one side, don't tip it or you could lose some of the key nodules.
-
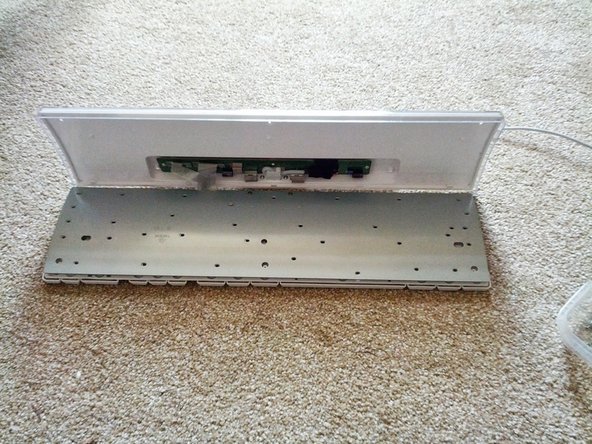
Place the metal holder back into the keyboard retainer as in picture 2. Then gently fold the membrane back into place.
-
At this stage if you can see any liquid residue or dirt on the membrane use a very lightly damp cloth to clean, or a some baby wipes.
-
Do Not use lighter fluid, turpentine, or nail polish remover. Anything strong like this could destroy the membrane.
-
Once you think you've got any dirt or residue you can off the PCB membrane, let it dry and move onto fixing the keys.
-
-
-
-
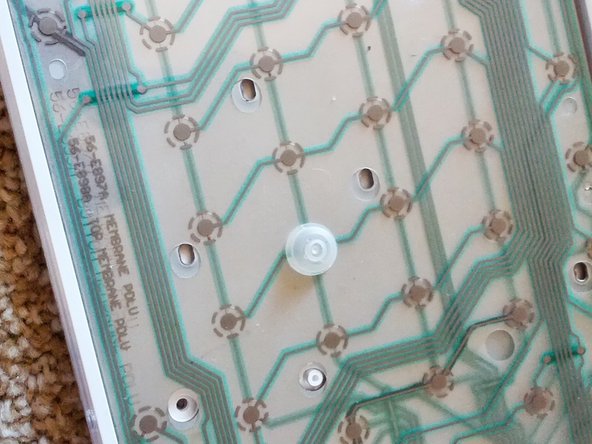
There are 3 plastic membranes, the key presses are created by the top layer points pressing against the bottom points.
-
in between the top and bottom layers is a clear piece of plastic membrane.
-
The key to repairing any broken keys is to find them, then follow the green line for each broken key back to the next key that works.
-
Once you find a key that works on the same green line as your broken one, you can...
-
Draw a line with your conductive pen to connect the broken and working key.
-
Remember, only on the same green line. If you cross lines your keys will not work correctly.
-
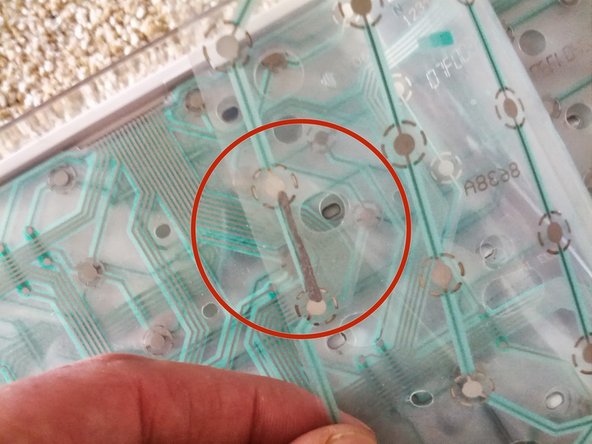
You can see the dark lines on my pictures connecting the broken keys. In some cases, i've gently scratched away the green covering to expose the wire underneath, and connected my keys to that instead of drawing a long messy line.
-
Often the key doesn't work without drawing lines on the top and bottom PCB membrane. Both sides will use slightly different routes, so remember to follow your green lines carefully.
-
-
-
Once you're confident you've sorted all the broken keys, bring back your white keyholder... Gently, check all the little rubbery nodules are in place in the keys.
-
Carefully bring the rest of the keyboard to the top of the white keyholder and fold the membrane over the top of the keys.
-
Carefully place the metal holder on top of the membrane. Checking that you haven't dislodged any of the rubber nodules.
-


Cancelar: não concluí este guia.
38 outras pessoas executaram este guia.

20 comentários
Nice description, thanks!
At step 6, I think it is worth reminding to not forget to put back the tiny LED device before bringing the membrane and metal holder,
as one may very easily either fall down at step 3... or forget to replace it before screwing back all the 30 screws!
Doing and un-doing is always working, I know...!
And between the LED leads and the white plastic there should be an even tinier conductive pad, which serves to improve electrical contact between the LED and the membrane. The pad sits in a small recess in the white plastic and the LED leads fit into two grooves on the membrane side of the pad. This part is easy to lose during disassembly, so be mindful of it!
I have this keyboard and decided to clean it. Unfortunately I did clean the main plastic key holder under sink water. That was a bad idea as water soaked the entire menbrane. Now only the keypad and some other keys works, the rest is dead. Any chance to recover it fully?
just open it again and dry it out and then try again. the water is causing shorts between connections
This is a very good guide. I had one spill after another and a few keys on left side no longer worked. I cleaned the keyboard and left it disassembled to dry out for a week. I was hoping a simple cleaning would help. It didn’t. Since conductive pens are a bit pricey in Canada I decided to test by using tiny bits of foil where I knew I had a faulty key or break to be sure a pen would work. With the foil I can get most of the keys to work but not all. Do you think a pen will produce better results or is it done ?