Esta versão pode conter edições incorretas. Mude para o último instantâneo verificado.
O que você precisa
-
Este passo não foi traduzido. Ajude a traduzi-lo
-
Remove the three 14.3mm T7 Torx screws from the bottom of AirPort.
-
-
Este passo não foi traduzido. Ajude a traduzi-lo
-
Remove the 5.1mm Phillips screw from the bottom of the AirPort. This screw is located under the identification sticker. You will have to remove the sticker or make a hole to remove it.
-
-
Este passo não foi traduzido. Ajude a traduzi-lo
-
Lift the bottom and top casing straight apart and then lift metal casing straight up from the bottom plastic casing.
-
-
-
Este passo não foi traduzido. Ajude a traduzi-lo
-
Unplug the black connector on the top of the metal casing by gently pulling horizontally.
-
-
Este passo não foi traduzido. Ajude a traduzi-lo
-
Remove the four 4.3mm phillips screws from the bottom of the metal casing.
-
-
Este passo não foi traduzido. Ajude a traduzi-lo
-
Lift and separate the top and bottom of the metal casing. You will now expose the motherboard and the AirPort card.
-
To remove the AirPort card, gently pull the plastic tab horizontally.
-
-
Este passo não foi traduzido. Ajude a traduzi-lo
-
Locate and remove the three 5.0mm phillips screws from the heat sink.
-
Lift to remove the heat sink from the motherboard.
-
-
Este passo não foi traduzido. Ajude a traduzi-lo
-
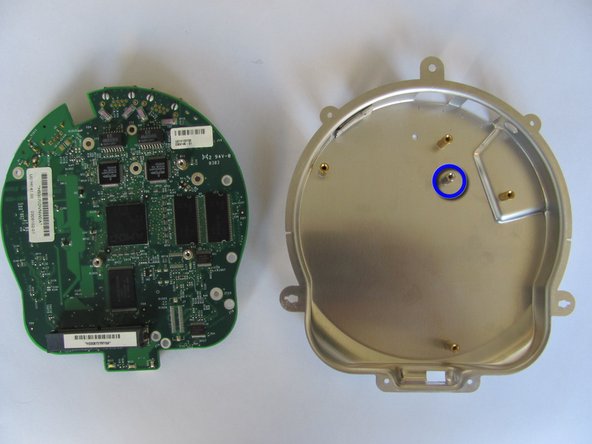
Locate and remove the five 7.5mm phillips screws from the motherboard.
-
Lift and separate the motherboard from the bottom metal casing.
-


Cancelar: não concluí este guia.
2 outras pessoas executaram este guia.
Equipe

Cal Poly, Team 17-15, Regan Fall 2011 Membro de Cal Poly, Team 17-15, Regan Fall 2011
CPSU-REGAN-F11S17G15
Membros da 3
Autoria de 13 guias