Ir para o conteúdo principal

Android tablet Nobis NB09 Screen Replacement

O que você precisa

  1. Android tablet Nobis NB09 Screen Replacement, Screen: passo 1, imagem 1 %32 Android tablet Nobis NB09 Screen Replacement, Screen: passo 1, imagem 2 %32 Android tablet Nobis NB09 Screen Replacement, Screen: passo 1, imagem 3 %32
    • Remove the two 00 Phillips screws located on the right side of the tablet.

    • Use the plastic opening tools to loosen and then pry the back if the tablet off.

    • When prying off the back of the tablet, be careful around the tablets ports. Too much pressure can cause cracks.

  2. Android tablet Nobis NB09 Screen Replacement: passo 2, imagem 1 %32 Android tablet Nobis NB09 Screen Replacement: passo 2, imagem 2 %32 Android tablet Nobis NB09 Screen Replacement: passo 2, imagem 3 %32
    • It is recommended that a grounding bracelet be used in order to avoid damage to the device's circuits through ESD (Electro-Static Discharge)

    • Remove the electrical tape covering the motherboard.

    • Remove the four 4.0 mm T4 Torx screws holding the motherboard to the front half of the tablet.

    • Remove any remaining adhesive tape on the exposed area.

    • Disconnect the ribbon cable attachments by lightly pushing up the locking arm (black tab) on each then gently detaching the pin connectors.

  3. Android tablet Nobis NB09 Screen Replacement: passo 3, imagem 1 %32 Android tablet Nobis NB09 Screen Replacement: passo 3, imagem 2 %32 Android tablet Nobis NB09 Screen Replacement: passo 3, imagem 3 %32
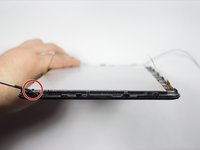
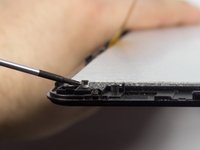
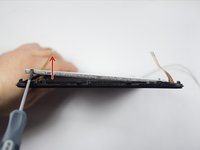
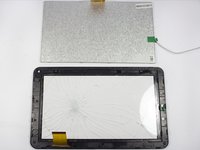
    • Find the notch on the digitzer, located on the left side of the device.

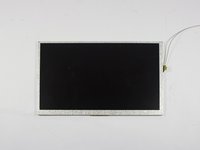
    • Use the Phillips Screwdriver to gently push the notch and lift the digitizer from the screen.

  4. Android tablet Nobis NB09 Screen Replacement: passo 4, imagem 1 %32 Android tablet Nobis NB09 Screen Replacement: passo 4, imagem 2 %32 Android tablet Nobis NB09 Screen Replacement: passo 4, imagem 3 %32
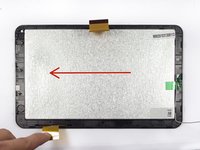
    • Gently slide the digitizer from its clasps to remove it from the screen.

    • The digitizer should now be removed separately from the screen.

Conclusão

To reassemble your device, follow these instructions in reverse order.

4 outras pessoas executaram este guia.

Enea Osmann

Membro desde: 10/31/14

158 Reputação

Autoria de 1 guia

Equipe

UMass Dartmouth, Team 7-1, Cichon Spring 2015 Membro de UMass Dartmouth, Team 7-1, Cichon Spring 2015

UMASSD-CICHON-S15S7G1

Membros da 4

Autoria de 12 guias

2 comentários

The digitizer replacement instructions was great. Thanks

steven warren - Responder

My screen is busted that has the sensor in it do I have to buy a screen or can I use a keyboard?

April sharp - Responder

Adicione um comentário

Exibir estatísticas:

Últimas 24 horas: 1

Últimos 7 dias: 7

Últimos 30 dias: 16

Duração total: 1,403