Ir para o conteúdo principal

AmazonBasics B0050BPWBQ On/Off Switch Replacement

O que você precisa

  1. AmazonBasics B0050BPWBQ On/Off Switch Replacement, Front and Back Panel Disassembly: passo 1, imagem 1 %32 AmazonBasics B0050BPWBQ On/Off Switch Replacement, Front and Back Panel Disassembly: passo 1, imagem 2 %32
    • The unit head needs to be switched to the off position and unplugged before any disassembly.

    • When removing screws in the following steps, make sure the unit is resting on a flat surface because pieces will easily come apart.

    • Remove seven 11 mm Phillips #1 screws from the underside of the head unit.

  2. AmazonBasics B0050BPWBQ On/Off Switch Replacement: passo 2, imagem 1 %32 AmazonBasics B0050BPWBQ On/Off Switch Replacement: passo 2, imagem 2 %32
    • Upon removal of the next screws, the front panel and the shredding component attached to it will fall apart from the back panel so have the unit resting on a flat surface.

    • Remove two 50 mm Phillips #1 screws from the middle of the underside of the head unit.

  3. AmazonBasics B0050BPWBQ On/Off Switch Replacement: passo 3, imagem 1 %32
    • Lay the back panel away from the front panel on a flat surface.

    • The back panel will be light because it is only the plastic, while the front panel will be heavy with the shredding component attached to it.

  4. AmazonBasics B0050BPWBQ On/Off Switch Replacement: passo 4, imagem 1 %32 AmazonBasics B0050BPWBQ On/Off Switch Replacement: passo 4, imagem 2 %32
    • Find the green control board that is located next to the shredding motor.

    • Remove two 11 mm Phillips #1 screws located on opposite sides of the control board.

    • You may need to move wires over to find the screws.

  5. AmazonBasics B0050BPWBQ On/Off Switch Replacement, On/Off Switch: passo 5, imagem 1 %32 AmazonBasics B0050BPWBQ On/Off Switch Replacement, On/Off Switch: passo 5, imagem 2 %32 AmazonBasics B0050BPWBQ On/Off Switch Replacement, On/Off Switch: passo 5, imagem 3 %32
    • Pull the front panel away from the shredding unit.

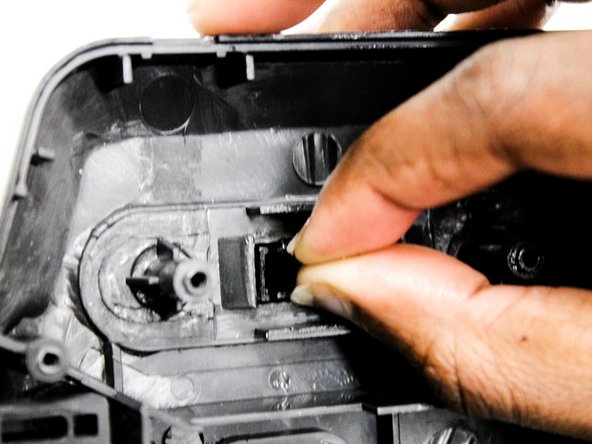
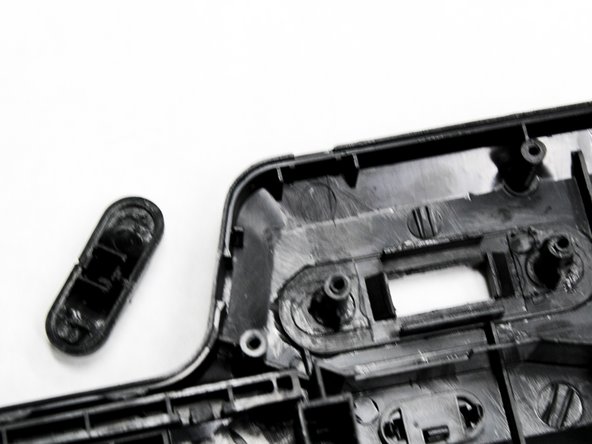
    • Locate the black On/Off switch attached to the front panel where the control board was once attached.

    • Squeeze the wings of the On/Off switch from the inside of the front panel to detach it from its slot in the panel.

Conclusão

To reassemble your device, follow these instructions in reverse order.

Uma outra pessoa concluiu este guia.

Natalie Meert

Membro desde: 02/11/16

678 Reputação

Autoria de 4 guias

Equipe

IUPUI, Team 2-4, Baechle Spring 2016 Membro de IUPUI, Team 2-4, Baechle Spring 2016

IUPUI-BAECHLE-S16S2G4

Membros da 4

Autoria de 8 guias

Um comentário

Does anyone know where to buy a replacement switch?

Shawn - Responder

Adicione um comentário

Exibir estatísticas:

Últimas 24 horas: 1

Últimos 7 dias: 3

Últimos 30 dias: 11

Duração total: 2,339