O que você precisa
-
-
Colocamos la unidad boca abajo y despegamos la tapa inferior de goma. Es mejor comenzar por una esquina.
-
Calentamos la tapa para poder despegarla. Lleva mucho pegamento bajo toda la superficie. Tened paciencia y mucho cuidado.
-
-
-
Quitamos los 10 tornillos Phillips #00 que sujetan el soporte metálico inferior de la Time Capsule.
-
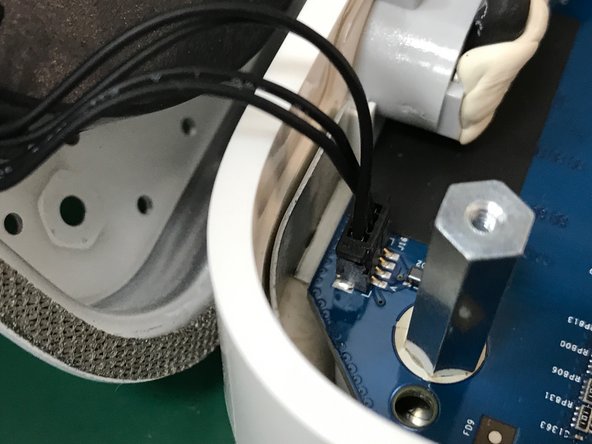
Abrimos hacia la izquierda dejando los conectores de red en ese lado. No abrir del todo para evitar romper el cable del ventilador.
thanks for doing this guide.
1. remove hash sign (#) before the 10. “Remove the 10 Phillips...
2. second bullet - “Do not open all the way to avoid…
I agree!
Good Job!
-
-
-
-
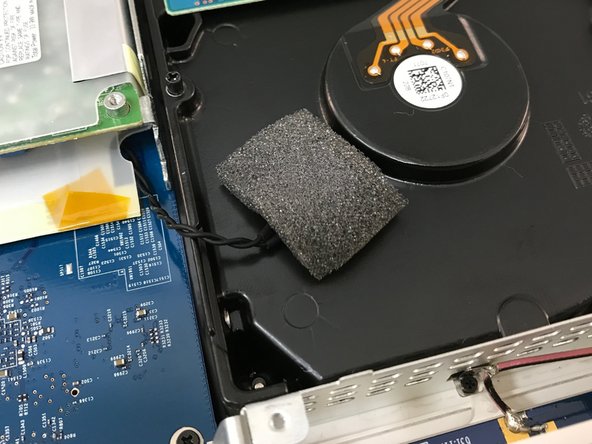
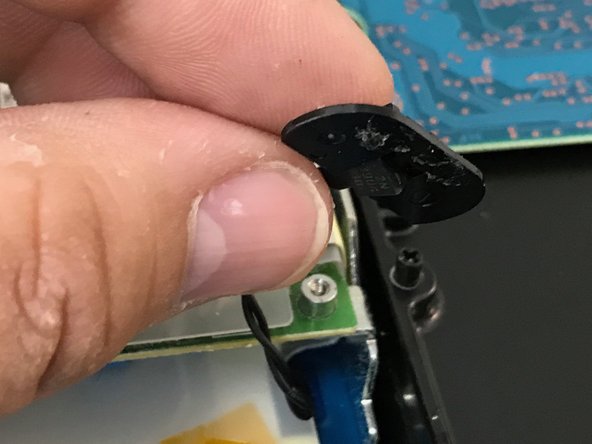
Una vez que tenemos ya el disco fuera de la Time Capsule quitamos los 4 pilares con cabeza Phillips #00 y los colocamos en la nueva unidad.
A #1 Philips works a lot better on these
Not gonna lie, I used a eye glasses repair kit screwdriver.
Hello there, is this SATA II or SATA III HDD?
-


Para reensamblar tu dispositivo, sigue estas instrucciones en orden inverso.
Para reensamblar tu dispositivo, sigue estas instrucciones en orden inverso.
Cancelar: não concluí este guia.
38 outras pessoas executaram este guia.
Equipe

Tecnico Center Teatinos, S.L. Membro de Tecnico Center Teatinos, S.L.
Business
1 Membro
Autoria de 3 guias
12 comentários
I replaced a dead drive in about 30 mins following these instructions. The steps are clear, straight forward and the photos were extremely helpful. Many thanks as I now have a renovated AirPort Time Capsule.
I just replaced the 2 TB WDC Green with a WD Red Pro 4 TB with this guide in less than 30 min. Except for the fan cable it was a cake walk.
Successfully upgraded my A1409 to a Western Digital - WD100PURZ - 5400 RPM Class SATA 6 Gb/s 256MB Cache 3.5. There are two additional steps: (a), there is a rubber strip around the original drive that reduces noise and protects the drive, gently remove from the original drive and place on the new drive; (b) once the rubber strip is on the drive, it is hard to get into place, angle the drive towards the connector side, and press in.
Hi. Is it possible to upgrade this to an SSD?
Yes, you could also use an SSD, just follow the same procedure.
Idrees -
How to Clone or Copy data to a new hard drive?
It's not formatting the installed WD Red WD101EFAX which I've installed. Any help or suggestions?
Take it out then Try formatting it on Mac and then re-install it and try formatting again.
This was super helpful. I used the microwaveable ifixit gel opener to loosen the glue on the rubber pad. Starting from one side and wedging a metal pry tool underneath as I moved about 1-2 inches at a time, reheating every few inches. Worked perfectly, no rips or tears on the rubber.
I mounted an SSD with VHB tape left over from another project, it holds drive securely against the side of the drive mount.
During reassembly, the glue on the back is still tacky enough to hold the rubber on, but a few small pieces of VHB tape in the corners helped.
It’s actually useful again, and very handy for my legacy Macs. Thanks for posting this!
The rubber tears real easy with age so carefully work your way inwards from each corner.
AndreasT - Responder
Just happen to me :/
Ben Capehart -